Showing posts with label how to. Show all posts

Tuesday, January 01, 2013

How To Grow Your Own Garlic (and How To Not Get Any Planted): Garden Journal 1/1/13

How to grow garlic (1) - save your biggest cloves for planting next year's crop - FarmgirlFare.com
Save your biggest cloves for planting next year's garlic crop.

Realization of the Day:
December is a bad time for me to plan on planting my garlic.

Of course I knew this already. The best time to plant garlic is a month or two before the ground freezes. Here in Missouri that means October. In warmer regions, you can plant after the first frost date through early winter. Ideally you want to get good root growth but no top growth before winter, although I've had sprouts shoot up before it got really cold, and they survived just fine.

If you're gardening by the moon, you want to put your garlic in the ground on a fertile day during the third or fourth quarter. (If you're interested in learning more about minding the moonsigns, Astrological Gardening: The Ancient Wisdom of Successful Planting & Harvesting by the Stars by Louise Riotte is a great book.)

the snowy kitchen garden on 12-29-12 - FarmgirlFare.com
The kitchen garden on Saturday, December 29th.

Miraculously, I did actually manage to get my garlic in the ground in October in both 2011 and 2010, but this year my planting plans were waylaid. Then I missed November. And on Saturday, which was my scheduled December planting day, the ground was frozen and there were three inches of snow on it. Yesterday and today are good planting days as well, except for the old snow and the new sleet. But that's okay.

Lots more below. . .

Wednesday, September 28, 2011

Will Green Tomatoes Ripen Indoors? Yes!

Green Tomato Harvest 10-17-09
Not to worry—you can pick green tomatoes and ripen them indoors, off the vine.

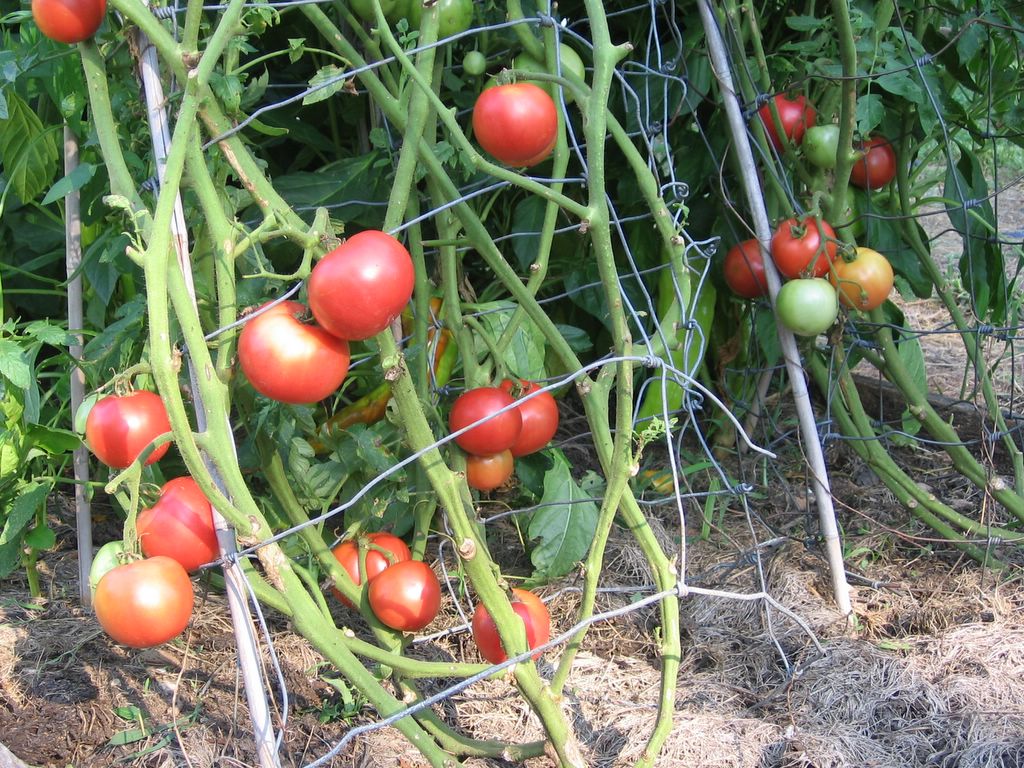
How was your tomato season? Ours was pretty disappointing, and while I'm already making plans for a bigger and better tomato crop next year (build sturdier cages, get plants in the ground earlier, pray for a cooler June!), I haven't written this one off completely yet.

My six late planted Roma tomato plants are finally loaded with fat green fruit, and the fresh tomato-crazed gardener in me refuses to give up.

October is often fairly mild here in southern Missouri, so I'm going to hold out for a while in the hopes that some of them will ripen on the vine—or at least until I get tired of covering them (as well as my other 15 tomato plants and all of the basil) with floating row cover and old bed sheets each night to protect them from the cold. (Why is it only windy on autumn nights, not summer nights when you're drenched in sweat, wishing for even a hint of breeze?)

If you're ready to call it tomato quits for the season, don't despair over all those green ones still out on the vine. My most popular post this time of year is How To Ripen Green Tomatoes Indoors the Really Easy Way—and it really is easy.

© FarmgirlFare.com, loving autumn on the farm and thrilled to be picking tomatoes, no matter what the color.

Sunday, August 15, 2010

Garden Journal 8/15/10: How To and, More Importantly, Hot Not To Store Fresh Basil

Basil Bouquet

Realization of the Day:
It's a lot easier to write off a garden disaster as a learning experience when it doesn't involve your entire crop.

The photo above illustrates one of the best ways to store fresh basil: in a fragrant little kitchen tabletop bouquet. Sweet looking, nice smelling, and obviously some very happy fresh cut herbs.

That's how I did things last year, when I had so much green and purple basil growing in the garden it kept bursting into bloom faster than I could use it up. This year I had a learning experience—with my one measly plant, which is why this post isn't called something chirpy like Hip Hip Hooray! It's Pesto Time Again! as was originally intended before the harvest.

Friday, May 28, 2010

Kitchen Garden How To: The Best Way to Store Fresh Parsley (and Other Herbs like Basil)

Parsley Bouquet in Rooster Glass 1
In a Kitchen Counter Bouquet!

Realization of the Day:
I often take parsley for granted, but if there isn't any growing in the garden I really miss it. It's just so versatile—and tasty. I love it in this Confetti Egg Salad Recipe I recently wrote about on Farmgirl Fare.

Like so many things, the very best place to store your parsley is out in the garden, still attached to the plant. But it won't stay out there indefinitely, maintaining its ready-to-pick state until you're actually ready to pick it. (Why do I always forget this basic rule of growing things?)

Thursday, May 13, 2010

Do It Yourself Kitchen Garden Inspiration: Build an Amish Cold Frame


Realization of the Day:
In all my years of gardening, I've never used a cold frame—and I love cold frames.

Several Amish families moved to this area two years ago, and in my opinion we're all the luckier for it. The Amish neighbors I've met so far have all been very friendly, and they've already brought much to our rural community. There are three basket makers and a furniture maker. The rough cut siding on our new sheep barn came from the Amish sawmill down the road.

More below. . .

Saturday, June 06, 2009

Gardening How To:
Growing and Thinning (and Weeding!) Heirloom Carrots

Looking to learn about growing carrots? You'll find links to two more of my carrot growing posts and a recipe for carrot herb rolls, along with all sorts of other things I like to grow, below.


Extreme baby vegetables (harvested on 5/28)

The first year I gardened in Missouri I tried growing carrots, didn't get very good results, and gave up—despite the fact that I usually consume at least one raw carrot a day. I continued to order one or two varieties of carrot seeds every couple of years, but except for a really old packet of seeds that I scattered during an ambitious and hopeful fall planting campaign in August 2006 (which were, not suprisingly, all no-shows) they never seemed to make it into the ground.

With good organic, U.S. grown carrots available year round for under a dollar a pound at the supermarket, homegrown carrots simply weren't a big priority. But deep down, I knew I was missing out. So this year to compensate I went a little overboard.
Back on April 11th, I sowed six varieties of heirloom carrot seeds (saving some of each kind for fall planting) in one of my 4'x8' raised garden beds: St. Valery (from Baker Creek Heirloom Seeds), Parisienne (Baker Creek), Little Finger (Baker Creek), Atomic Red (Baker Creek), Scarlet Nantes (Botanical Interests), and Red Cored Chantenay (Pinetree Garden Seeds). I chose a wide variety of colors, shapes, and sizes. I'm especially excited about the red ones.


So far they're all doing great—and so are the weeds (that would be the big pile on the left).

In The Vegetable Gardener's Bible (my favorite garden book, which I highly recommend for kitchen gardeners of all levels), author Ed Smith says that "thinning carrots, like sowing them, is best accomplished on days when patience can rule your actions." He's got that right. Talk about a teeth gnashing job, especially when you're also trying to pull out weeds that are twice the size of the carrot seedlings. Ed recommends using floral shears to thin your carrots, but I just pulled them out by hand—one small section at a time.

It's too bad I didn't check the carrot growing section of The All-New Illustrated Guide to Gardening from Reader's Digest (a humongous book packed with over 2,500 color photos & illustrations that I'm finding very informative—and love that the completely updated and revised version is all organic!) until just now, because I really like this idea:

They say to mix a few radish or leaf-lettuce seeds with the carrot seeds "since carrot seeds germinate slowly, and the row may be well defined by weeds long before the carrot tops appear. The radishes and lettuce will sprout quickly and will mark the row. Because they wil be ready long before the carrots are, they will not interfere with the growth of the carrots, and you will also be making more efficient use of your garden space."


These Happy Carrots Have Been Weeded, Thinned, and Mulched

Carrots prefer to have cool roots and warm tops, so mulch them with grass clippings (or freshly pulled weeds or, as seen above, rotting old hay that you pulled off the strawberry bed in March and still have laying around) during the late spring and summer. This will also keep new weeds from sprouting and help retain moisture in the soil—which is why I love mulching so much.


Digging Dogs in the Garden: That Big Empty Spot is Courtesy of Marta (aka Marta Beast)

The Vegetable Gardener's Bible suggests growing a leafy companion crop such as Swiss chard to help shade and cool the soil (Yes! Another reason to help convince you to grow Swiss chard!), so starting at the southern end of the bed, I sowed my seeds in 8-foot long rows like this: one of Swiss chard (two varieties), then three rows of carrots, one of Swiss Chard and Nero di Toscana cabbage (also called dinosaur kale, lacinato kale, and several other things—I love the stuff and refer to it as cat cabbage because I swear it has nine lives). As of right now, it looks like the edible shading scheme is going to work perfectly.

Carrots will grow well close together, but if they're too close they'll end up stunted, too thin, or deformed. You can see that some of the baby carrots in that top photo are already looking a little crooked. I usually like to wait to thin my vegetables (such as lettuce, arugula, beets, and Swiss chard) until the thinnings are large enough to eat, so I'm giving the rest of the carrots a bit more growing more time before I finish thinning them (though I admit I couldn't resist nibbling on these itty bittys—and they were tasty!). Besides, my teeth need a rest from all that gnashing.

Joe used to grow a big patch of carrots each year but said he stopped because they didn't keep well in the root cellar. "Sure, you can store them in sawdust like the books tell you to, and they won't rot," he told me, "but what they don't tell you is that they get all rubbery." I asked him if the sawdust had been damp, which is a detail that nearly all carrot-storing directions I've seen leave out. "It's supposed to be damp?" he said.

Since there used to be a large sawmill on our property back in the 1930s, we have a lifetime supply of free aged sawdust at our disposal—and plenty of sawmills still around if the sawdust needs to be fresh. I'm curious to see how carrots—which I usually buy four or five pounds at a time and store in the refrigerator for weeks—that are kept in damp sawdust in the cool root cellar would keep, but I have a feeling that all of this year's harvest is going to go straight from garden to kitchen to mouth.

Are you growing carrots this year? Do you have any growing tips, favorite varieties, or amusing carrot stories to share?

And the carrot growing continues!
6/13/09: Bigger Red and Orange Baby Carrots
4/27/10: My Favorite Heirloom Carrots (so far) to Grow from Seed: Parisienne
Carrot Herb Rolls (and a beautiful bread book for Beginners)

More posts about some of my favorite things to grow:
Favorite Heirloom Tomatoes to Grow—Mine and Yours


© 2009 FarmgirlFare.com, the crunch and munch foodie farm blog where getting our daily dose of beta-carotene has never been a problem.

Wednesday, January 07, 2009

Growing Cool Weather Fall Vegetables:
How to Harvest & Store Swiss Chard


Before Harvesting: Swiss Chard in the Greenhouse on 12/20/08


After Harvesting: By 1/4/09 the Plants are Already Growing Back

Never pull up a Swiss chard plant if you can help it! This easy to grow wonder green, for which I've become a rather loud champion, should not only be in every garden, but it should also always be there. Blistering heat, freezing cold, wet winter weather, dry summer days—delicious, nutrient-packed Swiss chard puts up with it all and just keeps putting out. Enjoy the young leaves in salads, or use the larger ones in place of spinach in nearly any recipe. The stalks make a delicious and colorful celery substitute.

In addition, Swiss chard is a cut-and-come-again vegetable, which means that one crop can literally supply you with bounty for months. Let some or all of your plants go to seed, and you'll be able to either start a new crop somewhere else or designate a permananent Swiss chard bed where the plants will keep re-seeding on their own. The plants above were direct seeded in early spring of 2008 and show no signs of stopping anytime soon.


Other Side of the Greenhouse Before Harvesting on 12/20/08


And Making a Comeback on 1/4/09

The Swiss chard plants in the two photos above are all volunteers that popped up last spring in the unheated and uncooled greenhouse, supplying me with fresh bounty through the summer despite it being a sweltering 120+ degrees on sunny days, and then into the fall as the thermometer dipped down into the teens. I draped floating row covers and old bedsheets over the plants on cold nights, which offer good protection for the plants but at the same time subjects them to being flattened by Sylvester the cat who likes to sneak into the greenhouse and curl up on them. We have 240 acres full of all sorts of cozy nooks and crannies and yet he insists on flattening my arugula (which is another easy-to-grow green no garden should be without). Good thing he's so cute.

The evening of the winter solstice found me frantically snipping back all of the Swiss chard plants in the greenhouse preparation of that night's forecast of 4 degrees with even colder temperatures the next night. To harvest, I simply grabbed the stems of each plant in my left hand and cut them off a few inches from the base with an inexpensive, large pair of scissors.

This is the same way I pick lettuce (which is also easy to grow) because not only does it leave the plants in the ground, allowing them to grow back, but it's also a lot less messy because you aren't pulling up any dirt. So even if I'm planning to clear out a bed, I still harvest this way and then later go back and rip out the cut bases of plants.


Swiss Chard Goes Beyond Green

I covered the trimmed plants in the greenhouse with sheets and blankets, put an electric space heater in there for the next two nights, and hoped for the best. All I have to do is keep the plants alive for the next month or so, and in February they'll take off and start providing me with baby leaves for salads long before anything else in the garden (except arugula, if I can keep Sylvester away from it) is even remotely ready to harvest.


This Little Sprout of Hope Might Grow Back Into a Monster

Worst comes to worst, the plants freeze to death and all I'm out is the time it took me to cover and uncover them each night. But as you can see, things are already looking quite hopeful. And they'll be looking a lot prettier if ever get around to cleaning up all the dead leaves in the bed. But don't hold your breath. This is when you tell yourself you're not being lazy, you're smothering potential weeds and amending the soil.


Warm Up with a Bowl of Swiss Chard Artichoke Soup

As for the several pounds of bounty I picked on the last day of fall, some of it went straight into a batch of this healthy and flavorful Swiss Chard & Artichoke Soup, which was inspired by my Hot Swiss Chard Artichoke Dip. The rest was put into plastic bags that I placed in a cooler on the covered porch off the kitchen because there wasn't room for them in the fridge. It's been over two weeks, and what's left is still looking fine. Freshly picked greens will last quite a while if kept cool and moist.

So if you haven't already, why not give Swiss chard a try in the garden this year? Even if you don't have a greenhouse, unless you live in the arctic you can probably keep a healthy crop alive for most, if not all, of the year.

Related posts:
How To Grow Your Own Swiss Chard From Seed & Why You Should
Hot Swiss Chard Artichoke Dip (and what else to do with Swiss chard)
Swiss Chard & Artichoke Soup
Healthy Swiss Chard Tuna Salad with Scallions & Kalamata Olives
Swiss Chard Cabbage Salad with Garbanzo Beans & Cottage Cheese

Is there anything growing in your garden right now?

© Copyright 2009 FarmgirlFare.com, the foodie farm blog where Farmgirl Susan shares recipes, stories, and photos from her crazy country life on 240 remote Missouri acre—and we're determined to make Swiss chard lovers (and growers!) out of as many people on the planet as we can.

Wednesday, September 26, 2007

How To Grow Your Own Swiss Chard From Seed & Why You Should

Fordhook Giant Swiss Chard in the homemade greenhouse last November.

Looking for Swiss chard recipes? Here are some of my favorites:
What To Do With Swiss Chard—Hot Swiss Chard Artichoke Dip Recipe & Other Ways To Cook & Enjoy My Favorite Leafy Green
Healthy Swiss Chard Tuna Salad with Scallions & Kalamata Olives
Swiss Chard Cabbage Salad with Garbanzo Beans & Cottage Cheese
Swiss Chard and Artichoke Soup

Swiss Chard and Artichoke 'White' Pizza

The year I turned 30, I had two friends who turned 60, and I took full advantage of the situation. "Save me some trouble," I said, "and tell me the most valuable thing you've learned in the last 30 years."

The first one offered up a piece of advice I've tried to abide by ever since. He said, "Be happy, not resentful or envious, when good things happen to other people." But it was seven words of wisdom from the second friend that truly changed my life: "Always plant Swiss chard in the garden."

Thursday, September 21, 2006

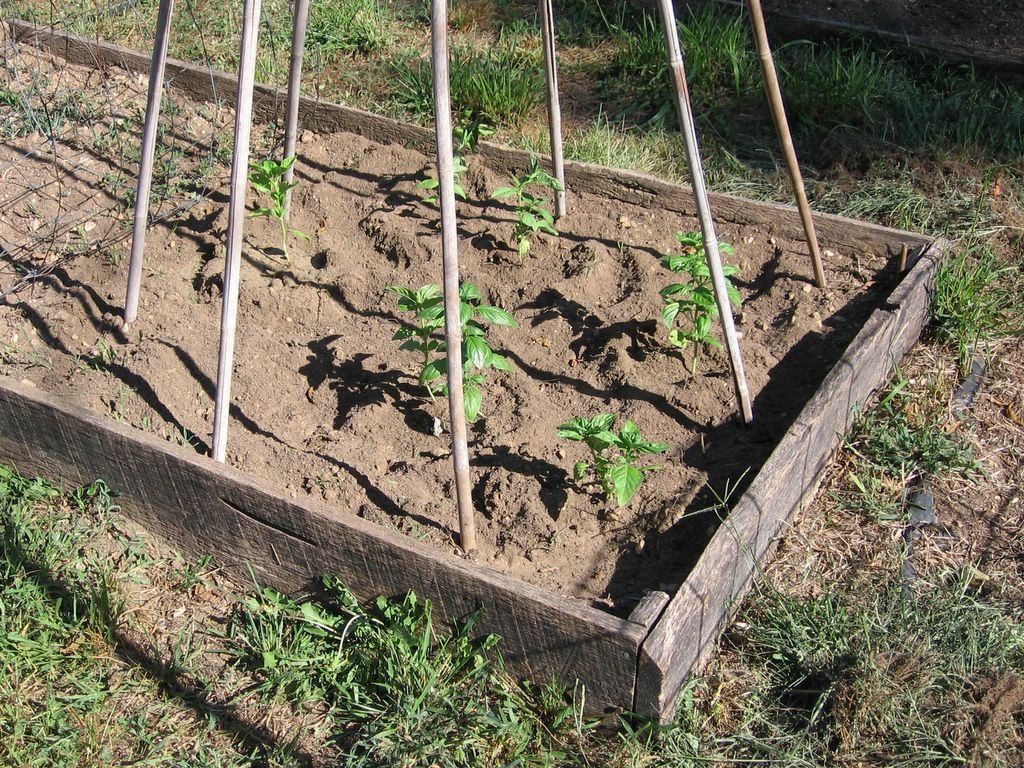
What's Growin' On 9/21/06: How To Keep Your Basil Plants Growing Into Fall

Don't Cut Your Basil Season Short


Volunteer Basil On August 8th
(Those bamboo stakes form a teepee for some pole beans that never popped up.)


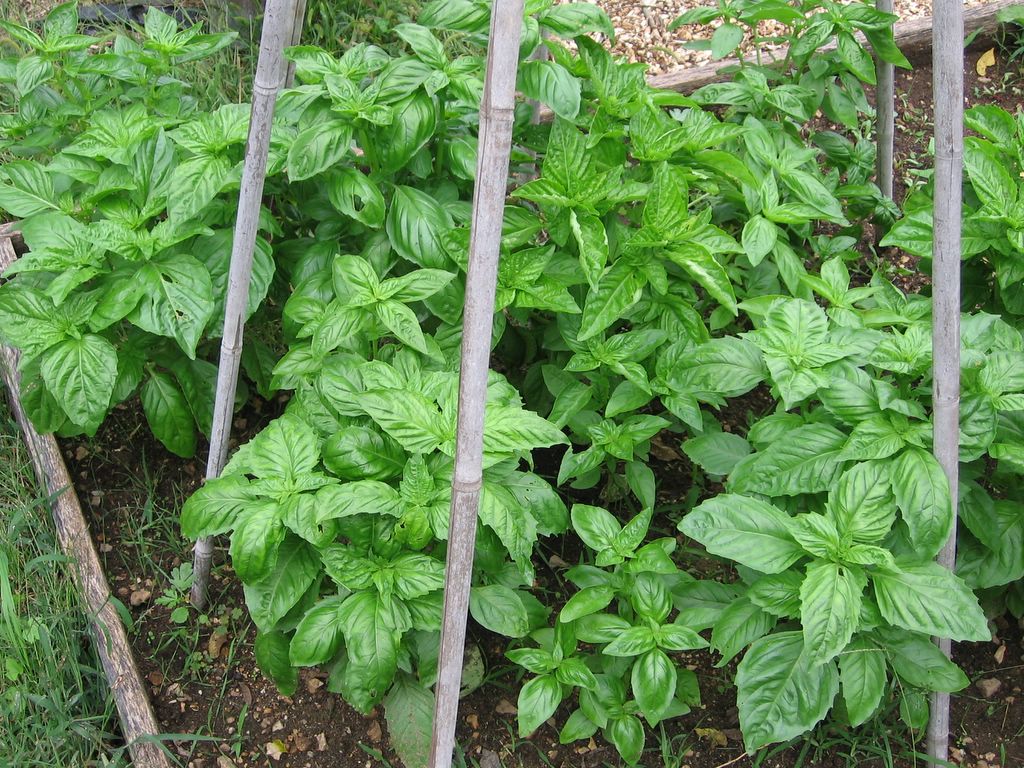
Begging To Be Picked Just Over A Month Later

The smaller plants were rootbound seedlings I transplanted shortly after taking the top photo. I find it interesting that the volunteers are so much bigger and healthier. To me, there is nothing better in the garden than a happy volunteer, and basil always seems willing to make a reappearance in mine. Growing basil from seed is easy, and growing volunteers is absolutely effortless, so don't forget to allow some of your plants to bloom and go to seed each year. An added benefit is that the pollinators will love you.


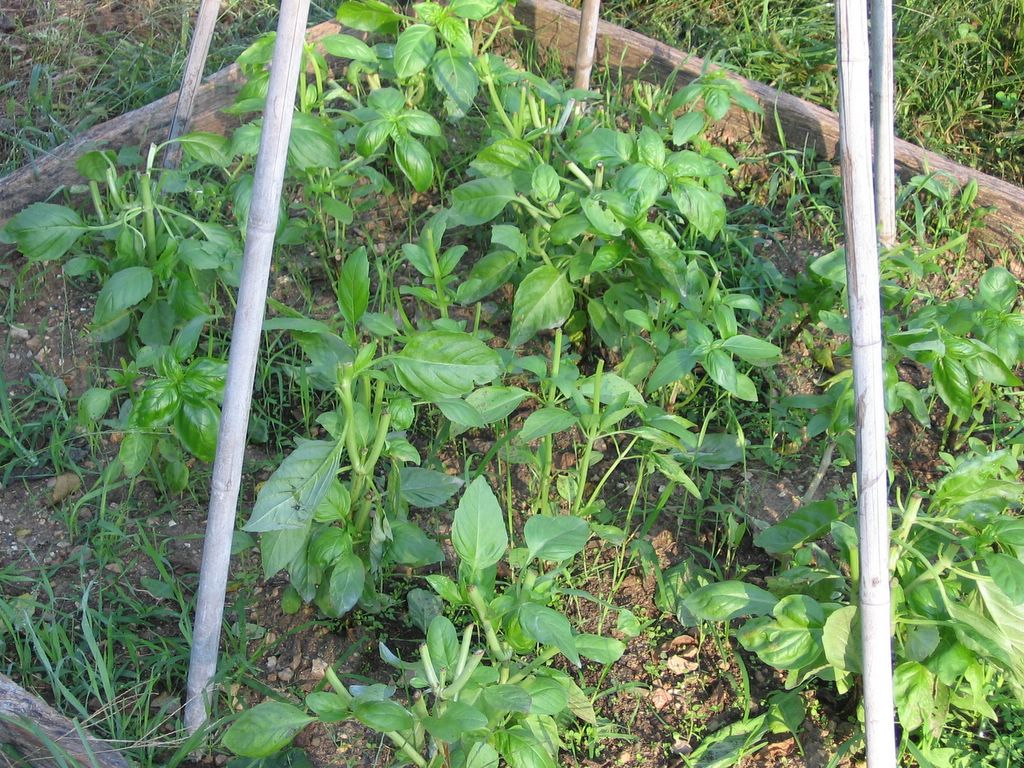
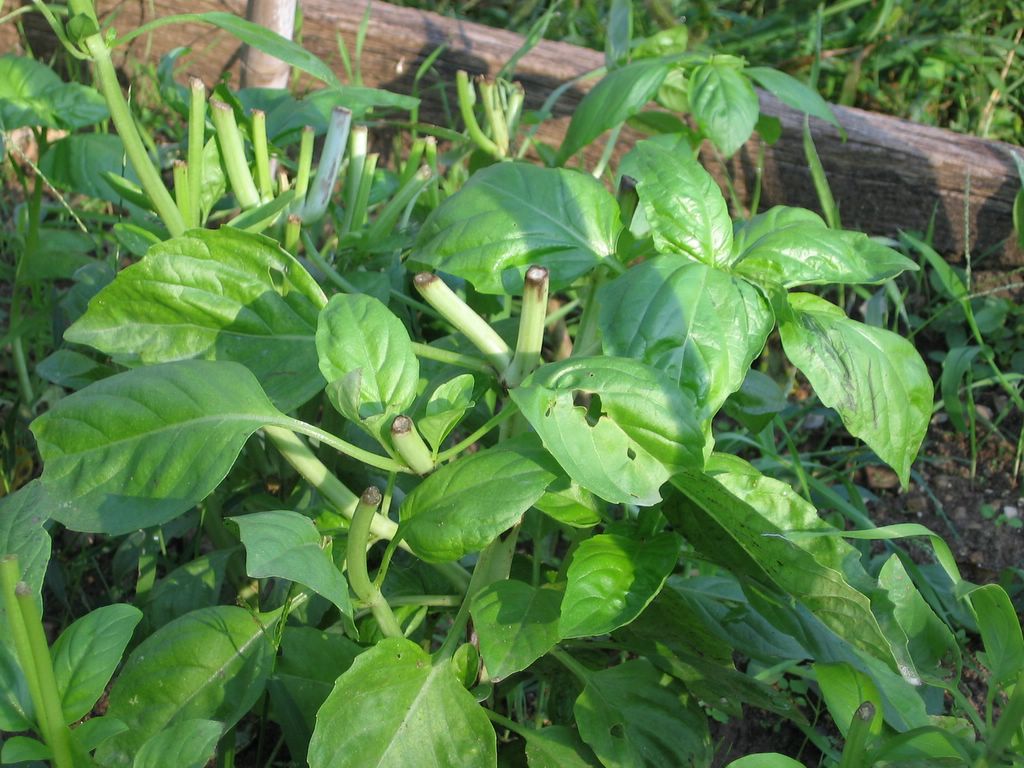
Don't Worry, It'll Grow Back

Realization Of The Day:
I don't think I've ever pulled a live basil plant out of the ground. There's simply no reason to.

About 14 or 15 years ago, when I was still living in northern California, I came upon a vendor at a farmer's market who was selling nothing but basil. He had a long table set up, and on it were several dozen brown paper bags, each holding one entire basil plant that had been uprooted only hours before. They were $1 each, and I remember thinking this guy was brilliant. (And still do.)

But even when I was selling fresh basil to an upscale restaurant a few years back, I still didn't pull up the entire plants when the basil was ready to be picked. Instead I simply snipped off most of the stems and left the stubs in the ground. The plants grew back, and this way I was able to get two or three good harvests over a period of many weeks from just one planting.


So even now, with that crisp feel of autumn in the air, I saw no reason to declare an end to basil season when I did a major harvest the other day--despite the fact that temperatures for the next two nights were predicted to be around 40 degrees F (and heat loving basil will turn black and croak well above freezing). The snipped plants are healthy and happy, and they survived the cold snap just fine tucked under a light blanket. As you can see, I left plenty of leaves on them so they didn't go into some kind of naked shock. Given a few more temperate weeks, these plants should fill out and reward me with more beautiful bounty. And since we're supposed to be having days in the 70s for at least the next week, I think the probability of more basil is very high.

Worst comes to worst? An arctic blast swoops in and kills off my crop. In the meantime, I'm putting in no extra effort except the ten seconds it took to cover and uncover the plants. It may not be a sure thing (because nothing in the garden ever is), but it seems foolish not to make this basil bet.

Pining For Some Pesto Now? Click here for my new favorite recipe.

Coming Up:
Another Less Fuss, More Flavor recipe—Fresh Tomato Pizza Sauce.

NOTE: This is my entry for Weekend Herb Blogging #51, a deliciously informative event based at Kalyn's Kitchen. Food and garden bloggers from around the world participate, and you never know what interesting new edibles you'll discover each Monday in the roundup. Check out the WHB rules if you'd like to join in the fun. And click here to read about next week's Special WHB Event.

Sunday, September 03, 2006

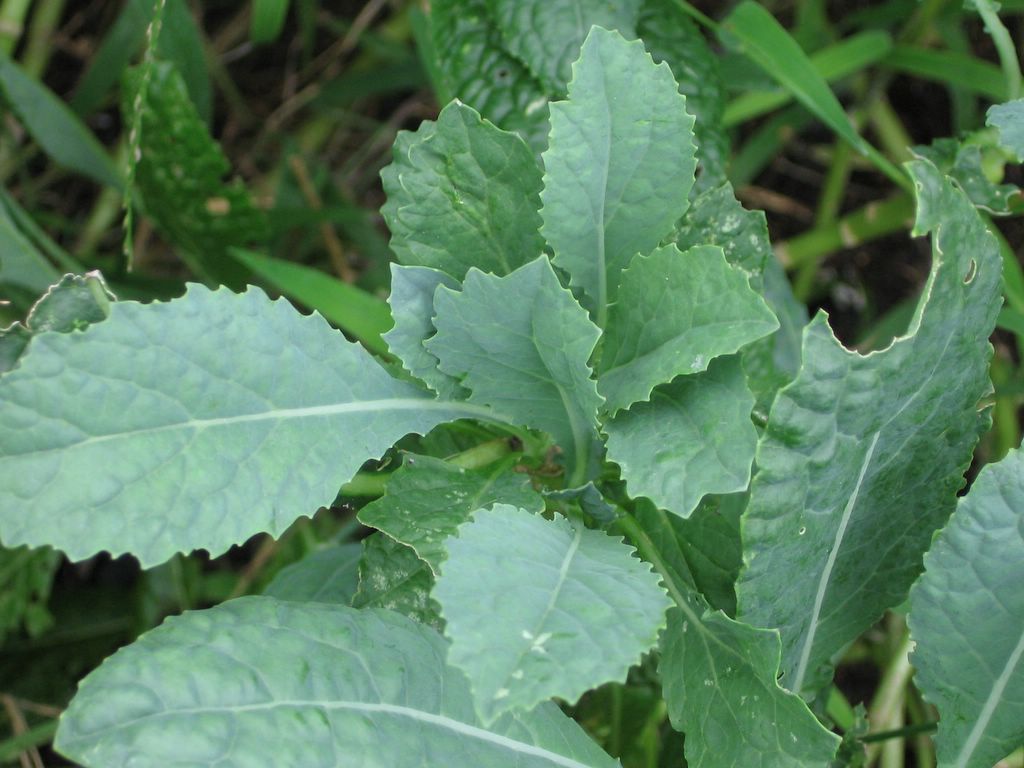
How to Grow Nero di Toscana Cabbage (aka Tuscan Kale, Cavalo Nero, Lacinato Kale, Dinosaur Kale) from Seed and What To Do with It


Realization Of The Day:
Nero di Toscana Cabbage is known around the world by several other names, including Black Palm Cabbage, Cavalo Nero, Black Kale, Tuscan Kale, Lacinato Kale, and Dinosaur Kale. But it really should be universally called Cat Cabbage because I swear this stuff has nine lives.

Regular readers know that I am entwined in a passionate love affair with Nero di Toscana Cabbage. It is easy to grow from seed and puts up with heat waves, cold snaps, long humid summers, with nary a complaint. But no matter how deep my feelings for it run, year in and year out, this delicious, easy to grow mainstay in my kitchen garden suffers through much more than its fair share of distress.

Wednesday, August 09, 2006

Growing Kellogg's Breakfast Tomatoes and a Colors of Summer Salad with Tomatoes, Zucchini, Sweet Red Pepper, Beet Greens, Basil, & Garbanzos


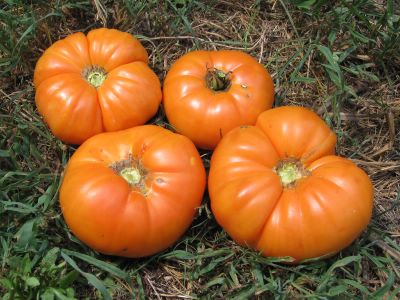
Kellogg's Breakfast Tomatoes Ripe, Ready To Eat. . .


And Looking Good From Top To Bottom

Realization Of The Day:
Absentmindedness saved me from having to eat my words--which left me with plenty of room for these glorious tomatoes.

Here's what happened. I planted Kellogg's Breakfast tomatoes because I absolutely love them. But when the first tomatoes ripened, they were big and bad. And not in a good way bad. In a rotting, cracked, mushy, bug-infested way bad. That's when I remembered that I'm not supposed to be growing giant tomatoes anymore. They simply take way too long to mature--which means there is plenty of time for tomato diaster to strike in one (or three or four) of its many forms.

The worst of the supersize tomatoes are the ones shaped like these--all rumpled and full of cracks and crevices. Similarly shaped varieties include Purple Cherokee and Brandywine (which is probably the best known heirloom tomato in the country--and possibly beyond). Many people who have no idea what an heirloom tomato actually is have heard of the infamous pink Brandywines. In fact, the Baker Creek Heirloom Seeds catalog claims it is "the most popular heirloom vegetable!" which makes sense considering heirloom tomatoes are undoubtedly more well known than all other heirloom vegetables.

But back to the rotten Kellogg's Breakfast tomatoes. I plucked two of the offending specimens from the vine and set them in the grass to take a photo. I figured I would show you what a waste of time it is to grow these and berate myself for falling into their sweet, juicy, beautifully orange trap once again.

Something distracted me, though (most likely Cary), and it wasn't until the next day that I realized I'd picked those tomatoes up and tossed them into the bowl of gourmet scraps for the chickens--and forgotten all about the photo.

No problem. I would simply take a picture of the next ripe ones, as they would surely look just as sorry. Boy, was I wrong. Not only did I find these four beauties yesterday, but the vines are loaded with (so far) perfect looking, nearly ripe tomatoes. Yes!

This means I am now officially recommending Kellogg's Breakfast tomatoes for your garden. I can't guarantee you'll have a successful harvest, but I think they're worth a try. These plants were started from seeds ordered in 2005 from Baker Creek Heirloom Seeds, who says of Kellogg's Breakfast tomatoes: "A giant, beautiful, orange beefsteak preserved by our friend Darrell Kellogg, a railroad supervisor from Redford, Michigan. The fruits are very flavorful and superbly sweet! This delicious heirloom is from West Virginia. A favorite of Dr. Carolyn Male, author of 100 Heirloom Tomatoes For The American Garden." I started my seeds on 2/6/06, transplanted the seedlings into individual plugs on 3/19/06, moved them into the ground on 4/25/06, wondered what the heck was taking so long on 5/19/06, and have probably eaten two pounds of them over the last two days, some of which were in this impromptu zucchini & tomato salad I created this afternoon.


This is basically a variation of my Summer In A Bowl, but it was inspired by this recipe my pal Alanna (whose last name just happens to be Kellogg) posted last year on her popular blog, A Veggie Venture. The recipe caught my eye when I was perusing her archives this morning because I have some zucchini I need to eat, and I liked the idea of using it raw. So I took her recipe and ran with it. I love how it is just bursting with the colors of summer.

Like the Summer In A Bowl, this is a very juicy salad--even if you squeeze some of the juice and seeds out of the tomatoes before dicing them up. I don't mind all that juice (in fact I will probably put it in a glass and happily drink it up), and if you let the salad sit around on the counter for a while, it acts as a marinade, allowing the veggies to soak up even more flavor. You could always dish it up with a slotted spoon if you don't want to serve something sloshy.

Again, you can play around with ingredients and ways to serve it. I think this would make a fantastic cold pasta salad. If I were going to toss it with hot pasta (which I bet would be very tasty), I would probably dunk the diced zucchini and sweet red peppers into the pasta water during the last minute or two of cooking.

Use what you love and what you have on hand when putting together this salad. Amounts are totally up to you. Make it yours--but please do share any scrumptious variations you come up with. Enjoy.

Farmgirl's Colors Of Summer Salad
(Adapted from A Veggie Venture's Tomato & Zucchini Salad)

Vine Ripened Tomatoes (preferably a variety of colors), diced
Raw Zucchini, diced
Sweet Red Pepper, diced (I used my favorite
Aconcagua from the garden)
Beet Greens, finely chopped (found them in the fridge)
Scallions, chopped
Garbanzo Beans (organic, I used one 15-ounce can)
Fresh Basil, chopped
Pecorino Romano Cheese, coarsely grated
Salad Dressing (I used Whole Foods Organic Fat Free Balsamic Vinaigrette--another item that needed using up)

Put everything (along with anything else that strikes your fancy) in a large bowl and toss with a big spoon until well combined. Salt & pepper to taste. Devour however you like (see my Summer In A Bowl post for more ideas), garnished if desired with shredded cheese and basil chiffonade. A hunk of warm, crusty bread served on the side to soak up all that juice should probably be a requirement.

© Copyright FarmgirlFare.com, the bright orange foodie farm blog where when we say Kellogg's, we aren't talking about breakfast cereal.

Saturday, August 05, 2006

How To Trim Tomato Plants


Realization Of The Day:
Although I've written two posts about the scary super trim I gave my two Arkansas tomato plants (click here), I never actually described exactly which leaves were the "useless" ones I cut off. This would have no doubt been helpful, especially since the experiment was a success. So here goes.

An added benefit to thinning your tomato plants is that it enables you to create order from chaos (and show me one gardener who doesn't have a chaos problem in their garden). A tangled mass of leaves and vines can become a neat and manageable plot in mere minutes.

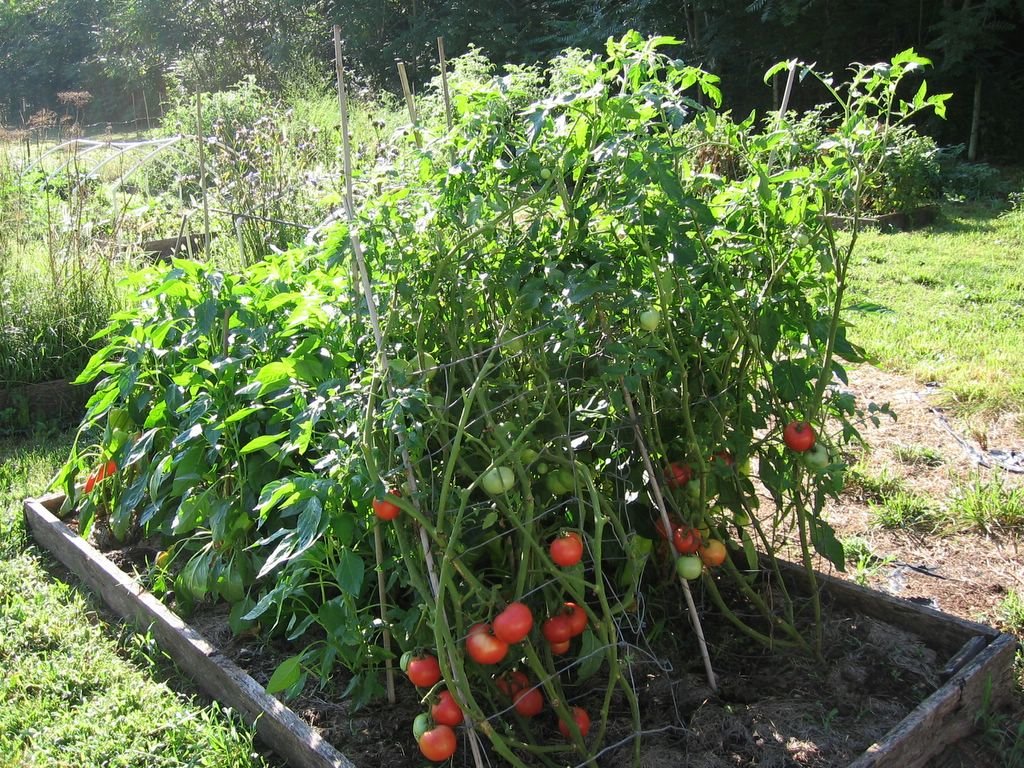
This is especially helpful if you have yet to cage or otherwise stake up your plants. And if they're growing quite close together (like mine always are because every year I insist on cramming way too many tomato seedlings into each 4' x 8' raised bed), thinning out the leaves will allow for better airflow between the plants.

Despite the abundance of sprawling, uncontrollable, cageless tomato plants currently growing like mad in my garden (what, you thought I showed you everything out there?), my tomato trimming days are pretty much over for the season. Due to heat-zapped brain cells—along with no desire whatsoever to spend any more time out in the blazing sun than absolutely necessary—I blow off a lot of garden stuff in August) But I'm sure there are some of you who are up to the challenge.

Although I have always figured that trimming the "useless" leaves would be more beneficial before they got very big—since you're trying to help the plant expend less energy growing them—as you can see in the original post, my Arkansas Travelers were quite mature when I took the scissors to them. They were even loaded with full-size fruits.

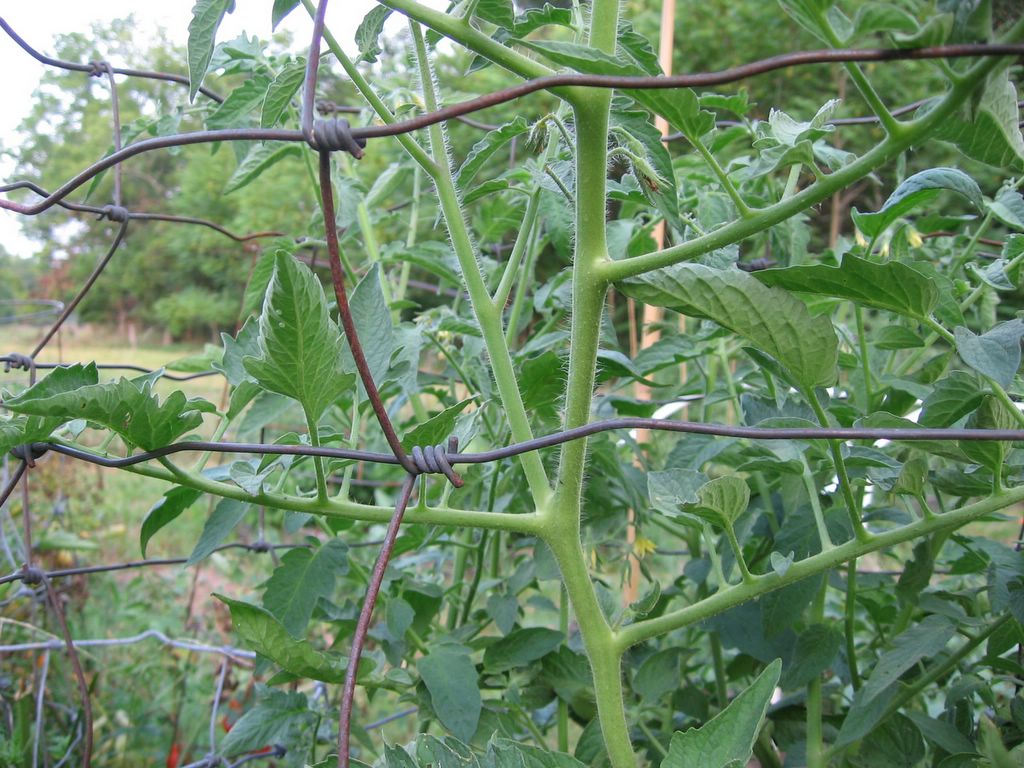
Okay, so this is all you have to do. Look up at the tomato plant in the top photo. Starting from the bottom, I count five side shoots coming off the main vertical stalk. Can you see that the 2nd shoot has several side shoots growing from it, but the 1st, 3rd, 4th, & 5th shoots are really just single large leaves? (You can click on the photo to enlarge it.)

Those are the ones that need to go. They are basically doing nothing except making you wait longer for your ripe tomatoes. Who needs that? Grab the scissors!


So how do you know for sure that you're cutting off the right leaves? Check out this close-up photo. Can you see the tiny leaves sprouting out of the main stem right above the shoot on the bottom right? (Again, you can click on the photo to enlarge it.)

Those tiny leaves are hoping to grow into fruit producing branches. Cut off that big useless leaf below them and help them out! There will almost always be useful growth literally right on top of the useless leaves. The size of that growth will vary. Sometimes it will be much larger than this.

And that's all you need to know. Except that I've found that regular old scissors work the best when tomato leaf trimming. For years I simply used my fingers and fingernails to snap off the leaves. But when you're dealing with dozens and dozens of stem snaps, this gets real old real fast. Plus if the leaves are thick, sometimes it doesn't work right.

This year when half my leaves started to bend instead of snap like I wanted them to, I pulled out my sharp little pocket knife and had one of those Oh my god, why haven't I been using this all along? moments. Then the knife thing started getting old, especially when I found I was often peeling away part of the trunk along with the leaf. Plus I slit a couple of fingers (not badly).

So then I had an even more brilliant idea and switched to scissors, which was same the day I launched the attack on the Arkansas Travelers.

Oh, and the only other thing you need to be aware of is that this is one of tasks where it is very easy to get carried away. But I think I've already made that quite clear.

From Garden To Table:
Well, not table--more like fridge and freezer. Pesto! Most of my basil is blooming (already?), but I found a large and lovely plant this morning that still had big fat leaves and no flowers on it. I just turned 14 ounces of basil leaves into two different pestos. One has been spooned into an ice cube tray and is in the freezer. The other is in the fridge waiting to be used in a new tomato recipe I've just created in my head and hope to make tonight or tomorrow. If it's a success, I will definitely share it. (Update: You'll find my favorite Low Fat, Full Flavor Basil Pesto Recipe, made with roasted almonds and fresh tomatoes here. The best pesto I've tasted was made with purple basil; read all about it, plus find an easy white bean pesto spread here.)

One of these days I'll also share how I make inexpensive homemade tomato cages that beat the storebought varieties I've tried hands down, because they actually keep my giant tomato plants up! Soon (I hope).

In the meantime, a question:
Does anyone have experience using basil or making pesto from blooming plants? I know I've just cut off the flowers and used the leaves many times (because I am always, always late making my pesto), but since I usually just make super strong pesto that I freeze and toss into pizza sauces during the winter, I've never bothered to see if the leaves taste a lot stronger or are bitter or whatever once the plants are blooming. You know, like how the taste of arugula changes so much once the plant matures and starts to bolt (click here and look for my comment).

I do know that, like arugula, the shape of my basil leaves totally changes as the plants mature: from rounded, smooth, and 'soft' looking to smaller, sharper, and more textured. I don't know why, but it always amazes me when that happens.

© FarmgirlFare.com

Monday, July 31, 2006

Garden Journal 7/31/06: Growing Arkansas Traveler Heirloom Tomatoes & How To Save Your Own Tomato Seeds


Arkansas Traveler tomato plants are one of my favorite heirloom tomatoes to grow from seed.


The pretty pink tomatoes are crack and disease resistant, and the plants don't mind the heat and humidity.

Realization Of The Day:
The scary experimental super trim I gave my two Arkansas Traveler tomato plants back on July 7th appears to be a success. What a relief! As you can see, all those green tomatoes at the base of the plants ripened nicely, and the tops have not only filled out with lush new growth but are also putting on quite a few more fruits.

There are two ripe tomatoes with minor pale splotches (I assume from 'sunburn'), but other than that, these beautiful rose colored babies are nearly all perfect and have a great flavor.

The plants were started on 2/6/06 with 2003 seeds from Baker Creek Heirloom Seeds and transplanted into individual plugs on 3/20/06.

The seedlings were planted in a raised bed full of soil rich with aged sheep manure on 4/20/06. They were mulched with grass clippings which kept all but a few determined weeds from sprouting. I watered them regularly.

If you garden in a location with iffy and unpredictable weather like I do, and/or you often have a hard time getting good looking mature tomatoes, I highly recommend giving this medium-sized variety a try.

Don't forget to save the seeds from your best tomatoes to plant the next year! It's so easy:

1. Slice off the top of the tomato, squeeze the seeds into a small dish (by all means eat the rest of it!)

2. Add a little water (I can't remember why I do this part except that years ago I read that I should—and considering the VFN tomatoes I grew this year were from 5 year old seeds, I'm going to keep doing it).

3. Let them sit around for a day or two, then pour the seeds into a fine strainer, rinse them off, and allow them to dry in a little cotton drawstring bag, or spread out on some waxed paper in a protected spot, or however you like to dry your seeds.

4. Store your dry seeds in bags or containers (I use itty bitty zipper seal plastic bags) in a cool, dry place or in the freezer.

From Garden To Table:
So how have we been enjoying these luscious beauties (besides as Summer In A Bowl)? Well, the other night we piled thick slices on homegrown, grass-fed Angus beef burgers while they were still on the grill—and before we put on the cheese. Oh my.

Allowing the tomatoes to cook slightly, while sealing in all the juices between the meat and cheese, gave the burgers a whole different flavor. In fact, they were so good we had burgers again the next night.

And last night we had the first BLTs of the summer (though these were made with VFN tomatoes—a standard, disease resistant heirloom—pictured here and here). This is always a highlight of the year for us—and even more so last night since we used up our last package of bacon in the freezer. No, we can't just go out and buy some more. This was not your average bacon.

Every couple of years we purchase an entire hog that has been locally and naturally raised and have it butchered to our specifications, including having bacon made that's smoked without any nitrates or other additives. I'd never seen or tasted bacon like this before 'going whole hog.' It's so lean and meaty you have to add oil to the pan when you cook it up.

But back to the BLTs. That amazing bacon, thick toasted slices of freshly baked Farmhouse White basic sandwich bread slathered with mayonnaise, the most wonderful tomatoes on earth (because they were grown on our little piece of it), crisp Iceberg lettuce. Smirk or gasp if you will, but we're old-fashioned purists when it comes to BLTs—we love that Iceburg crunch—and besides, there hasn't been any lettuce in the garden in two months.

It just wouldn't be fair to show you a photo—which is good because once those heavenly sandwiches were assembled, the thought of taking pictures of them was the last thing on my mind.

It's reward time in the garden. This year's tomato disasters are for another day. Enjoy!

© FarmgirlFare.com, the vine-ripened foodie farm blog where we eat as many fresh tomatoes as we can during summer and then dream about them the rest of the year.

Monday, July 17, 2006

How To Deal with Blister Beetles in the Garden: Organic Pest Control Methods


Striped blister beetles on Straight 'N' Narrow bean leaves

June 2011 update: The other day I saw my first blister beetle of the year. Ick. Our last few springs have been wetter than normal, and this has apparently kept the blister beetles from appearing in their usual droves (hooray!).

If they start destroying the garden this year, I'll be liberally dousing them and the plants they're attacking with food grade diatomaceous earth. This amazing stuff is 100% natural and organic and very safe.

We buy this brand in economical 50-pound bags and use it all over the farm: we feed it to our livestock as a natural wormer and wellness supplement, dust the dogs with it to help with fleas and ticks, sprinkle it in water troughs to keep algae from forming, and have even started taking small daily doses ourselves (up to 1 Tablespoon, mixed in water or juice), as it's supposed to help with everything from joint pain to detoxification.

Food grade diatomaceous earth will last indefinitely (keep it dry) and can be used to combat all sorts of garden pests, including both hard-bodied (like sow bugs) and soft-bodied (like slugs and cabbage worms). Apparently it's also an excellent way to naturally kill bed bugs. It will not harm earthworms, but avoid sprinkling it directly on flower blooms, as it can kill beneficial pollinators.

August 3, 2011 update: Last week the blister beetles arrived in force in the pepper and tomato beds, and the diatomaceous earth is working beautifully! I liberally sprinkled it around the base of the plants and on some of the leaves, and by the next day they were almost completely gone, with no more visible damage.

You can read more about blister beetles and the many uses for diatomaceous earth in my new post, Garden Journal 8/1/11: Attack! Using Using Organic Diatomaceous Earth on Blister Beetles and Other Pests in the Garden and Around the House and Farm.

Be sure to read through the comments section below for lots more information on how to control blister beetles. And if you've had success getting rid of blister beetles in your garden, please let us know how you did it!

Realization Of The Day:
The blister beetles have arrived. What to do?

If you don't know what these horrid little creatures are, please take a moment right now to feel very, very grateful. If you are all too familiar with them and their treacherous acts of decimation in the battlefield we foolishly call our gardens, then you have my sympathy. And if the blister beetles have not declared war on you yet this year, right now you're probably taking a moment to pray to whatever or whomever it is you pray to about these kinds of things. Me? I forgot to pray.

Blister beetles devouring my Swiss chard

Last year I happened to mention blister beetles on a Farmgirl Fare post about, of all things, chocolate cake. Okay, it was about farm emergencies in general, which is why the blister beetles came up.

Anyway, a reader named Emily left me the following comment:
"Since you mentioned blister beetles, could I ask how you deal with them? We have tomato plants in our backyard garden (in Kansas), and those nasty things wiped out an entire plant in one day!

We had never heard of them before, but our extension office identified them, solving the mystery of what happened to the plant as well as my poor husband's leg. Yikes, those blisters are vicious. Any advice you have would be most appreciated!"

And this was my reply:
I was so sorry to hear about your blister beetle invasion. You're right; they are vicious—and ravenous. They can destroy your entire garden in a couple of days.

For those fortunate readers who are not familiar with blister beetles, here is a little background information on them, taken from one of my very favorite books, Organic Plant Protection, published by Rodale Press:

"The black blister beetle, also known as the Yankee bug and just plain 'blister beetle'. . . is a fairly long (up to 3/4") and slender beetle, with soft, flexible wing covers. The entire body is black or dark gray, and the covers may be marked with white stripes or margins.

Another species, the margined blister beetle, is distinguished by a narrow gray or yellow margin on the covers. Blister beetles are very active, and frequently appear in large numbers in the latter part of June and through July.

Handpicking is effective in controlling this pest, but you should protect your hands with gloves, as the beetles discharge a caustic fluid that is harmful to the skin. Some growers achieve control by dusting with equal parts lime and flour. This should be done at the warmest time of the day.

Blister beetles are usually found in swarms or colonies feeding on the blossoms and foliage of any of a number of garden and field crops—vegetables, vines, trees, and flowers."

We have both species mentioned here—the black/grey and the lighter striped ones. Last year both were out in force, and it was terrible. What they don't completely devour, they ruin with their icky black droppings.

I didn't know about that lime/flour solution until reading it just now. It sounds interesting. I would start with that as it is totally safe. Look for lime at a feed/farm supply store or nursery or garden center; it's very inexpensive.

I have read various other 'folk tale' remedies—like that they won't cross wide, empty spaces so you should either leave wide rows between plantings or once they have invaded, clear out the surrounding weeds, grass, plants, etc.

I've even read about people yelling at them to scare them away. Who knows. When I'm desperate, I'll try some pretty crazy sounding things myself.

I've never gone the hand-picking route, as there were always way too many of them—hundreds and hundreds last year. They also run fast! But that would be your best bet if you only have a few to contend with. I hope this helps. Good luck!

She came back and said:
"Thank you kindly for the information! Those terrors seem to be gone for now, but we'll know what to do next time. We thought we had gotten rid of them once, but they showed up a second time. It's good to know some natural remedies to try. Much appreciated!"

Bean and chard bed that has been hit the hardest (taken yesterday afternoon)

I saw two blister beetles in the garden yesterday morning. By the afternoon the troops had arrived and they were in full munching mode, happily making dirty lace of that poor, struggling Fordhook Giant Swiss Chard that had up to this point been eaten down to practically nothing by deer and then attacked by worms.

I snapped some photos, started getting depressed, and readied myself for total decimation by morning. A quick garden tour this morning assured me that the blister beetles were showing no signs of having filled up their small but seemingly bottomless bellies—I suppose because they immediately empty them with all that black yuck.

Attacked chard sprinkled with flour/lime mixture

I searched through Farmgirl Fare, located the above information, and decided that I had nothing to lose with the flour/lime dusting suggestion. I used all-purpose flour and limestone ('granular calcium carbonate for livestock and poultry') that I bought two years ago in a 50-pound bag at the farm supply store for under two dollars (to add to the water of the two bottle lambs I had at the time to help control scours and some other stuff).

Since it was 95 degrees F in the shade, I figured this qualified as 'the warmest time of the day' and simply sprinkled the mixture all over the plants and the surrounding soil.

I checked back later and only saw a few blister beetles, but there also weren't any in evidence on the bean plants they had been all over earlier. I wondered if they were all simply taking a siesta. I also wondered if this was such a wise idea. If I succeeded in getting them to vacate my already ruined chard, what would they attack next?

What's left of the Oriole Orange chard.

Another round of surveillance just moments ago revealed a few on the chard, a few on the Nero di Toscana cabbage in the adjacent raised bed (which had already been half devoured over the past few days by Cary and cabbage worms), and the scary remains of what had once been Oriole Orange Chard that I had missed seeing being attacked earlier.

In between these checks I launched a fairly exhaustive search on the internet for any helpful information in beating the blister beetles. I didn't find much. The highlight was definitely this incredibly significant and yet ridiculously obvious statement I found on a Texas Cooperative Extension site: Mouthparts are for chewing. At least it made me laugh.

Here's some more information about blister beetles I came across:
--The 'caustic fluid' blister beetles discharge/secrete is called cantharadin and is toxic to people and animals.

--Most of the sites I found focused on controlling/dealing with blister beetles in alfalfa hayfields, as potential injury to horses (and less commonly to cattle and sheep) is possible if they ingest blister beetles with harvested forage (the poisonous substance stays remains active in dead beetles).

--Larval stages feed on grasshopper eggs or are predaceous and are thus considered to be beneficial, although a few species feed in nests of solitary bees.

--I read more than once that blister beetles supposedly do little or no damage to backyard gardens (Ha. Ha ha ha ha ha. Oh please.).

--Those sites that did admit to the terrible destruction they are capable of usually had nothing helpful to tell gardeners to do except to practice "diligent hand picking" while of course always wearing gloves to protect your skin from the cantharadin. Or you can simply knock the beetles directly into a can of soapy water.

--The National Garden Association suggested using pyrethrum on them, and a site called Natural Pesticide In The Garden suggested sabadilla (something I've read about before but am still not sure where/how to obtain).

--A thread on the Garden Clinic Forum on Gardenweb.com was started by a woman in Southwest Missouri who said, "I am having the same problem with blister beetles.I had never seen them before. They have almost completely devoured my potatoes and were starting on a tomato plant. I've sprayed several times with rotenone. It kills them but more just keep on coming." Nobody was able to offer her much help.

In years past, I've simply admitted defeat as soon as the battles with the blister beetles began. Their surprise attacks come without warning (is that redundant?) and are short, messy, and full of horrific damage. But they usually seem to disappear just as quickly as they arrived, and I have never had them decimate my entire garden.

Once again, I won't pull up either of the patches of chard (even the Oriole Orange that is simply painful to look at right now), the Nero di Toscana cabbage, and anything else they decide to devour in the next day or two. At least some of these plants should recover and reward me with edible bounty once the blister beetles are only a hazy nightmare.

If you have any experience with blister beetles, especially if you've figured out a way to win the war with them, I (and probably many other frustrated gardeners) would love to hear about it.

But right now I'm forcing the blister beetles out of my mind so I can concentrate on cooking up the beautiful beets I harvested earlier to go with the garlic and herb encrusted leg of lamb that I just pulled from the oven.

And for the person in this household who doesn't care for beets (yippee, all for me!) there will be crispy pan-fried new potatoes (in homemade lard), along with salads for both of us made with any greens I can scrounge up in the garden and topped with slices of rosy red tomatoes that will no doubt still be warm from the sun.

Oh, the dragonflies arrived in swarms yesterday, too. That almost made up for the blister beetles. They're glorious.

© FarmgirlFare.com

Friday, April 28, 2006

Lettuce and Arugula in the Garden, with Step-by-Step Photos Showing How To Grow Arugula from Seed in Less than a Month

Sublime Homegrown Salad Greens for Those Short on Time, Space, and Sunlight

Love lettuce? You might find my post How To Grow Your Own Gourmet Lettuce from Seed: It's Easier than You Think! helpful. And there are links to lots more favorite things to grow at the bottom of this post.

Got a bumper arugula crop? Make some Arugula Pesto or try this easy, all-purpose Arugula Cottage Cheese Dip/Spread/Sauce.


Arugula is so easy to grow I didn't even plant this.

Really. This is what you get when you grow some arugula in the greenhouse, let it flower and go to seed, and then, months later, finally pull up the dried out stalks and plunk them down on an unused patch of bed on the other side of the greenhouse.

Ignore them all winter, then toss the stalks into the compost bin because all of the seeds have dropped out of them. Realize where the seeds have landed, and wonder if a little water might just sprout something. Lo and behold—an arugula jungle! A little more about arugula below. But first, here are some photos to show you just how quickly you can grow yourself some salad. The photo above was taken on April 27th.