Wednesday, July 29, 2009

Garden Journal 7/28/09:
Growing and Loving Surprise Lilies (aka Naked Ladies, Magic Lilies, Spider Lilies, and at Least Nine Other Names)

This old time favorite flower requires virtually no care (more photos here).

Realization of the Day:
It's hard to imagine a more beautiful flower that is so easy to grow.

That is actually what the informative site Floridata says about surprise lilies, which pretty much sums them up for me. But if you'd like to know a little more about these robust and vigorous (and so pretty!) plants, here's some information.

Surprise Lilies go by many other names, including Naked Lady (because the trumpet shaped flowers bloom atop 2-foot tall naked stems), Nekkid Lady, Magic Lily (because the flowers seem to pop out of the ground like magic), Spider Lily, Mystery Lily, Resurrection Lily, Hardy Amaryllis, Guernsey Lily, Autumn Lycoris, Hurricane Lady, Pink Lady, and Pink Flamingo Flowers.

Since this is my tenth summer on the farm and I'm still surprised each year when our one clump of them pops up next to the front yard fence, I always think of them surprise lilies. And what a nice surprise they are.

A member of the amaryllis family, surprise lilies have been cultivated for centuries in their native Japan. They were first introduced to American gardeners around 1880, and the most well known variety here—which is what I have—is the pink surprise lily, Lycoris squamigera.

The daffodil-like leaves emerge in late winter or early spring and then wither and die away. The plants go dormant (and need no water) until the flowers emerge in mid-summer (hence the 'surprise'), which allows them to survive prolonged periods of summer drought.


These leaves are actually other plants which conveniently cover the nakedness.


I've always been partial to plants that will 'persist for years once established.' Surprise lilies are hardy to USDA Zones 5-10 and require virtually no care. I remember the first time I saw them blooming in long rows along an old highway in Sonoma County, California. They do well in full sun, part shade, and even heavy shade and will thrive in both sandy and heavy clay soils.


The blooms are long lasting and make good cut flowers. The plants are mildly toxic, which may be part of the reason they're touted as deer resistant, though when Cary was a baby she made a beeline straight for the blooms and survived just fine. Other than her, I've never noticed any pests or insects bothering my plants.


Surprise lilies produce large bulbs (about 2 inches across) that multiply quickly and can be divided every 3 to 5 years. Buy bulbs in spring and fall or beg some from a friend's garden. I've never divided mine, but I probably should try it, especially since I wouldn't mind expanding my little patch.


Dig up the bulbs in spring—when it's easy to see the yellowing leaves—or after the blooms fade in August or September. Plant your bulbs in clusters as soon as possible after digging them up, 1 to 7 inches deep (the colder your climate, the deeper you'll want to plant) anywhere you'd like a showy summer display. If you don't mind a few wilting leaves, you can even plant them under the sod in your lawn, mowing around the stalks when they bloom.


Your surprise lilies may not flower for the first two years, and depending on weather conditions, they may not flower every subsequent year (which means a 'surprise' for you when they do). One source I found said the closer you plant the bulbs, the sooner they'll bloom, which may be why they make good potted plants.


Do you have surprise lilies in your garden? Any growing tips, info to add, or other nicknames to share?


Previously posted surprise lily photos:
8/4/05: Surprise Lilies Are Also Known as Naked Ladies
7/31/06:
Surprise Lilies Attacked!
8/2/06:
Surprise! Cary Didn't Eat All the Lilies
7/28/09: There Are Naked Ladies in My Front Yard!

Information sources: Floridata, University of Arkansas Cooperative Extension Service, Wisconsin Master Gardener Program.


© FarmgirlFare.com, the flowering foodie farm blog where we're thankful for the previous gardener here whose meager plantings of various hardy bulbs decades ago (like the irises and those beloved daffodils that just keep spreading) are still providing so much beauty and joy.

Friday, July 24, 2009

Garden Journal 7/24/09: How To Beat the Summer Heat


You Simply Sleep Through It

Realization of the Day:
At least somebody's getting some use out of my potting bench this time of year.

I hope you have a very relaxing weekend!

© Copyright 2009 FarmgirlFare.com, the siesta taking foodie farm blog where the one advantage to living in an area that's constantly being deforested is that you can often buy rough cut lumber from local sawmills for a ridiculously low price—but after several years it starts to reach warp factor six. I don't consider this a problem—more like an excuse to build a whole new potting shed where I'll be able to not only do my dirty work but display some of my vintage garden treasures (photos of them hopefully up soon) as well. If nothing else, it's something to dream about during those siestas.

Tuesday, July 21, 2009

Garden Journal 7/21/09: Mixed Emotions
(and Growing Lemon Cucumbers from Seed)


Happy Dog and Sad Lemon Cucumber Plants

Realization of the Day:
The August mindset I've had since mid-June is going to have me very disappointed—and very hungry—once August actually arrives.

I don't know about you, but usually by the time August rolls around, my main concern in the garden is to simply keep whatever is still out there alive. It's too late to plant any of the poor spring seedlings that might be still hanging around, too hot to start fall crops yet, and pulling weeds in the ridiculous heat and humidity borders on insane. Watering is the main priority.

But if your August weather arrives a month and a half early, things can get really screwed up. Just before our heat wave struck, I put 15 heirloom tomato seedlings into a dandy new, sheep manure-filled plot I'd created especially for them. And after eight of them fried and died within days, transplanting any more of the several dozen other seedlings that still needed to go into the ground seemed like a waste of time and sweat.

I also neglected to direct seed all the warm weather veggies I never got around to starting in containers, like summer squash, winter squash, cantaloupe, and cucumbers. Just totally spaced them out. Obviously I was suffering from heat-induced brain damage, although, in my defense, we were also in the middle of putting up hay, a grueling task that takes priority over everything. (It also happened to be our worst haying season ever, as far as things going wrong were concerned, but with 744 bales of hay now neatly stacked in the barn for next winter, we've almost forgotten all the frustration and pain.)

I'm going to have to do without homegrown squash and melons this year (thank goodness for Amish garden overflow), but things are looking up in the cucumber department. I discovered these volunteer lemon cucumber vines while ruthlessly tearing out a depressing raised bed of disappointing broccoli, insect-ravaged beets, and amazingly healthy weeds.

I've been doing really well implementing my new gardening rule, and at first I was tempted to yank these sad little plants—complete with sad looking little stunted cucumbers—out. Then I remembered my otherwise cucumberless state and decided that with some sunlight and sheep manure, they might begin to flourish. If not, out they'll go.

I first came across lemon cucumbers at the Santa Rosa, California farmers' market almost 20 years ago, and I've been in love with them ever since. I asked the same question about them that everybody asks, Do they taste like lemons? No, they look like lemons. They taste like cucumbers, mild yet wonderfully flavorful. They also do really well for me here in Missouri and love to volunteer.

The Pinetree Garden Seeds catalog (from whom I've purchased lemon cucumber seeds) says this of lemon cucumbers:

Originated in 1894. The 3-inch fruits are round, pale yellow in color, with a white flesh that is easily digested and never bitter. Yields are most abundant [this is an understatement]. Also called crystal apple, the plant is drought resistant.

And the Johnny's Selected Seeds catalog says:

Small, rounded, pale yellow cucumbers. Pick at 1½—2½" diameter. This versatile cucumber is sweet and flavorful, and doesn't have much of the chemical that makes other cucumbers bitter and hard to digest. Though it's often served raw, it's also a good pickling cucumber. Specialty market salad item. NOTE: Very late to begin bearing.

Baby lemon cucumbers start out nearly white and turn progressively yellower. Pick them when they're still light yellow, like these. To save seeds from your best specimens, leave them on the vine until the fruits mature—they'll be big with dark orange skin.

I usually eat my lemon cucumbers raw (you can use them in place of regular cucumbers in nearly any recipe), but I'm thinking they would make really good refrigerator pickles. Hopefully I'll harvest enough this year to make some.

And since lemon cucumbers only take 65 days to mature, I figure I'll go ahead and sow some seeds next to these plants. The August harvest is going to be pretty sparse, but we just might make up for it in September.

Ways I like to eat lemon cucumbers:
—Sliced and dipped into Herbed Yogurt Cheese
—In the Easiest Greek Salad Ever
—Tucked into Homemade Pitas with onions, tomatoes, & ground lamb
—With Grilled Lamb Burgers with Garlic and Feta on Rosemary Focaccia
—Alongside Greek Style Slow Roasted Leg of Lamb with Oregano & Lemon
—Blended up in a refreshing batch of Gazpacho (cold vegetable soup)

Are you a lemon cucumber lover? Got any growing tips, stories, or favorite ways to enjoy them?

© Copyright 2009 FarmgirlFare.com, the self-seeding foodie farm blog where thankfully the temperatures have finally dropped (to below normal even!) and a big, beautiful storm has spent the day showering us with a couple inches of very much appreciated rain. Everything (and everybody) is perking up—and I've actually been getting stuff planted!

Saturday, July 11, 2009

Garden Journal 7/11/09:
Clearing Out & Giving Up (In a Good Way)


It's into the Compost Bin for these Tomato Plants (minus the containers of course)

Realization of the Day:
I've been on a cleaning and decluttering rampage lately, and my latest target is the garden.

The depths of the chest freezers (buried homemade basil pesto from 2002, vacuum sealed green beans from 2003), the refrigerator crisper drawers (what is that in there?), the musty tubs of forgotten clothes (shirts that have always been uncomfortable, sailing shorts Joe hasn't worn since he left Florida 20 years ago), the dusty piles of three-year-old yet still unread magazines, the dozens of saved jam jars I'm never going to use—nothing is safe from my much needed wrath. I'm even working on organizing my cramped and collectible-filled little studio office.

As for the garden—in all of its unplanted, heat stroked, and insect-ravaged weediness—I have a new rule I've started implementing with a gloved iron fist:

If looking at it only depresses/frustrates/irritates you, then it's time to rip it up or toss it out.

The pathetic tomato plants in the photo above are in the compost pile, along with some other seedlings that I know will never grow well even if I do get them into the ground soon. The decision was made easier once something (I think an elusive tomato hornworm) ate them down to practically nothing.


In this 4'x8' raised bed are my second (very late) broccoli planting (seeds started in containers), four rows of Maxibel and Masai haricots verts bush beans, a few dozen kohlrabi plants, a volunteer dill plant, and weeds. The first harvest of beans is over (I picked about 2 pounds), and I've finally come to realize that whatever matures after that initial crop is usually disappointing, especially in July and August. So out they go. It feels so liberating!

The Di Cicco broccoli plants—a new to me Italian variety that's supposed to produce an abundance of small to medium heads—offered up a few florets but already seem to have petered out. Joe suggested I leave them in the ground in case they took off and started producing again once it cooled down. Sorry, new rule in effect. I am leaving the first planting—which did slightly better—in the ground for now (except for the scrawniest plants I already gave to the chickens), but I have a feeling they won't be there long.


I couldn't get myself to yank out the kohlrabi just yet, even though only three of the plants have put on bulbs (which might be enough for a small batch of my beloved kohlrabi purée), and the others aren't likely to in this heat. Same story, different season, though this time I started my seeds in containers and transplanted them into the garden rather than direct seeding, making sure to plant them a little deeper in the ground than they were in the pot, as per instructions from my gardening guru girlfriend (and kick-ass kohlrabi grower) Cynthia at Love Apple Farm.

Unfortunately I think it may have simply been too hot for the bulbs to form. I still haven't given up on kohlrabi completely (I love that purée too much). I'm thinking I might try starting seeds for a fall crop, but not until it cools down for good.

I'm not sure why I decided to tackle this bed clearing project in the middle of a 90 something degree day, especially since I'd already spent a good half hour out there weeding other beds (and cleaning out the fridge is a much cooler job), but it really only took about 20 minutes, provided me with a huge green lunch for our foodie chickens (you can read more about what else they eat in the comments section of this post), and looks so much better.

For a lifelong packrat who lives on a farm that's miles away from everything, doesn't have garbage pickup, and always seems to need something two days after finally tossing it out, this is definite progress—and it feels great.

Are you good at giving up and weeding out all the useless and/or depressing stuff from your garden?

© Copyright 2009 FarmgirlFare.com, the still pretty cluttered foodie farm blog where it would be a lot easier to keep all the flat surfaces clear and everything neat and orderly if we didn't have so many interests and hobbies (not to mention a passion for books)—but where would be the joy in that?

Friday, July 10, 2009

Garden Journal 7/10/09: Designer Pollinators


Is This a Best Dressed Bug or What?

Realization of the Day:
It's Fashion Week in the garden.

I'll admit it. I'm a sucker for cool looking insects, especially if they aren't decimating any of my plants—and sometimes even when they are. Since these little beauties so far appear content to spend their time pollinating the showy display of leek blossoms (which is a whole other very disappointing story I'll hopefully get around to writing about one of these days), I'm content to simply gaze at them in open admiration.

I remember seeing some of these winged insects last year for the first time (lots of new and bizarre—and sometimes very unwelcome—things have been happening during our past two wetter-than-usual springs), and I don't recall them doing any noticeable damage.


That pattern reminds me of vintage fabric or wallpaper. And check out those subtly coordinated legs.


Then there's that underbelly! It's like a suit and matching jacket. So chic. The star of Fashion Week is definitely Mother Nature.

Anybody else into cute bugs—or know what kind this one is?

I'm slightly obsessed with pollinators in general (adorable or not):
4/10/06:
Look What Landed At My Feet
5/11/06:
Butterfly Conference
5/11/06:
My Good Deed For The Day
6/22/06:
Farms Depend On Pollinators
6/23/06:
You Can't Have Too Many Pollinators Around
6/24/06:
Butterflies & Sheep & I Love Spiderwort
6/28/06:
Butterfly Paradise
6/29/06:
Obsessed With Bunnies & Butterflies
7/08/06:
The Stuff Of Life
7/16/06:
Butterfly Bonanza
8/26/06:
Butterfly Photos Are Better Than Nothing
8/14/07:
Joint Pollination Task Force
9/11/07:
Welcoming Autumn with Open Arms
9/27/07:
The Squash Blossom Butterfly
1/1/08:
Fortunately All Flowers Look Perfect to Pollinators
5/8/08:
Luna Moth Love (and an amazing butterfly book)
7/6/08:
Abuzz with Activity
7/8/08:
Winged Spectacular
3/31/09:
Flash of Butterfly Brilliance
6/10/09: A Lovely Luna Moth

© Copyright 2009 FarmgirlFare.com, the unfashionista foodie farm blog where my usual outfit of choice is overalls, a ratty shirt, and workboots. Thankfully the other creatures around here make up for my serious lack of style.

Saturday, July 04, 2009

Garden Journal 7/4/09: Fireworks in the Front Yard


Or Maybe It's Just a Fiery Burst of Beautiful Color—But Definitely a Celebration Nonetheless

Here's hoping you had a glorious Fourth of July!

Did you do anything in the garden over the holiday weekend? Or, more importantly, did you eat anything from the garden? I harvested the garlic (and about 40 pounds of weeds) earlier today, tried to make it rain by continuing to water the garden as a few drops started to fall (didn't work), and then enjoyed a fabulous dinner of grilled pork ribs smothered in homemade bbq sauce (from the locally raised hog we had butchered last year) with a side of freshly dug new red potatoes that were simply boiled up and tossed with lots of salt and butter. Insanely good.

© Copyright 2009 FarmgirlFare.com, the happy we're done with haying this year foodie farm blog where the difference between regular old tuna salad and the best tuna you've ever eaten can be nothing more than a handful of homegrown chopped purple onion and fresh chives—and if you're eating at 10pm after having spent all day bringing in and
stacking 300 bales of hay, it tastes all that much better. Hooray for edible gardens—and being done with haying!

Saturday, June 27, 2009

Garden Journal 6/27/09:
Digging Up an Early Red Potato Harvest


Volunteer New Potatoes and a Few 'Test' Heads of Garlic

Realization of the Day:
Gardening must be one of the few things where your ineffeciency will sometimes end up rewarding you.

Of course that's not always the case—like when you never get around to mulching something and get a bumper crop of weeds that's twice as tall as what you're trying to grow (been there, still doing that).

But today some of my carelessness out there paid off in the form of the beautiful little red bounty you see above. Apparently I missed a few potatoes when I was digging the last of them in the fall, and when they started sprouting up come spring I decided to leave them—even though they were growing in the middle of what was now my garlic bed. I figured they would be growing deeper than the shallow rooted garlic and probably wouldn't bother it.

My 'real' potato planting (which I'll be writing about in a future post) didn't happen until May 12th (I always plant my potatoes much later than anybody else around here), so this early harvest—which I'll simply scrub clean, cut into chunks, boil until tender, and toss with organic butter and a sprinkling of salt—is especially welcome.

There are only enough potatoes for a small serving each, but for the amount of effort involved—which was zero, unless you count the three minutes it took to dig them up—I'll gladly take it. I bet they'll taste wonderful alongside a couple of homegrown grilled lamb leg steaks, some of the green beans I picked yesterday (more about these in an upcoming post, too), and maybe a warmed up hunk of Four Hour Parisian Baguette from the freezer.

The garlic, on the other hand, is a different story. It should have been planted back in the fall, but for some now unfathomable reason I didn't get it into the ground until February—and have the disappointingly small bulbs to prove it. I went ahead and planted it so late because I figured whatever I ended up with would be better than nothing. This is when your inefficiency becomes experimenting.

Has your lack of attention (or downright laziness) ever paid off in the garden?

© Copyright 2009 FarmgirlFare.com, the spud loving foodie farm blog where sometimes it seems like the volunteer plants (like this beautiful basil and these sprawling lemon cucumber vines, which are only two of many) provide nearly as much bounty as the cultivated ones—thank goodness.

Wednesday, June 24, 2009

Echinacea: My Favorite Easy To Grow, No Maintenance, Heat Loving, Drought Tolerant, Long Blooming Flowering Perennial

Echinacea is a beautiful, hardy, no maintenance, long blooming, perennial medicinal herb - FarmgirlFare.com
Echinacea Purpurea, also known as purple coneflower (despite its pink flowers)

Realization of the Day:
If basil declares that summer has arrived in the vegetable garden, then cheerful echinacea shouts it out from the flower bed.

Summer is here—in a hot, humid, stripped down, and extremely sweat-drenched way. It's already been in the 90s for over a week, and there's no end (and no rain) in sight. It just keeps getting hotter.

The heat index is supposed to get up to 108 on Saturday, but our thermometer in the backyard (yes, I stupidly looked) says it's already there. It feels as if we went from the middle of June to the middle of August overnight.

We really need to be putting up the hay (which will feed the sheep and donkeys next winter), but it's simply way too hot to do that kind of strenuous work—we'd never survive. It's too hot to do pretty much anything outdoors, though you wouldn't know it from looking at the echinacea.

There are several species of echinacea, but echinacea purpurea, also known as purple coneflower, is the most common and probably the easiest to establish in the garden. I originally started some from seed years ago at my first farm, and then dug up and brought a few of those plants with me when I moved to this farm nine years ago. I also started some echinacea angustifolia, narrow leaf coneflower, but it didn't make the move.

The seeds were pretty easy to start, but you can also find echinacea seedlings for sale at nurseries and garden centers. If you have a friend or neighbor who has some growing, ask them if they'll share.

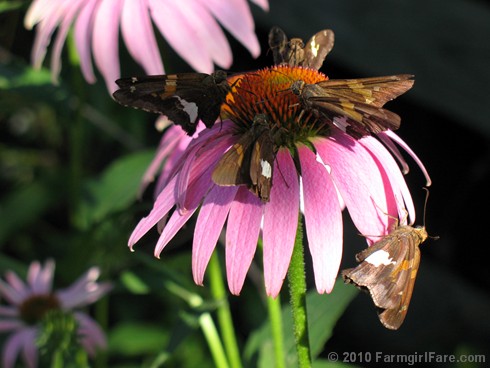
Pollinator Party 1

Echinacea is everything I claimed in the title of this post and then some. It was supposed to say Self Seeding, Pollinator Attracting, Poor Soil Loving, Insect Resistant, Cold Tolerant, Pretty Much Impossible to Kill as well, but Blogger said the title was too long.

I've found that the less I pay attention to my echinacea, the more it flourishes, though I'm sure it would probably go crazy if I fertilized it with a little sheep manure. You'll find sweeping roadside displays of wild echinacea blooming along Missouri highways, often growing out of what looks like solid rock.


My echinacea, which conveniently starts to flower just as my beloved spiderwort is petering out, blooms all summer long and doesn't require deadheading. And if you never get around to cutting off the seedheads in fall, they'll simply drop to the ground and start sprouting up on their own come spring, while the dead flower stalks fall over or are buried in the lush new growth of old and new plants.

Echinacea also happens to be one of the most popular medicinal herbs in America. Here's an excerpt from an article by the University of Maryland Medical Center:

Results of archeological digs indicate that Native Americans may have used echinacea for more than 400 years to treat infections and wounds and as a general "cure-all." Throughout history people have used echinacea to treat scarlet fever, syphilis, malaria, blood poisoning, and diphtheria.

Today, people use echinacea to shorten the duration of the common cold and flu and reduce symptoms, such as sore throat (pharyngitis), cough, and fever. Many herbalists also recommend echinacea to help boost the immune system and help the body fight infections.

Several laboratory and animal studies suggest that echinacea contains active substances that enhance the activity of the immune system, relieve pain, reduce inflammation, and have hormonal, antiviral, and antioxidant effects. For this reason, professional herbalists may recommend echinacea to treat urinary tract infections, vaginal yeast (candida) infections, ear infections (also known as otitis media), athlete's foot, sinusitis, hay fever (also called allergic rhinitis), as well as slow-healing wounds.


On top of all that, it's beautiful, especially since the flowers look different at every stage. If you're looking for a winning perennial in the garden, I highly recommend echinacea.

Is there echinacea growing in your garden?

Previous purple coneflower posts (Did I mention it's a joy to photograph?):
8/23/05: Hardy Echinacea Blooms All Summer Long
6/20/06: Preparing to Burst into Color
7/16/06: Butterfly Bonanza
8/26/06: Butterfly Photos are Better than Nothing
6/28/06: Butterfly Paradise
7/8/06: The Stuff of Life
11/25/06: The Easiest Way to Store Seeds
6/25/07: Echinacea by the Cat Cabin
8/14/07: Echinacea Visitors
7/6/08: Been Busy
7/8/08: Winged Spectacular (one of my favorite photos)

© Copyright 2009 FarmgirlFare.com, the hot stuff foodie farm blog where the donkeys (and the rest of us) may be wilting, but the first green beans are ready!

Saturday, June 20, 2009

Garden Journal 6/20/09:
Harvesting the First Green & Purple Basil of the Season (And the Best Ways to Store Your Fresh Basil)


It's Almost Too Pretty to Eat

Realization of the Day:
Freshly picked basil always feels like summer.

It's the longest day of the year today, and it's also the hottest—90 degrees in the shade (which is why I'm hiding in my little office with a fan blasting on me, writing about gardening instead of actually doing it). But even without the calendar and thermometer, I'd know that summer is about to begin because the fresh basil is ready.

I ordered all sorts of different kinds of basil seeds this year, and then I ended up buying some plants instead. This purple variety is Red Rubin, which the
Johnny's Select Seeds catalog says is a "vigorous Italian large leaf type with high yields and great flavor. Flat, 3" long leaves stand out horizontally, and are a copper-tinged purple color. Height 18"—24" and 76 days to harvest."

I'm pretty sure this is the mystery purple variety I grew last year that made such incredible pesto. The plants look similar, and many of the leaves have the same pretty green outline along the edges.

The green basil was grown and sold by a local gardener at the natural foods store in town. It was simply labeled 'sweet basil,' but at $2.00 for six healthy little plants I wasn't about to pass it up just because I have no idea what kind it is.

While Genovese basil is a favorite and dependable Italian variety for pestos, I prefer the Italian Large Leaf, which has a sweeter and less clove-like flavor. The tiny leaves of lemon and lime basil smell wonderful, and are a nice change from the norm, though I admit to never using them to their full potential.

One year I grew bush basil, and I ended up with about 20 adorable and perfectly shaped little mounds that made me think of hedgehogs. They do well in pots and a closely planted row of them would make a beautiful edging along a pathway or herb bed.

Since it's going to be a long, long time before I have any tomatoes in the garden (especially since five of my most recently transplanted seedlings fried up and died yesterday), I'll probably just turn this basil into my favorite pesto. Tonight we're grilling homegrown beef burgers that we'll serve on hunks of Four Hour Parisian Daily Baguettes (I love this easy bread!), and I'm thinking a pesto burger—smothered with a thick slice of fresh mozzarella perhaps—would be very nice. Or maybe I should wait for the tomatoes.

I actually picked this basil back on Wednesday, but after 72 hours in the refrigerator it still looks perfectly fresh. I rinsed the leaves under water and put them in a plastic bag with a paper towel. The paper towel will soak up extra moisture and keep the leaves from rotting while maintaining a high level of humidity in the bag. I gently pressed most of the air out of the bag and sealed it with a clothespin.

Some people claim that fresh basil will quickly rot in the refrigerator if the leaves aren't perfectly dry, but I find they do better when left a little damp. And as with lettuce and other greens, wilted basil leaves won't perk up in the refrigerator—you need to refresh them in a quick cold water bath first.

The best way to store fresh basil is of course to leave it on the plant until just before you're ready to use it. Harvesting often can actually benefit the plant since, as my gardening girlfriend Cynthia Sandberg at Love Apple Farm explains in this informative post, pinching your basil plants is the key to success.

One of our butcher lamb customers is an avid gardener, and she likes to keep a big bunch of basil in a pitcher of water on her kitchen counter. She says it lasts for quite a while that way, and sometimes the stems will even send out roots, creating new plants that can go back in the garden. I really need to try this.

Are you harvesting any basil yet? What are your favorite varieties—and what do you like to do with them?

Related posts:
9/21/06: How To Keep Your Basil Growing Into Fall
6/25/06: Beautiful Basil Seedlings in the Greenhouse
7/25/06: Volunteer Basil in the Kitchen Garden
8/10/06: Basil Gone Wild - and Happy Pollinators

Other Farmgirl Fare basil recipes and appetizers you might enjoy:
Purple Basil Pesto and the Easiest White Bean Dip/Spread Recipe Ever
Savory Tomato Pesto Pie with a No-Fail Biscuit Crust
Fresh Tomato Pesto Pizza & A Simple Tomato Salad
Fresh Tomato & Basil Whole Wheat Sourdough Bread
Simple Fresh Tomato Pizza Sauce (no blanching required)
The Easiest Greek Salad Ever
Colors of Summer Salad with Fresh Basil
Summer in a Bowl with Fresh Basil
Fiesta Cottage Cheese Veggie Dip
Hot Swiss Chard Artichoke Dip
How To Make Arugula Pesto & What To Do with It
All About Chives & How To Make Herbed Yogurt Cheese

© Copyright 2009 FarmgirlFare.com, the herb infused foodie farm blog where—oh gosh, look at the time—it's happy hour! Time to water the thirsty garden and pour myself a drink. Happy summer solstice!

Saturday, June 13, 2009

Garden Journal 6/13/09: Bigger Red and Orange Baby Carrots


More Carrot Thinning—St. Valery and Atomic Reds

Realization of the Day:
The Atomic Red carrots are orange inside!

I'm a little disappointed, but maybe that's just when they're young, since the Pinetree Garden Seeds catalog describes both the surface and flesh as brilliant red. Red is good because not only is it beautiful, but it also means the carrots are full of the antioxidant lycopene—the one you always hear about in connection with tomatoes.

I'm also growing an heirloom variety of carrots from 1929 called Red Cored Chantenay which, according to my seed catalogs, are supposed to be short and fat (about 5½ inches long) with a very appealing shiny orange color, smooth skin and a deep red-orange center. I'd really like to see that gorgeous red both inside and out!

Slowly but surely I'm getting my carrot bed thinned. I'm also keeping it covered with floating row cover 24/7 (because if I take it off during the day I'll probably forget to put it back on at night) as protection against the deer since they munched down all the Swiss chard in the bed (thanks so much for sharing your deer deterring suggestions!). I know I'd said the other day that they didn't eat any of the carrots, but a closer inspection that afternoon revealed that they had indeed nibbled on some of the tops. I'm not taking any chances.

After purposely keeping my hand out of this photo I realized that I should have kept it in, since it's a little hard to tell just what size the carrots are. These are the biggest ones I picked, and most are 2 to 3 inches long. There were also plenty of itty bitty ones in the Atomic Red row since it hadn't been thinned at all yet and was really crowded.

If you can't stand the thought of simply tossing your tiny carrot thinnings into the compost pile or feeding them to the chickens (most of mine snubbed their beaks at the tops, though the rapidly growing chicks will eat anything) and are willing to invest a few extra minutes, I think it's worth doing a 'light' thinning just to make sure they have at least a little growing room, and then going back through again when the babies have had a chance to get bigger. You can see what a size difference two weeks made.

Coming up, though, I'll be sharing a reader's tip for how to sow your carrot seeds so that no thinning is required. Cute babies or not, I'm definitely going to try it.

Have you ever grown (or eaten) red carrots? Were they red all the way through?

© Copyright 2009 FarmgirlFare.com, the crazy about carrots foodie farm blog where these little babies were almost too cute to eat. Almost.

Thursday, June 11, 2009

Dealing with Deer in the Garden: Which Vegetable Plants They Love (and Don't Love) to Eat


What do deer like to eat? Everything in this bed looks fine at first glance.

Realization of the Day:
Just when you think your plants are safe from the bugs, the dogs, the cold, the heat, the [fill in the blank with your latest garden problem here], the deer show up.

We have literally thousands of acres of forest and greenery surrounding us, and yet the deer want to eat in my little cultivated spot. What I want is an 8-foot high stone wall around my entire garden. It's the only thing that will keep out the deer (and the digging dogs), and I've always loved how they look. Of course it's probably never going to happen—who builds 8-foot high stone walls anymore?—but a girl can dream, can't she?

A few years ago my mother was staying with a cousin in Pennsylvania who told her that all he grows anymore is asparagus because it's the only thing the deer won't eat. I feel his pain—and I'm sure many of you do, too.

More below. . .

Saturday, June 06, 2009

Gardening How To:
Growing and Thinning (and Weeding!) Heirloom Carrots

Looking to learn about growing carrots? You'll find links to two more of my carrot growing posts and a recipe for carrot herb rolls, along with all sorts of other things I like to grow, below.


Extreme baby vegetables (harvested on 5/28)

The first year I gardened in Missouri I tried growing carrots, didn't get very good results, and gave up—despite the fact that I usually consume at least one raw carrot a day. I continued to order one or two varieties of carrot seeds every couple of years, but except for a really old packet of seeds that I scattered during an ambitious and hopeful fall planting campaign in August 2006 (which were, not suprisingly, all no-shows) they never seemed to make it into the ground.

With good organic, U.S. grown carrots available year round for under a dollar a pound at the supermarket, homegrown carrots simply weren't a big priority. But deep down, I knew I was missing out. So this year to compensate I went a little overboard.
Back on April 11th, I sowed six varieties of heirloom carrot seeds (saving some of each kind for fall planting) in one of my 4'x8' raised garden beds: St. Valery (from Baker Creek Heirloom Seeds), Parisienne (Baker Creek), Little Finger (Baker Creek), Atomic Red (Baker Creek), Scarlet Nantes (Botanical Interests), and Red Cored Chantenay (Pinetree Garden Seeds). I chose a wide variety of colors, shapes, and sizes. I'm especially excited about the red ones.


So far they're all doing great—and so are the weeds (that would be the big pile on the left).

In The Vegetable Gardener's Bible (my favorite garden book, which I highly recommend for kitchen gardeners of all levels), author Ed Smith says that "thinning carrots, like sowing them, is best accomplished on days when patience can rule your actions." He's got that right. Talk about a teeth gnashing job, especially when you're also trying to pull out weeds that are twice the size of the carrot seedlings. Ed recommends using floral shears to thin your carrots, but I just pulled them out by hand—one small section at a time.

It's too bad I didn't check the carrot growing section of The All-New Illustrated Guide to Gardening from Reader's Digest (a humongous book packed with over 2,500 color photos & illustrations that I'm finding very informative—and love that the completely updated and revised version is all organic!) until just now, because I really like this idea:

They say to mix a few radish or leaf-lettuce seeds with the carrot seeds "since carrot seeds germinate slowly, and the row may be well defined by weeds long before the carrot tops appear. The radishes and lettuce will sprout quickly and will mark the row. Because they wil be ready long before the carrots are, they will not interfere with the growth of the carrots, and you will also be making more efficient use of your garden space."


These Happy Carrots Have Been Weeded, Thinned, and Mulched

Carrots prefer to have cool roots and warm tops, so mulch them with grass clippings (or freshly pulled weeds or, as seen above, rotting old hay that you pulled off the strawberry bed in March and still have laying around) during the late spring and summer. This will also keep new weeds from sprouting and help retain moisture in the soil—which is why I love mulching so much.


Digging Dogs in the Garden: That Big Empty Spot is Courtesy of Marta (aka Marta Beast)

The Vegetable Gardener's Bible suggests growing a leafy companion crop such as Swiss chard to help shade and cool the soil (Yes! Another reason to help convince you to grow Swiss chard!), so starting at the southern end of the bed, I sowed my seeds in 8-foot long rows like this: one of Swiss chard (two varieties), then three rows of carrots, one of Swiss Chard and Nero di Toscana cabbage (also called dinosaur kale, lacinato kale, and several other things—I love the stuff and refer to it as cat cabbage because I swear it has nine lives). As of right now, it looks like the edible shading scheme is going to work perfectly.

Carrots will grow well close together, but if they're too close they'll end up stunted, too thin, or deformed. You can see that some of the baby carrots in that top photo are already looking a little crooked. I usually like to wait to thin my vegetables (such as lettuce, arugula, beets, and Swiss chard) until the thinnings are large enough to eat, so I'm giving the rest of the carrots a bit more growing more time before I finish thinning them (though I admit I couldn't resist nibbling on these itty bittys—and they were tasty!). Besides, my teeth need a rest from all that gnashing.

Joe used to grow a big patch of carrots each year but said he stopped because they didn't keep well in the root cellar. "Sure, you can store them in sawdust like the books tell you to, and they won't rot," he told me, "but what they don't tell you is that they get all rubbery." I asked him if the sawdust had been damp, which is a detail that nearly all carrot-storing directions I've seen leave out. "It's supposed to be damp?" he said.

Since there used to be a large sawmill on our property back in the 1930s, we have a lifetime supply of free aged sawdust at our disposal—and plenty of sawmills still around if the sawdust needs to be fresh. I'm curious to see how carrots—which I usually buy four or five pounds at a time and store in the refrigerator for weeks—that are kept in damp sawdust in the cool root cellar would keep, but I have a feeling that all of this year's harvest is going to go straight from garden to kitchen to mouth.

Are you growing carrots this year? Do you have any growing tips, favorite varieties, or amusing carrot stories to share?

And the carrot growing continues!
6/13/09: Bigger Red and Orange Baby Carrots
4/27/10: My Favorite Heirloom Carrots (so far) to Grow from Seed: Parisienne
Carrot Herb Rolls (and a beautiful bread book for Beginners)

More posts about some of my favorite things to grow:
Favorite Heirloom Tomatoes to Grow—Mine and Yours


© 2009 FarmgirlFare.com, the crunch and munch foodie farm blog where getting our daily dose of beta-carotene has never been a problem.

Tuesday, June 02, 2009

Garden Journal 6/2/09:
Harvesting Spring Onions Grown from Purchased Plants


Just Picked Red Candy Apple Onions (and Topaz)

Realization of the Day:
These just might be the prettiest onions I've ever picked.

Back in February, on the recommendation of my friend and gardening hero, Cynthia Sandberg of Love Apple Farm, I ordered 400 leek plants and way too many onion plants (the more you buy, the better the price) from Dixondale Farms in Texas, the oldest and largest onion farm in the U.S.

I'm a little embarrassed to admit that up until this year, I had no idea that the size of an onion bulb is dependent upon daylength and temperature, not the size or age of the plants—which probably at least partly explains why over the years I've often ended up with disappointing (albeit tasty) little bulbs.

Because we're sitting right on the borders of Dixondale's 'which varieties are right for you' map, I went ahead and ordered all three types of onions that they offer—Long Day, Intermediate Day, and Short Day—just to see how they fared.

I figured if worst came to worst, some of the varieties wouldn't form bulbs, and we'd have a lot of green onions. Fortunately last year, dozens of you pitched in and offered up your favorite ways to enjoy green onions, so I wasn't worried about what to do with the excess.

As a rule, I don't grow any hybrids in my kitchen garden, but I made an exception with these onion plants—mostly because there were no heirloom Intermediate Day varieties available, which looked to be the most suitable variety for our southern Missouri location. Besides, I reminded myself, the onion sets I usually buy at the feed store are probably hybrid varieties, too. I ordered a total of nine different onion varieties, including some heirlooms.

Red Candy Apple is a new variety that is exclusive to Dixondale Farms, where they've been growing onions since 1913. Here's what they have to say about it:

We have been working on a red intermediate day hybrid that is as sweet as candy—so sweet that you can eat it like an apple. Compared to the Stockton Red, the Red Candy Apple offers improved sizing, better interior color and an intense dark red skin with very mild taste. This red onion's color moves inside as the bulb matures and the interior produces beautiful red rings after curing. Remarkably uniform, this new development also features a high percentage of single centers in its solid, firm bulbs.

In order to have enough onions so that I could harvest some of them during the growing season as green onions, when I planted them in early March I spaced them 2" inches apart instead of the usual 4" apart. But since I put in hundreds of plants, the green onions quickly got away from me. They're now what you'd call large spring onions, which I think are even better—at this size you can enjoy the green tops as well as the young bulbs.


One of My New Favorite Easy Salad Recipes

If you want to store your onions, pull them out of the ground and let them dry in the sun for two days—with the tops of one row of bulbs laid over the bulbs of another to prevent sunscald.

There was no need to dry this beautiful bunch of Red Candy Apples, though, as they went straight from the garden into a batch of this simple and refreshing Garbanzo Bean & Feta Salad (along with some fabulous cilantro—the first I've grown in years!). I haven't tried eating one of these onions like an apple, but they are definitely nice and sweet.

Are there onions in your garden this year? Any favorite varieties, growing tips, or recipes to share? Do tell!

Previous onion posts:
6/7/08: What To Do with 125 Green Onions (Scallions)
6/7/08: Wanted: Your Recipes and Favorite Ways to Use Green Onions
6/12/05: Growing Onions In The Garden
3/16/06:
It's Time to Plant Onions!
4/4/06:
Operation Onion Complete!
4/26/06:
Companion Planting Beets & Lettuce with Onions

More ways to enjoy scallions and spring onions:
Sour Cream & Onion Dip
Savory Cheese & Scallion Scones
Fiesta Cottage Cheese Veggie Dip
Mexican Jumping Bean Slaw
Summer in a Bowl
Colors of Summer Salad
Healthy Swiss Chard Tuna Salad with Kalamata Olives
Swiss Chard Cabbage Salad with Garbanzo Beans and Cottage Cheese
Sprinkled on top of Hot Swiss Chard Artichoke Dip
Three Onion & Three Cheese Pizza

© Copyright 2009 FarmgirlFare.com, the heatwave foodie farm blog where they don't always make it into the final photo, but if I'm taking pictures outdoors—or working in the garden—you can usually bet there's a cute four-footed critter somewhere underfoot.

Friday, May 29, 2009

A Question for Gardeners: Can You Identify this Easy to Grow Purple Flowering Perennial Plant?


Sedum Autumn Joy in Back, Volunteer Spiderwort to the Right, Mystery Perennial up Front

In my last post, It's the End of Bloomin' May Already, I mentioned a several-year-old mystery potted perennial in my garden that is not only pretty, but requires no maintenance and will also put up with anything—so who cares if I don't know what it is.

Katherine at Windchimes (who makes elegant fashion jewelry from glass and metal beads—look at these cute little dragonflies!) was curious about it and asked if I would post a picture, which is exactly what I'd been thinking of doing. I realized it might actually be nice to know what this plant is, because then you'd be able to seek out one or two for your own garden. (I wouldn't mind adding a few more, too.) I also figured at least one of you out there would be able to identify it for us.

I have no idea where or when I got this plant, but it was at least a few years ago. It's growing in a round ceramic pot that's about 12 inches across and maybe 10 inches high, and right now is sitting against the front of the greenhouse where it receives several hours of sun a day. I think during previous years I've had it out in full sun. During the winter it lives in the unheated (except for a couple of nights a year) greenhouse with my other potted perennials. When temps dip down into the single digits, I cover it with floating row cover and/or an old bedsheet.


The plant itself is about 14 inches tall right now and is covered with these delicate pale purple blooms which last for quite a while, though I've never paid attention to exactly how long. The leaves always make me think of catnip, which is in the mint family, and—I just went out and checked—they do smell faintly minty.

I have a feeling the plant might get a whole lot bigger if I put it in the ground, as this has been my experience with other potted perennials, despite the fact that I periodically put a layer of compost on top of the soil and fertilize with sheep manure (simple instructions on how to make your own manure tea coming soon!). The only exceptions to this have been my big pots of lemon balm and
Sedum Autumn Joy (seen behind the mystery plant), but that's because I've kept them in the same place for so long they simply sent roots out the drain holes of their pots into the soil below, and so technically are growing in the ground.


So do you know what my mystery plant is? Do tell! And if you'd like to solve other garden mysteries—or have one of your own you need help with—check out Fine Gardening's Mystery Plant gallery, a fun and informative place where you can post a photo and have your questions answered.

© Copyright 2009 FarmgirlFare.com, the mysterious foodie farm blog where solving plant puzzles is a lot more interesting than weeding, though it doesn't help feed the compost pile like weeding does—unless of course everything you identify turns out to be a noxious weed, which is what happened the other day when I did a little mystery plant identification in a beginning gardening friend's flower bed.