Monday, August 21, 2006

What's Growin' On: 8/21/06

Planting For Fall


Baby Beets

Realization Of The Day:
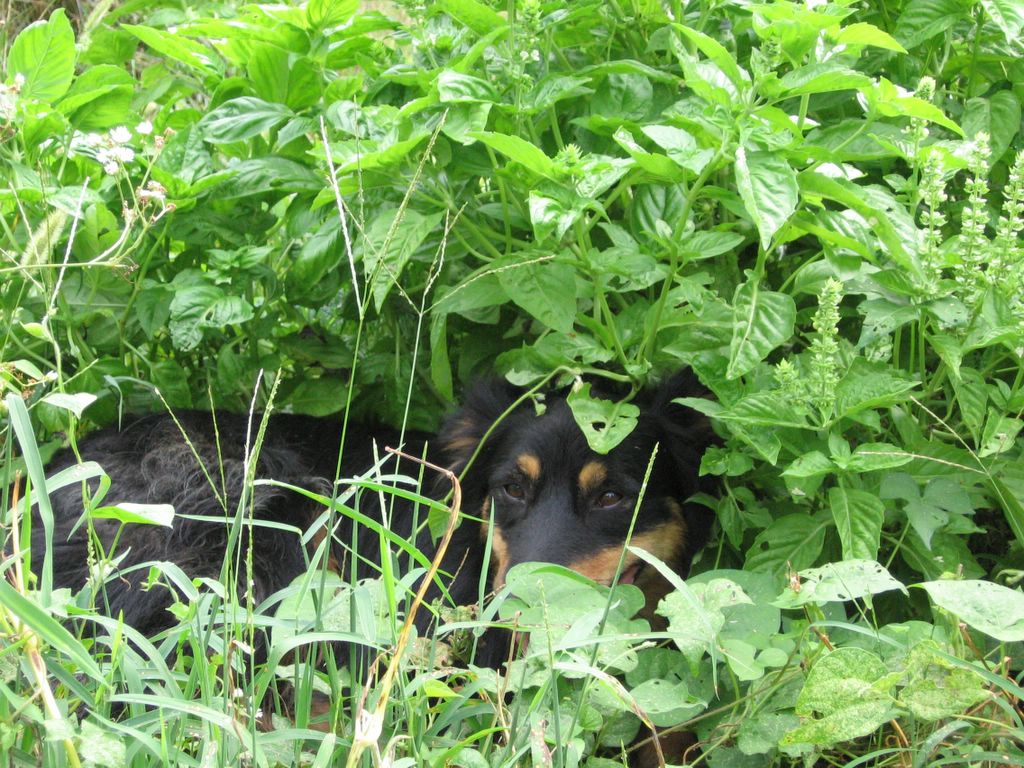
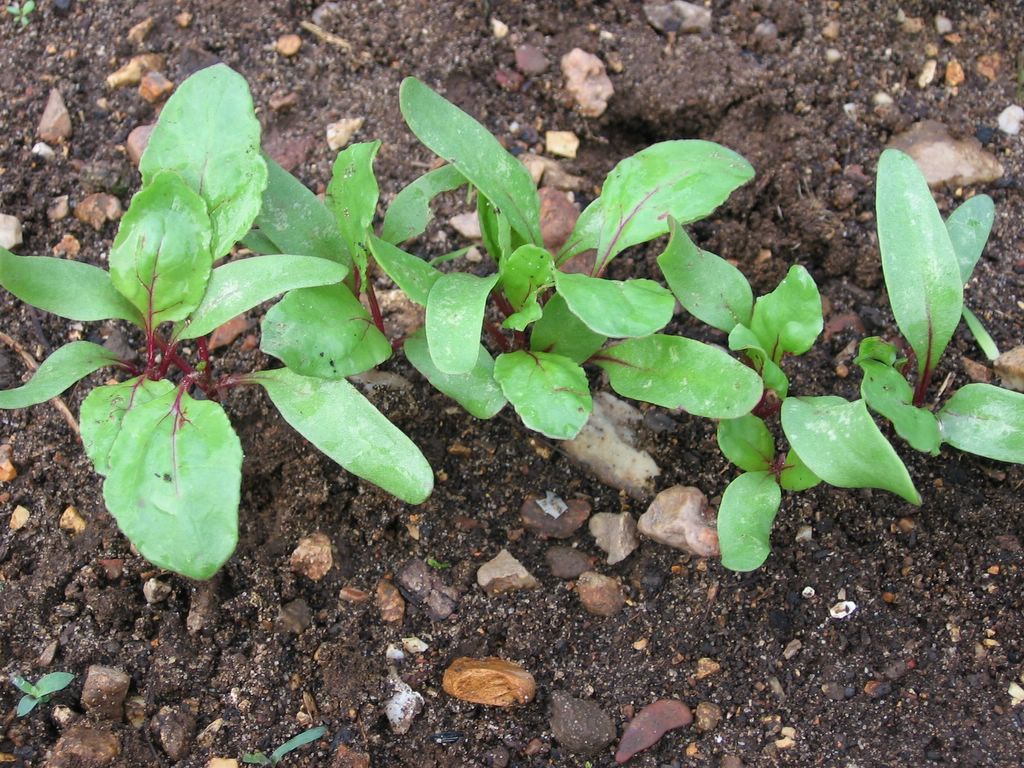
A few Detroit beet seedlings survived last week's Attack Of The Digging Dogs.

Several of you have asked me to write about fall planting in the garden. Since technically this blog is my personal garden journal, I'm going to tackle this subject from the perspective of my own garden (meaning I'm finally getting around to making note of what I've been doing). But I'll also do my best to offer tips and advice for those of you considering extending your gardening season into the cooler months this year.

Officially my garden is located in Zone 6, but because our farm is tucked several hundred feet down in a little valley, it's really more like Zone 5. We often have frost earlier and later than the Zone 6 dates of October 15th and April 15th, and I've seen the thermometer on the front yard fence drop down to -15F in the winter. (We checked it with binoculars from the safety of the house.)

Of course no matter where you live, it is possible to trick your plants into thinking that brisk air isn't as cold outside as they think. Walk-in greenhouses, makeshift mini greenhouses (check the comments section in that link for my notes regarding construction), and temporary hoop houses can all be used to effectively extend the growing season and protect more tender plants from frost. Even a length of inexpensive, floating row cover (sometimes called Reemay) draped over your plants at night (and during the day if necessary) gives you 5 extra degreesF of heat--and sometimes that can mean the difference between fine and fatal.

I love my floating row covers. I have yards and yards of the stuff and use it for everything from protecting young seedlings from early spring frosts to hiding tender bush bean plants from Cary and the deer. I bought mine from (my favorite) Pinetree Garden Seeds. It is 67 inches wide and you can buy whatever length you like for 28 cents per foot (10 foot minimum). For those of you unfamiliar with floating row covers, here is Pinetree's description:

"This polyester crop cover material has some advantages over the Reemay we've carried for years. The UV resistance has improved, it is softer and less abrasive, it's much stronger in both tension and tear tests and the heat retention is better. Still made of white, UV resistant spun bonded polyester, it is lighter weight and designed to hold in heat while transmitting 70% of light through for adequate crop growth. Placed directly on crops without support, it requires no tending and water readily passes through it. It also retards insects when the edges are buried."

Just be sure to remove it when your plants are flowering if they require pollinators. I have been using the same pieces of floating row cover for years and they're still in pretty good shape, but of course now I want some of this better stuff.

On to the actual planting. Overall, our weather isn't conducive to fall gardening. It's simply too hot when it's time to start cool season crops (it's the end of August and we're looking at temps in the mid 90s for at least the rest of the week), and then it will turn cold before anything has had much of a chance to grow. Besides the hardy crops such as chard and beets I keep alive throughout the winter in my greenhouse and perhaps some turnips or kale or endive outside, I don't usually try for much of a fall harvest. This year, however, I've decided to do some experimenting (partly to use up a bunch of old seeds I didn't want to just toss out). For example, this is the first time I've ever had broccoli seedlings in the ground in August. I sowed them in a mostly shaded plot, and they came up pretty thickly, so I think I'll transplant some of them to a sunnier location once they're a little bigger and it cools down.

I actually direct seeded all kinds of stuff back on August 8th, but (for various reasons) my success rate sucked, so I'm going to replant. I don't think it's too late. For the record, here is what I did start (knowing full well that if they did sprout, some things--like the lettuce--might perish in the heat, and others--like the pole beans--probably wouldn't have time to mature and produce a crop before being killed off by frost):

Front Left Bed (short rows: left to right, looking south):
1. Beets
--Detroit (63 days, Baker Creek 2006 seeds)
--Crosby's Egyptian (BC, 2006)
--Bull's Blood (BC, 2006)

2. Pole Beans
--Romano (Pinetree Garden Seeds, 1998, flat Italian type, 70 days)
--Purple Trionfo Violetto (PT, 2002, "a great nutty sweet flavor," 60 days)

What's Growin' On Now: Most of bed dug up by the dogs on 8/13/06. No sign of any beans. Beets all sprouted within a couple of days; some Detroit seedlings & a few Bull's Blood lived through the attack.

Front Second Bed (long rows: north to south, looking south):
1. Batavian Full Heart Endive (BC, 2006)
2. Red Russian Kale (PT, 2006, tender 3 foot reddish green leaves "best after a frost," 58 days--I've grown this many times but have never cooked it, just tossed the leaves in salads, somehow forgot to start any seeds in the spring; NOTE it is not super cold hardy like most kales)
3. Nero di Toscana or Black Tree Cabbage (BC, 2005 & 2006--another personal favorite, still have a small patch planted in the spring struggling to come back after being fried by me, eaten by worms and then blister beetles and then Cary; this stuff is resilient--I never pull it up after pest/pet attacks)
4. Canary Yellow Swiss Chard (BC, 2006--love this stuff)
5. Oriole Orange Swiss Chard (BC, 2005--actually, I love all chard)

What's Growin' On Now: Lots of seeds sprouted in only a few days. All destroyed by dogs except a few endive seedlings. Now have volunteer cucumbers popping up in one corner for some reason, but not enough time for plants to mature before frost.

New Big Experimental Bed (will write more about this another time) by south fence, closest to house:
1. Little Finger Carrot
(BC, ?? very old)
2. Carentan Leek (BC, 2006, same seeds as ones STILL in container started in February and never transplanted--along with two types of broccoli mentioned below--looking almost sad enough to be tossed into compost pile, but not quite)
3. Early Purple Vienna Kohlrabi (BC, 2006, same seeds as planted early spring in othe raised bed--ate lots of young leaves in salads, mature leaves decimated by worms so fed to chickens, new growth nibbled constantly by Cary; no big deal as the only way I truly like to eat kohrabi calls for the leaves as well as the bulbs)
4. Early Purple Sprouting Broccoli (BC, 2006)
5. Waltham 29 Broccoli (BC, 2006)

What's Growin' On Now: No sign of carrots or leeks. Lots of small kohlrabi and broccoli sprouts. Seem okay in heat so far, though already being attacked by bugs. Need to sprinkle with diatomaceous earth. 8/22/06 Update: Was out sprinkling with d.e. this morning and noticed the leeks are sprouting! Have never direct seeded leeks before. This should be interesting. May try transplanting into the greenhouse. Should probably move some of the broccoli into the greenhouse as well. Fall planting can get very complicated!

Other New Big Experimental Bed by south fence, furthest from house:
1. Seeds from a large zipper bag simply labeled "Kale 1998." Must have been thousands of seeds in there. Tossed all onto plot.

2. Rocky Top Lettuce Salad Mix (BC, 2004, same mix I grew this spring with great success, only those seeds were for 2006).

What's Growin' On Now: Nothing but a few stray weeds. I'm blaming the seeds and not the bed. I've mentioned before that in my experience, lettuce seeds do not save well from year to year. And those kale seeds were 8 years old. Figured it was worth a try though, especially as that bed is mostly shaded. Will probably reseed with something else.

In The Greenhouse:
1. 3 Aconcagua Pepper plants leftover from spring (know they won't last long once it gets cold but couldn't bear to toss them)
2. One tiny Thai Pink Egg Tomato plant leftover from spring (the sad story of the ones in the garden will be told sometime soon)
3. One rogue broccoli seedling found growing in a container with something else
4. 4 Swiss Chard seedlings from 2005 (!) still hanging around in individual plugs--NOTE: dug up and destroyed by something (think Lucky Buddy Bear) on 8/15/06.
5. Several basil plants that have been languishing in plugs since spring.

Okay, this is getting awfully long, so I'm going to stop for now. I'll continue in another post with what seeds I am planning to start next week. If you are in Zone 5 or higher, I think you probably have plenty of time left to grow a fall garden. (Not sure about the colder zones--if you haven't already, check out Cold Climate Gardening for all kinds of growing advice.)

But anyone who has at least four weeks left before a killing frost is likely can plant a gourmet salad garden (many people don't realize that most lettuces will survive frosts and temps below 32F). Click here to read my previous post that shows how you can go from seed packets to salad bowl in less than a month.

If you plan to start seeds and are minding the moonsigns (click here to learn more about this), you'll want to start them August 28th, 29th, and 30th (fertile 1st quarter days) or September 4th (fertile 2nd quarter day). If you're pressed for time, just start your seeds whenever you can!

I hope I've answered some of your questions about fall planting. As always, your comments, tips, and questions are welcome.

Sunday, August 20, 2006

What's Growin' On: 8/20/06


Today's Picks

Realization Of The Day:
Sometimes a photo can wipe out a thousand words.

All the ones you cursed and muttered and screamed in shock and frustration and disappointment and disbelief--while struggling to create your garden.

P.S. The farm got an inch of rain last night. Thank goodness.

Saturday, August 19, 2006

What's Growin' On: 8/19/06


Showing Off My Handywork


Less Than Two Weeks Later

Realization Of The Day:
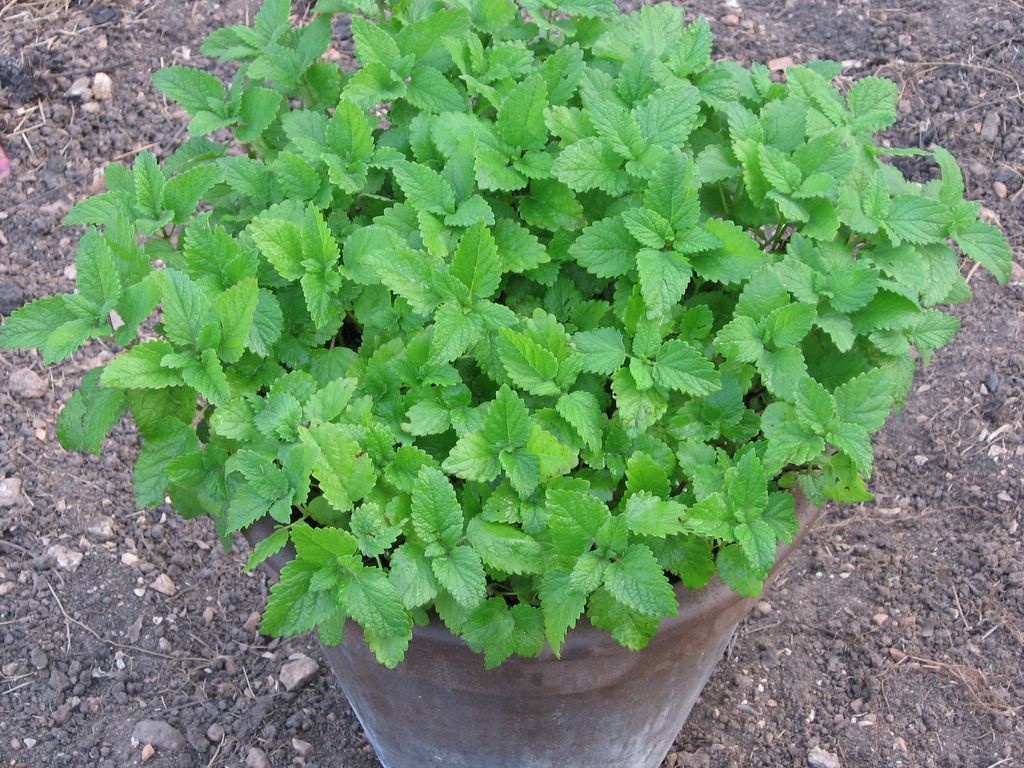
By 8:00 this morning, even the weeds were already wilting. But record breaking temperatures and barely a drop of rain for weeks can't keep the garden mint from growing back. Brown thumbs--meet your new best friend!

Realization #2:
It's way too hot to write coherent sentences about gardening.

Realization #3:
I have lots of nice white laundry on the line (that's been dry since 10 minutes after I hung it up yesterday), the thunder is rumbling so loudly it's practically shaking The Shack--and it is totally sunny outside. Something is seriously wrong here.

Thursday, August 17, 2006

Preserving the Harvest: How to Freeze Sweet Peppers - No Special Equipment or Boiling Water Required!

My Favorite Heirloom Sweet Peppers and How To Save Your Own Pepper Seeds

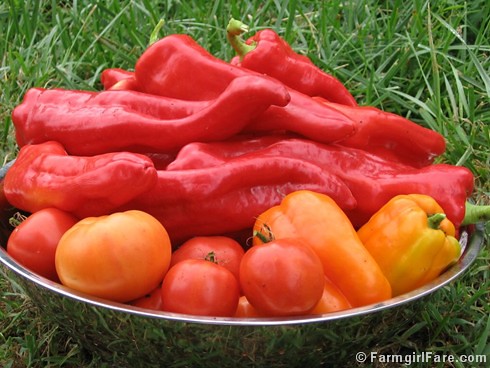
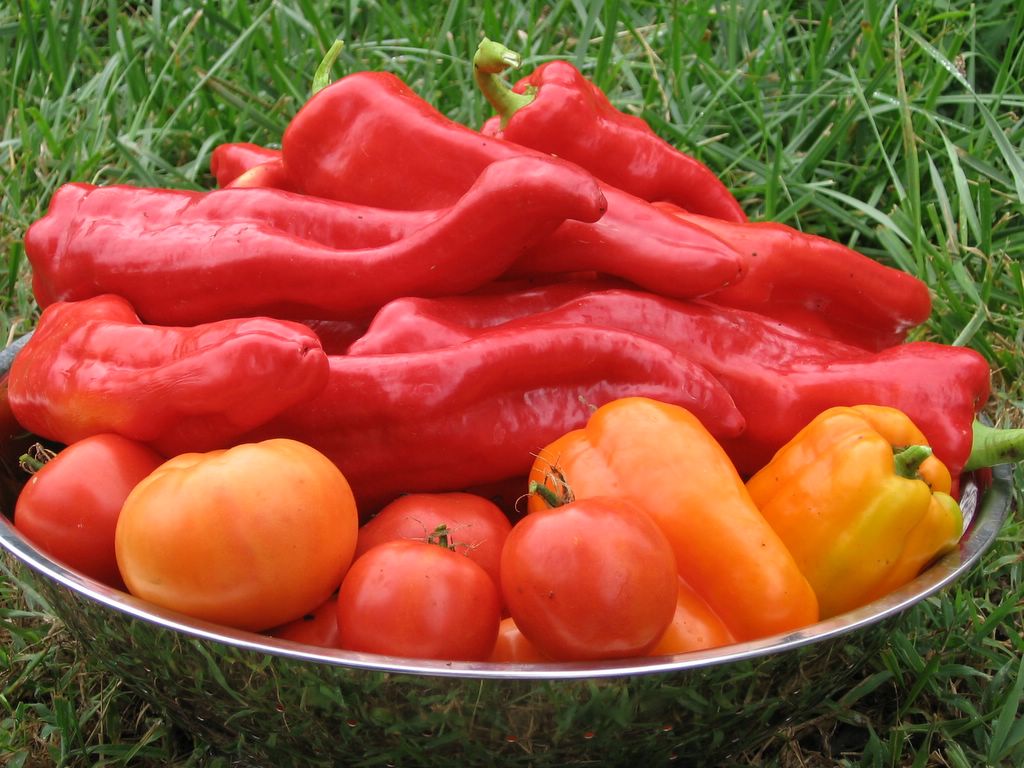
freshly picked in the kitchen garden - aconcagua sweet red peppers, orange sun bell peppers, and heirloom tomatoes - FarmgirlFare.com
Is there anything more beautiful than edible homegrown bounty?

Update: For tips on planting and growing sweet peppers, check out these posts. Happy growing!

Realization Of The Day:
Much of the garden may be in a pitiful state, but my sweet Aconcagua peppers haven't failed me yet.

I've probably tried growing at least fifteen different heirloom varieties of sweet peppers from seed over the last twelve years. Red, orange, yellow, purple, short, fat, tall, thin, you name it, including a few with names I could barely pronounce.

So after all that exploration into the world of sweet peppers, how many kinds will you find in my garden today? Just two. Yep, that's it. Sometimes a girl just has to quit experimenting and settle down with a couple of dependable favorites.

Aconcagua is one of those two. (Orange Sun bells is the other.) Year after year—while the fate of nearly everything else in my garden is uncertain—I always end up with tall, healthy plants loaded down with large, beautiful peppers (knock on wood).

The plants require nothing more than some nice, fertile soil (I amend mine with lots of sheep manure), a layer of mulch such as grass clippings (unless you find pulling weeds relaxing), water at regular intervals, and something to support the plants because they will grow 3 to 4 feet tall and tend to fall over when weighted down with ripening peppers, especially during heavy rainstorms. I tie them to bamboo stakes with recycled baling twine.

Pests are rarely a problem, although the blasted blister beetles have been attacking several of my plants this year. They've only nibbled on the leaves so far, and haven't devoured enough to kill off any of the plants.

While I don't recall any pepper plants being plagued by disease, this year I have found a couple of unripe peppers simply rotting away on the vine for no apparent reason (and they weren't touching the ground). The same thing is happening with the Orange Sun bells, though, and since the majority of the peppers aren't doing it, I haven't bothered to look into this. Weird, unexplainable stuff always goes on in my garden.

I've been saving seeds from my best peppers for years, but the original seeds were purchased from Baker Creek Heirloom Seeds, and they have this to say of Aconcaguas: "Very large, long, frying peppers, up to 11" x 2½". Tall plants give good yields over a long season, and the fruit is very sweet and delicious! This pepper was named after Mt. Aconcagua in Argentina." A packet of 25-50 seeds will set you back $1.35.

The pepper on the left in the photo is 8 inches long and weighs half a pound. In the summer, I tend to eat most of my sweet peppers raw--either cut into chunks and tossed into salads or cut into slices and dipped into something like herbed yogurt cheese or homemade blue cheese dressing. Today I added a couple to a batch of Summer In A Bowl. These are also the peppers I use when I make my Simple Summer Harvest Soup.


They do cook up quite nicely, though (notice Baker Creek even calls them "frying peppers"), so what I do is preserve much of my harvest for cooking up later in the easiest way possible—I freeze them.

No fancy equipment or giant vats of boiling water—like I had in the kitchen today to put up tomatoes—or special containers required. This is how a hot, tired, and lazy gardener freezes her peppers and saves her own pepper seeds.

Take a sharp knife and slice off the stem. Then cut the pepper in half lengthwise and pull out the seeds. Be sure to save the seeds from your best looking specimens. Simply detach them from the membranes and, if they seem a little moist, put them in a nice dry spot for a while. Otherwise stick them right into a little labeled storage bag. I either use itty bitty zipper seal bags or reuse the paper envelopes the seeds I ordered came in.

That's it. You're now ready to grow an even better crop of peppers next year. Isn't it nice when something is so easy?

And freezing your beautiful bounty is just as painless. The pepper halves go right into a freezer bag; no blanching required. You can vacuum seal them with a FoodSaver if you want them to last longer, but it's not necessary. (I do seal up all my green beans with my FoodSaver.)

Just 'spoon' the halves together and pack them tightly into the bags so you don't have a lot of extra air inside. Seal them up, label, and toss into the freezer. Done!

The peppers won't freeze into a massive clump, so you can pull out just a few halves at a time if you like. (If for some reason yours do clump together, spread the pieces out on a baking sheet and freeze until solid, then pack in freezer bags). Your frozen peppers can be added to practically anything: soups and stews, chili, omelets, fritattas.

You can fry the whole halves up in olive oil or roast them in the oven with lots of other veggies or just some little halved potatoes. You can chop them up and add them to salads. Basically you can do anything with them that you could do when they were fresh, but now you can do it during a snowstorm.

This is important, as it is what makes all of this hot and sweaty and dirty work worthwhile. There is nothing more delicious and rewarding than being able to enjoy instant homegrown food in the middle of winter when the garden is covered with a sheet of ice and you can barely remember what a blister beetle even looks like.

© FarmgirlFare.com, the year round foodie farm blog where Farmgirl Susan shares recipes, stories, & photos of her crazy country life on 240 remote Missouri acres - and the freezers are always full.

Tuesday, August 15, 2006

What's Growin' On: 8/15/06


Realization Of The Day:
After a trying and tiring day in the garden, sometimes it is necessary to search deeply for one good reason to continue the crazy, neverending struggle over our little tended patch of earth. And sometimes you simply look up, and your eyes wander over to a neglected fence where they land on a spray of smiling wildflowers that seem to have appeared for no reason at all except to capture every single drop of your attention for one brief moment--and make you smile.

Today I was captured. And I am still smiling. Mother Nature may one-up us every time, but tomorrow I will be ready and willing to continue to fight. To garden.

Sunday, August 13, 2006

What's Growin' On: 8/13/06


Sunday Morning Dog Damage

Realization Of The Day:
There's a reason bookies don't take bets on gardeners. I could probably get better odds at the blackjack tables in Vegas.

This is what I woke up to this morning after stumbling, bleary-eyed and half asleep, out the back door in search of the reason for the intermittent, high-pitched yapping of my beagle which clearly translates as, "We are definitely up to no good."

Behold one of the four beautiful beds I lovingly weeded and prepared and direct seeded last Tuesday (the right moonsign day!) in the hopes of having a tasty little fall harvest. Unfortunately what you are seeing now--instead of the zillions of happy sprouts that were there when I went to bed last night--is a giant dog-dug hole. Ignoring the fact that my footwear and attire were decidedly not garden-friendly, I couldn't help myself. I crouched down on the ground and stuck my arm in it. This hole is elbow deep. And all that nice, rich soil you see on the outside of the bed? You probably can't tell from the photo, but I'm not going to be able to just sweep it up and put it back.

This is not the way one wants to begin their Sunday morning (even if one's Sundays aren't any different from every other day of the week). Unable to take my eyes off the new crater in my garden, I just kept circling around it, my mouth hanging open in disbelief. Then I caught sight of the adjacent bed which had also been full of tiny sprouted seeds the night before and now was not. By the time I finally noticed the two wiggling, grinning dogs who had the audacity to hang around and act as if nothing whatsoever was wrong, I was wide awake.

Let's just say it's a good thing I don't live in a place that has one of those ridiculous No Yelling At The Top Of Your Lungs Before 9AM ordinances in effect.

Realization #2:
Funny how they never dig up the beds you've prepared but haven't planted yet.

I had planned to finally make note today of all the different seeds I started last Tuesday, but I don't think there's any big rush.

Check It Out!
New reader Anne at Backyard Treasures says, "You should consider joining us for a virtual Garden Party and Tour that Thicket Dweller is hosting over at her blog, Today's Lessons. Check it out." So I did, and now I'm spreading the word. Anyone with a blog is welcome to join the party. "Show me your summer garden--vegetable, herb, flower, container, or weed--and I'll show you mine," says Thicket Dweller. What a fun way to peek into other peoples' gardens and show off your own, while discovering new blogs at the same time. Not a blogger? Not to worry! You're invited to take the garden tour. Click here to check it out.

Miscellaneous:
Thanks to all of you who jumped right in to help save my little unknown plant in the greenhouse. I haven't had a chance to check out the links and photos you left for me, but it looks like the majority of you are leaning toward ajuga (something I'd never heard of). Rest assured it is still alive and well, though I do plan to relocate it somewhere else--just as soon as I figure out what it is for sure. Oh, and assuming it is ajuga--any recommendations regarding where I should plant it? And any idea how big/wide it's going to get? Thanks.

And more thanks from me and my shepherdgirl pal Katherine at Apifera Farm for all of the pickle help. She was overwhelmed and thrilled that so many of you took the time to share your tips and recipes and has already put up her first batch of pickles. Here's a direct quote from her latest email to me: "Wow, that was really satisfying! Now I can't guarantee how they'll tase, but they sure look pretty. I sort of combined like 5 million recipes for everyone." And if anyone else has a pickle recipe they'd like to share, by all means do. Pickling season is far from over for many of us! Just click here and leave it in a comment. Thanks again.

I was sure I had something else to mention, but I have no idea what it is now. If I remember I'll add it in. Don't hold your breath, though. Ah! I just remembered!

Culinary Newsbites:
Last night I posted a recipe for Savory Tomato Pesto Pie over on Farmgirl Fare, my main food and farm blog. Click here if you're looking for a new way to serve up all the garden fresh tomatoes that are hopefully piled all over your kitchen.

Hmmm. I still feel like I'm forgetting something, though. Oh! She remembers again! I've been literally deluged over the past few days with requests for various articles and recipes, as well as questions about all kinds of things. I'll do my best to get to them as soon as possible. Thanks for your patience, and feel free to bug me again--I don't mind. I have a short attention span.

Friday, August 11, 2006

What's Growin' On: 8/11/06


Save Me! Save Me! Help!

Realization Of The Day:
I think I've finally gone over the edge. (I tried to think of a clever garden analogy just now to use in place of "the edge" but failed.) And it's all the Internet's fault.

Okay, I have been out in the greenhouse doing a massive cleanup and replanting campaign (partly because someone--not Cary for once--dug up my only remaining patch of Swiss Chard in there). I lugged out containers of dried bean pods and radishes that have been waiting (since last year) to have their seeds removed. I fearlessly pulled out giant beet plants that had only half gone to seed but were laying all over and making a mess. I moved a big wad of row cover fabric along with various other non-living things off one of the raised beds.

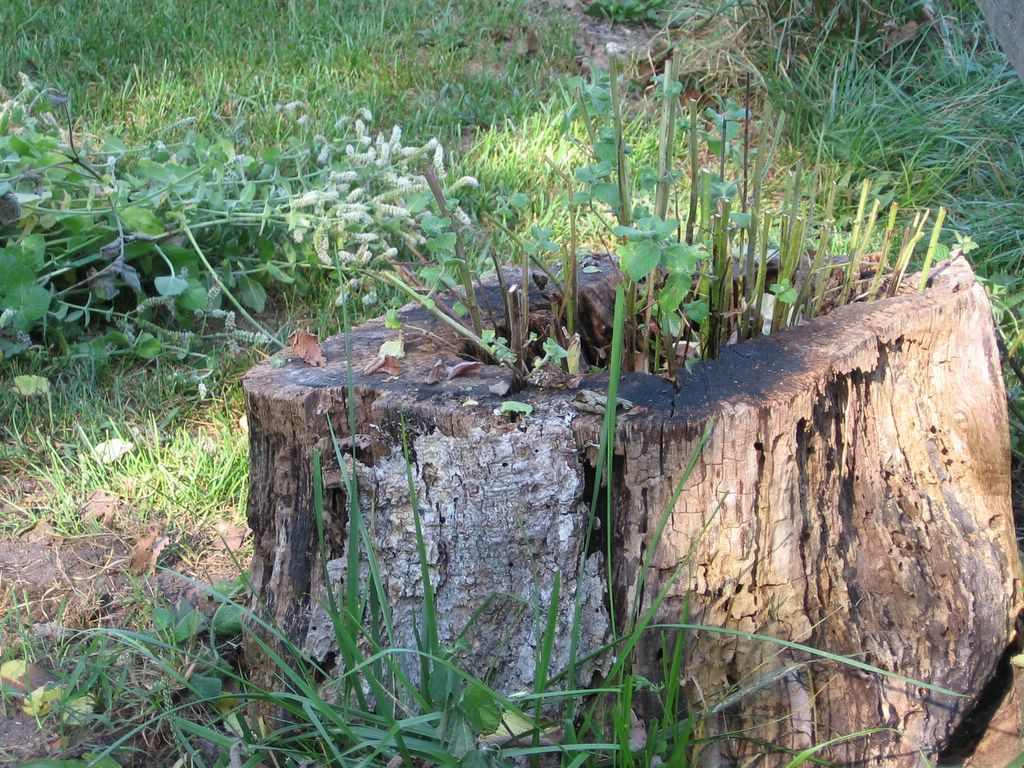
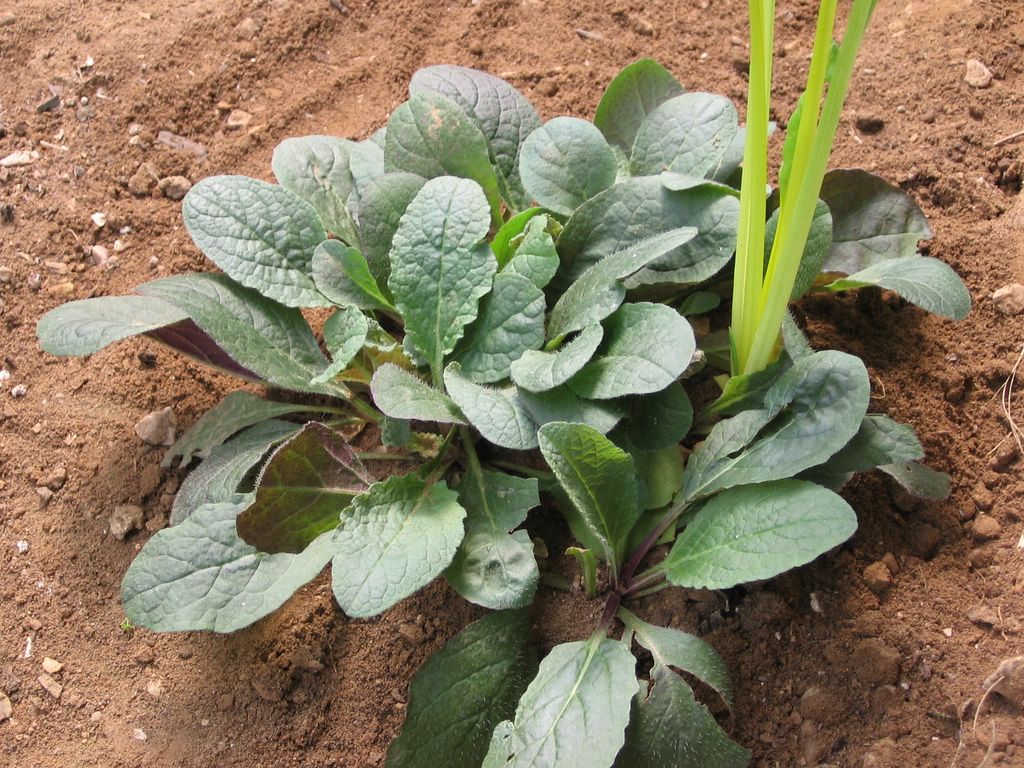
And then I came to this. This thing. This clump. This happy little plant that mysteriously appeared last spring in a container that once held one of these (until it died). When I transplanted the contents of that container into the greenhouse bed several months ago (because it had a couple of volunteer baby lettuce plants in it as well), this clump was much smaller. And while I have been ignoring it, it has been thriving.

There is nothing else growing around it (that stem you see in the middle is volunteer yellow chard). It is surrounded by barren soil. It looks like one of those places in New York where they've razed an entire city block and are ready to start building the high-rise except that there's a rickety little cottage sitting at the edge of the property because the ancient owner refuses to sell.

I did not feel sympathy for this mystery clump as I might the ancient cottage owner. No, I was all ready to yank it out of the ground to make way for something bigger, bolder, and better tasting. Then, just as the wrecking ball that is my gloved hand was about to level the site, I stopped. I (gosh, this is embarrassing) started to feel kind of bad. I started wondering what kind of plant it might be.

And then I remembered I have a garden blog.

Where I could ask for help.

So now it's sitting out there, leaves sweating, roots trembling, wondering if The Girl In Charge Of The Greenhouse is going to announce a stay of execution--or send it flying into the compost pile.

I'm going to leave it up to you.

Does anyone know what this is? Is it a real plant--as in, something I should save? It actually appears to be lots of little plants all bunched together. The undersides of the leaves are purple. I have no idea if this is normal or due to lack of nutrients. I realize, of course, that I am setting myself up for possible total humiliation here, as I may be pleading for life on behalf of some common noxious weed. Yet here I am, tapping away at the keys when I could be out playing with the plants I can identify.

I'm going to go back out to the greenhouse and work around it for now. But if I don't hear anything from anyone soon, well. . .

Thursday, August 10, 2006

What's Growin' On 8/10/06: A Bounty of Beautiful Basil & a Plea for Pickle Recipes


Basil Gone Wild

Realization Of The Day:
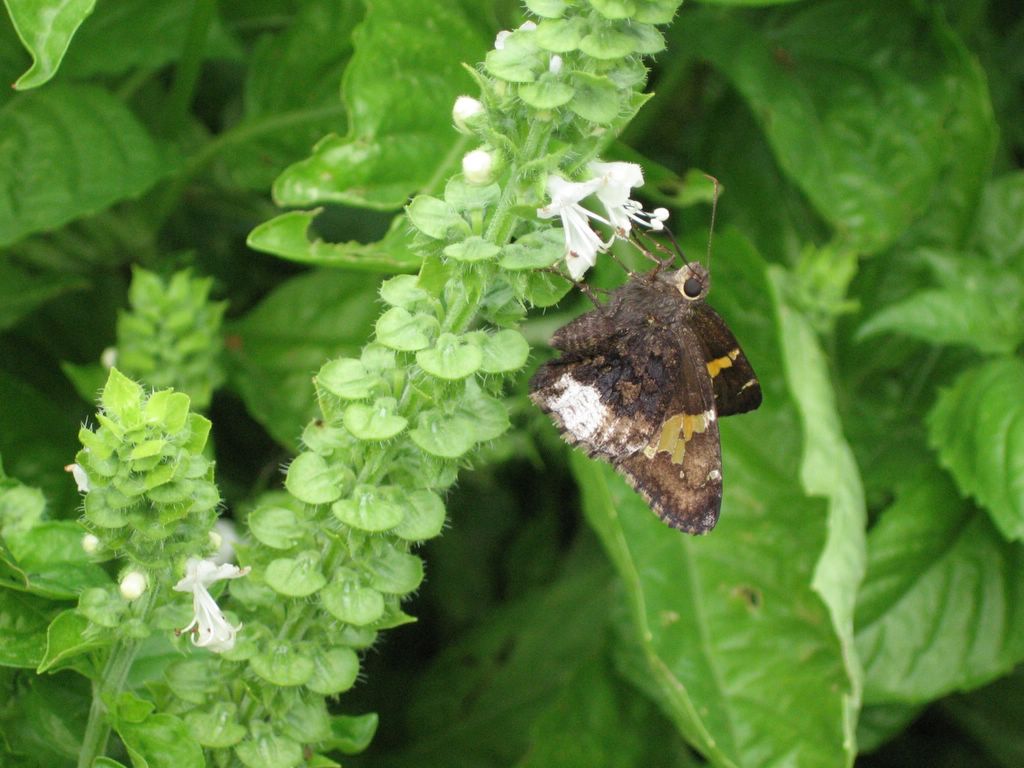
I think I'm just going to let this giant volunteer patch of basil go to seed. I have plenty more in the garden (including some very young volunteer plants that popped up where the pole beans were supposed to). And besides. . .


It's not as if it isn't being used. (I'll give up my basil to pollinators any day. They literally mean the world to us. As for Bear--well, he usually treads pretty lightly. Plus he's really cute.) Many thanks to all of you who took the time to let me know your thoughts and experiences regarding using blooming basil in the kitchen.

Minding The Moonsigns:
Don't forget that Friday the 11th, Saturday the 12th, and Tuesday the 15th are all fertile days in the third quarter--the perfect time to put seedlings into the ground or move potted plants into roomier quarters. (Click here if you're wondering what this is about.)

I was feeling optimistic (plus I was tired of having old packets of seeds hiding everywhere) so I did go ahead and start some seeds last Tuesday (fertile second quarter day). Four entire full beds of them! I have to admit, though, that I don't have real high hopes for fall crops. (What fool plants 70-day pole beans less than two months before the first expected frost? Oh, wait, that would be me.) But I do have notes on what went where in case something decides to show up and survive.

Okay, I don't exactly have notes, but, like I usually do, I piled the seed packets on top of one another in the order I planted them in each bed. But then I went one step further--I held the ordered packets together with clothespins. Now as long as I remember which bundles of seeds went in which raised beds, and where the seeds on the top packet went, I'll be fine. I know. I'm supposed to be recording all my planting information here. That was the whole reason for starting this garden blog. And I will. Maybe tomorrow. Today I had more pressing (and more interesting) things to write about first. Which leads me to. . .

Out Of My Inbox: In A Pickle!
I thought my pal Katherine, who lives on Apifera Farm ("where animals, art, and lavender collide") knew how to do everything. I mean, she rides a horse, tends the 4700 lavender plants she and her husband planted, has a wonderful way with words on her farm blog, is an acclaimed artist, quietly created a rapidly growing peace movement with her animals, and can even bake a mean blackberry pie.

But it turns out she has absolutely no idea how to make a pickle. Here is an excerpt from the (dare I say desperate?) email I received from her:

"I can't find any basic pickling recipes in my Joy of Cooking or basic cookbooks. Perhaps they think any farm wife should already know how to do this...

I want to pickle my little cucs... and my finger beets - do you have any archive recipes?

Don't you love the word pickle?"

I do not have any pickle recipes in my blog archives, and I know nothing about pickling beets (and yes, now that she mentioned it, I do love the work 'pickle.' I even had a cat once named Pickles who had a brother named Onions.) The first summer I was at Windridge Farm I put up something like 37 quart jars of garlic dill pickles. I don't recall putting up any since then (is it any wonder?), but I offered to hunt down my old recipe for her. I also mentioned that if she only has a few cucumbers, refrigerator pickles might be the way to go. (Personally I like how they stay crisper because the cucumbers don't cook during the canning process, and I refuse to add alum--which is basically aluminum--to the jars to help them stay crisp. Plus refrigerator pickles are easier to make.)

I then offered to ask you all for help, and she was thrilled.

"I would love to see recipes! I think I want to try the long version/jar version - but I'd be curious about the fridge ones too for the ease of it..."

So how about it? Does anyone have a favorite pickle recipe they would like to share? And remember--she wants to pickle her little beets, too. I'm sure we can come to her rescue. And then I'll be able to go back to assuming she knows how to do everything, and the world will feel right again.

Thanks in advance for your help. And who knows? You might even convince me to start making pickles again. (Has anyone ever pickled lemon cucumbers? I think I'm going to have quite a few very soon.)

Wednesday, August 09, 2006

Growing Kellogg's Breakfast Tomatoes and a Colors of Summer Salad with Tomatoes, Zucchini, Sweet Red Pepper, Beet Greens, Basil, & Garbanzos


Kellogg's Breakfast Tomatoes Ripe, Ready To Eat. . .


And Looking Good From Top To Bottom

Realization Of The Day:
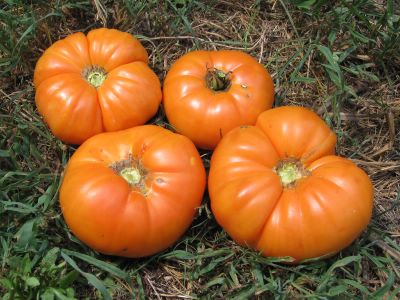
Absentmindedness saved me from having to eat my words--which left me with plenty of room for these glorious tomatoes.

Here's what happened. I planted Kellogg's Breakfast tomatoes because I absolutely love them. But when the first tomatoes ripened, they were big and bad. And not in a good way bad. In a rotting, cracked, mushy, bug-infested way bad. That's when I remembered that I'm not supposed to be growing giant tomatoes anymore. They simply take way too long to mature--which means there is plenty of time for tomato diaster to strike in one (or three or four) of its many forms.

The worst of the supersize tomatoes are the ones shaped like these--all rumpled and full of cracks and crevices. Similarly shaped varieties include Purple Cherokee and Brandywine (which is probably the best known heirloom tomato in the country--and possibly beyond). Many people who have no idea what an heirloom tomato actually is have heard of the infamous pink Brandywines. In fact, the Baker Creek Heirloom Seeds catalog claims it is "the most popular heirloom vegetable!" which makes sense considering heirloom tomatoes are undoubtedly more well known than all other heirloom vegetables.

But back to the rotten Kellogg's Breakfast tomatoes. I plucked two of the offending specimens from the vine and set them in the grass to take a photo. I figured I would show you what a waste of time it is to grow these and berate myself for falling into their sweet, juicy, beautifully orange trap once again.

Something distracted me, though (most likely Cary), and it wasn't until the next day that I realized I'd picked those tomatoes up and tossed them into the bowl of gourmet scraps for the chickens--and forgotten all about the photo.

No problem. I would simply take a picture of the next ripe ones, as they would surely look just as sorry. Boy, was I wrong. Not only did I find these four beauties yesterday, but the vines are loaded with (so far) perfect looking, nearly ripe tomatoes. Yes!

This means I am now officially recommending Kellogg's Breakfast tomatoes for your garden. I can't guarantee you'll have a successful harvest, but I think they're worth a try. These plants were started from seeds ordered in 2005 from Baker Creek Heirloom Seeds, who says of Kellogg's Breakfast tomatoes: "A giant, beautiful, orange beefsteak preserved by our friend Darrell Kellogg, a railroad supervisor from Redford, Michigan. The fruits are very flavorful and superbly sweet! This delicious heirloom is from West Virginia. A favorite of Dr. Carolyn Male, author of 100 Heirloom Tomatoes For The American Garden." I started my seeds on 2/6/06, transplanted the seedlings into individual plugs on 3/19/06, moved them into the ground on 4/25/06, wondered what the heck was taking so long on 5/19/06, and have probably eaten two pounds of them over the last two days, some of which were in this impromptu zucchini & tomato salad I created this afternoon.


This is basically a variation of my Summer In A Bowl, but it was inspired by this recipe my pal Alanna (whose last name just happens to be Kellogg) posted last year on her popular blog, A Veggie Venture. The recipe caught my eye when I was perusing her archives this morning because I have some zucchini I need to eat, and I liked the idea of using it raw. So I took her recipe and ran with it. I love how it is just bursting with the colors of summer.

Like the Summer In A Bowl, this is a very juicy salad--even if you squeeze some of the juice and seeds out of the tomatoes before dicing them up. I don't mind all that juice (in fact I will probably put it in a glass and happily drink it up), and if you let the salad sit around on the counter for a while, it acts as a marinade, allowing the veggies to soak up even more flavor. You could always dish it up with a slotted spoon if you don't want to serve something sloshy.

Again, you can play around with ingredients and ways to serve it. I think this would make a fantastic cold pasta salad. If I were going to toss it with hot pasta (which I bet would be very tasty), I would probably dunk the diced zucchini and sweet red peppers into the pasta water during the last minute or two of cooking.

Use what you love and what you have on hand when putting together this salad. Amounts are totally up to you. Make it yours--but please do share any scrumptious variations you come up with. Enjoy.

Farmgirl's Colors Of Summer Salad
(Adapted from A Veggie Venture's Tomato & Zucchini Salad)

Vine Ripened Tomatoes (preferably a variety of colors), diced
Raw Zucchini, diced
Sweet Red Pepper, diced (I used my favorite
Aconcagua from the garden)
Beet Greens, finely chopped (found them in the fridge)
Scallions, chopped
Garbanzo Beans (organic, I used one 15-ounce can)
Fresh Basil, chopped
Pecorino Romano Cheese, coarsely grated
Salad Dressing (I used Whole Foods Organic Fat Free Balsamic Vinaigrette--another item that needed using up)

Put everything (along with anything else that strikes your fancy) in a large bowl and toss with a big spoon until well combined. Salt & pepper to taste. Devour however you like (see my Summer In A Bowl post for more ideas), garnished if desired with shredded cheese and basil chiffonade. A hunk of warm, crusty bread served on the side to soak up all that juice should probably be a requirement.

© Copyright FarmgirlFare.com, the bright orange foodie farm blog where when we say Kellogg's, we aren't talking about breakfast cereal.

Monday, August 07, 2006

What's Growin' On: 8/7/06


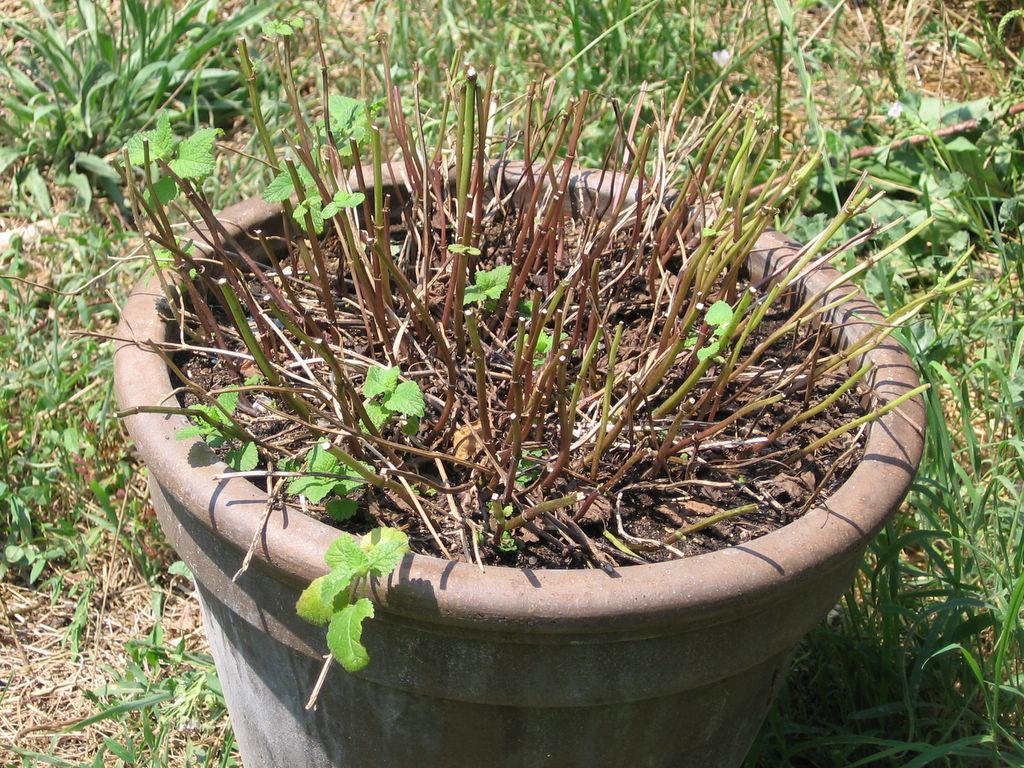
Garden Mint Before


And After I Got My Hands On It

Realization Of The Day:
Somebody may have to take my scissors away from me.

But I've been getting so much done with them. First there was the Greek Oregano. Then the Arkansas Traveler tomato plants. And look at this:


Freshly Trimmed Lemon Balm on July 1st


I Mean Really, Could It Look Any Happier Now?
(Click
here to read my previous post about lemon balm.)

I think the mint is very happy. In fact, it'll probably take off and be at least that height again before winter. It's mint!

Okay, so after I finished chopping down the mint, I saw some chunks of fur that were all tangled up with burrs on Lucky Buddy Bear so I cut them off. (It'll grow back. And he only looks scary from a few very specific angles.) Then I found a couple of those big, nasty burrs stuck way into the wool on Cary's side and took care of them. (Hey, sheep have a different kind of skin than we do--technically it wasn't even bleeding.)

Now if you'll excuse me, I'm sure there's something around here that desperately needs to be cut off.

Saturday, August 05, 2006

How To Trim Tomato Plants


Realization Of The Day:
Although I've written two posts about the scary super trim I gave my two Arkansas tomato plants (click here), I never actually described exactly which leaves were the "useless" ones I cut off. This would have no doubt been helpful, especially since the experiment was a success. So here goes.

An added benefit to thinning your tomato plants is that it enables you to create order from chaos (and show me one gardener who doesn't have a chaos problem in their garden). A tangled mass of leaves and vines can become a neat and manageable plot in mere minutes.

This is especially helpful if you have yet to cage or otherwise stake up your plants. And if they're growing quite close together (like mine always are because every year I insist on cramming way too many tomato seedlings into each 4' x 8' raised bed), thinning out the leaves will allow for better airflow between the plants.

Despite the abundance of sprawling, uncontrollable, cageless tomato plants currently growing like mad in my garden (what, you thought I showed you everything out there?), my tomato trimming days are pretty much over for the season. Due to heat-zapped brain cells—along with no desire whatsoever to spend any more time out in the blazing sun than absolutely necessary—I blow off a lot of garden stuff in August) But I'm sure there are some of you who are up to the challenge.

Although I have always figured that trimming the "useless" leaves would be more beneficial before they got very big—since you're trying to help the plant expend less energy growing them—as you can see in the original post, my Arkansas Travelers were quite mature when I took the scissors to them. They were even loaded with full-size fruits.

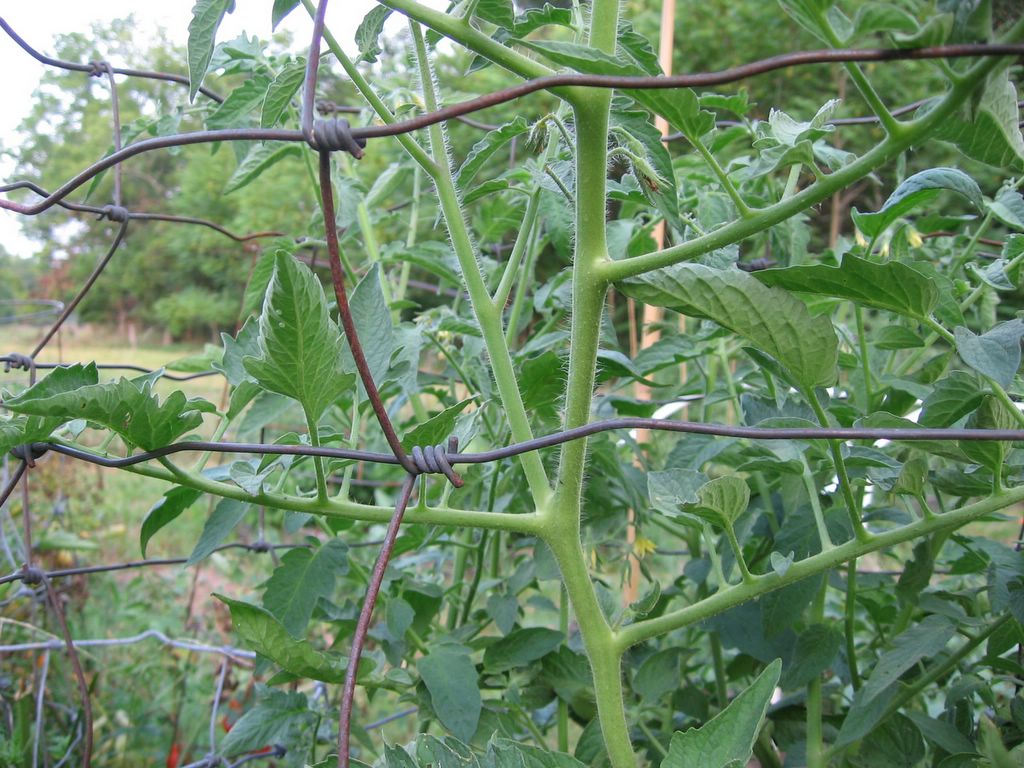
Okay, so this is all you have to do. Look up at the tomato plant in the top photo. Starting from the bottom, I count five side shoots coming off the main vertical stalk. Can you see that the 2nd shoot has several side shoots growing from it, but the 1st, 3rd, 4th, & 5th shoots are really just single large leaves? (You can click on the photo to enlarge it.)

Those are the ones that need to go. They are basically doing nothing except making you wait longer for your ripe tomatoes. Who needs that? Grab the scissors!


So how do you know for sure that you're cutting off the right leaves? Check out this close-up photo. Can you see the tiny leaves sprouting out of the main stem right above the shoot on the bottom right? (Again, you can click on the photo to enlarge it.)

Those tiny leaves are hoping to grow into fruit producing branches. Cut off that big useless leaf below them and help them out! There will almost always be useful growth literally right on top of the useless leaves. The size of that growth will vary. Sometimes it will be much larger than this.

And that's all you need to know. Except that I've found that regular old scissors work the best when tomato leaf trimming. For years I simply used my fingers and fingernails to snap off the leaves. But when you're dealing with dozens and dozens of stem snaps, this gets real old real fast. Plus if the leaves are thick, sometimes it doesn't work right.

This year when half my leaves started to bend instead of snap like I wanted them to, I pulled out my sharp little pocket knife and had one of those Oh my god, why haven't I been using this all along? moments. Then the knife thing started getting old, especially when I found I was often peeling away part of the trunk along with the leaf. Plus I slit a couple of fingers (not badly).

So then I had an even more brilliant idea and switched to scissors, which was same the day I launched the attack on the Arkansas Travelers.

Oh, and the only other thing you need to be aware of is that this is one of tasks where it is very easy to get carried away. But I think I've already made that quite clear.

From Garden To Table:
Well, not table--more like fridge and freezer. Pesto! Most of my basil is blooming (already?), but I found a large and lovely plant this morning that still had big fat leaves and no flowers on it. I just turned 14 ounces of basil leaves into two different pestos. One has been spooned into an ice cube tray and is in the freezer. The other is in the fridge waiting to be used in a new tomato recipe I've just created in my head and hope to make tonight or tomorrow. If it's a success, I will definitely share it. (Update: You'll find my favorite Low Fat, Full Flavor Basil Pesto Recipe, made with roasted almonds and fresh tomatoes here. The best pesto I've tasted was made with purple basil; read all about it, plus find an easy white bean pesto spread here.)

One of these days I'll also share how I make inexpensive homemade tomato cages that beat the storebought varieties I've tried hands down, because they actually keep my giant tomato plants up! Soon (I hope).

In the meantime, a question:
Does anyone have experience using basil or making pesto from blooming plants? I know I've just cut off the flowers and used the leaves many times (because I am always, always late making my pesto), but since I usually just make super strong pesto that I freeze and toss into pizza sauces during the winter, I've never bothered to see if the leaves taste a lot stronger or are bitter or whatever once the plants are blooming. You know, like how the taste of arugula changes so much once the plant matures and starts to bolt (click here and look for my comment).

I do know that, like arugula, the shape of my basil leaves totally changes as the plants mature: from rounded, smooth, and 'soft' looking to smaller, sharper, and more textured. I don't know why, but it always amazes me when that happens.

© FarmgirlFare.com

Friday, August 04, 2006

What's Growin' On: 8/4/06


Realization Of The Day:
My salad plot plan has a rapidly growing glitch in it.

If you've been reading about my garden for a while, you might recognize this lettuce bed from previous posts. But then again, maybe not. It keeps changing all the time. Every day for weeks and weeks last spring it provided me with the most delightful salads. When the temperatures began to soar into summer, I took a pair of scissors and harvested two humongous colanders of lettuce (plus a giant bucketful for the chickens) before they turned bitter. I stored the lettuce in a cooler with ice packs. (My ice packs are plastic liter and two-liter seltzer bottles that I fill most of the way with water and freeze. They work better than any purchased products I've tried, and this is coming from a girl who never leaves the house without at least one cooler in the car--and usually uses a couple of coolers for refrigerator overflow throughout the spring and summer months. If you have unused space in your freezer, they are a good way to fill it up, as freezers operate more efficiently when they don't have a lot of empty space in them.)

I actually have photos of the lettuce harvest, but I never got around to posting them (or the handy harvesting tips I discovered). I did write an article back in April all about growing your own gourmet salad greens called "Sublime Salads For Those Who Are Short (On Time, Space, & Sunlight): From Seed To Salad Bowl In Less than A Month."

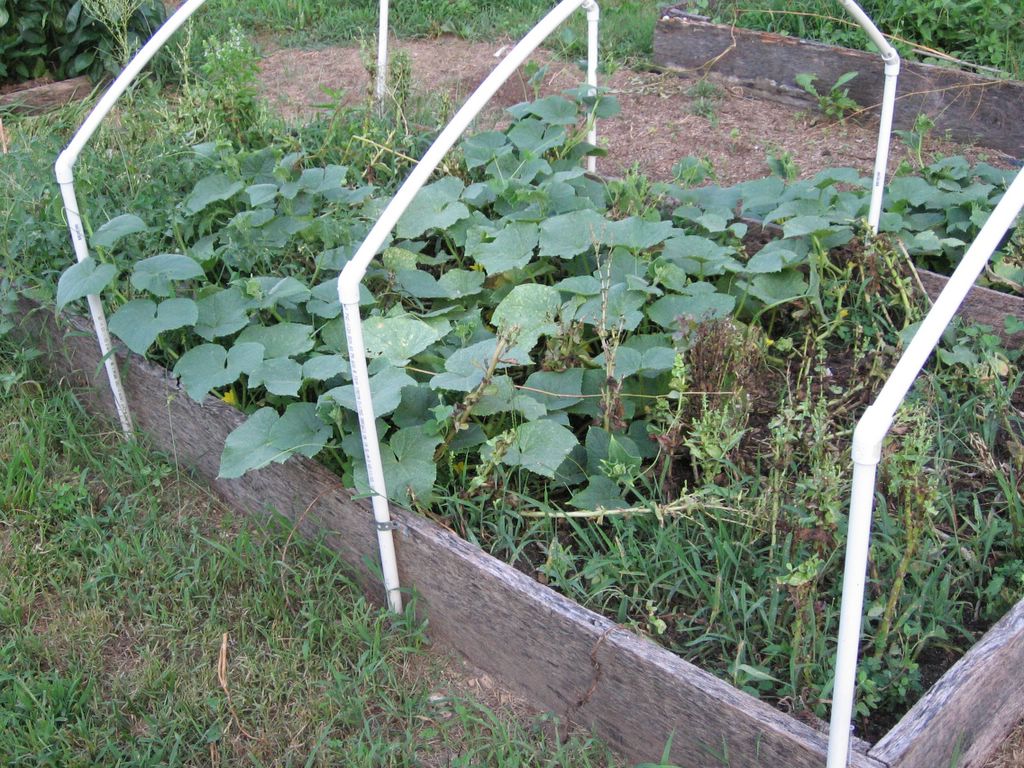
After the final lettuce cut, I decided to let the entire 4' x 8' bed go to seed rather than pulling everything up and planting something else in it. That's when it started to look like an alien landscape. (If you're wondering why there is PVC pipe running over the bed, click here and look in the comments section for my explanation.)

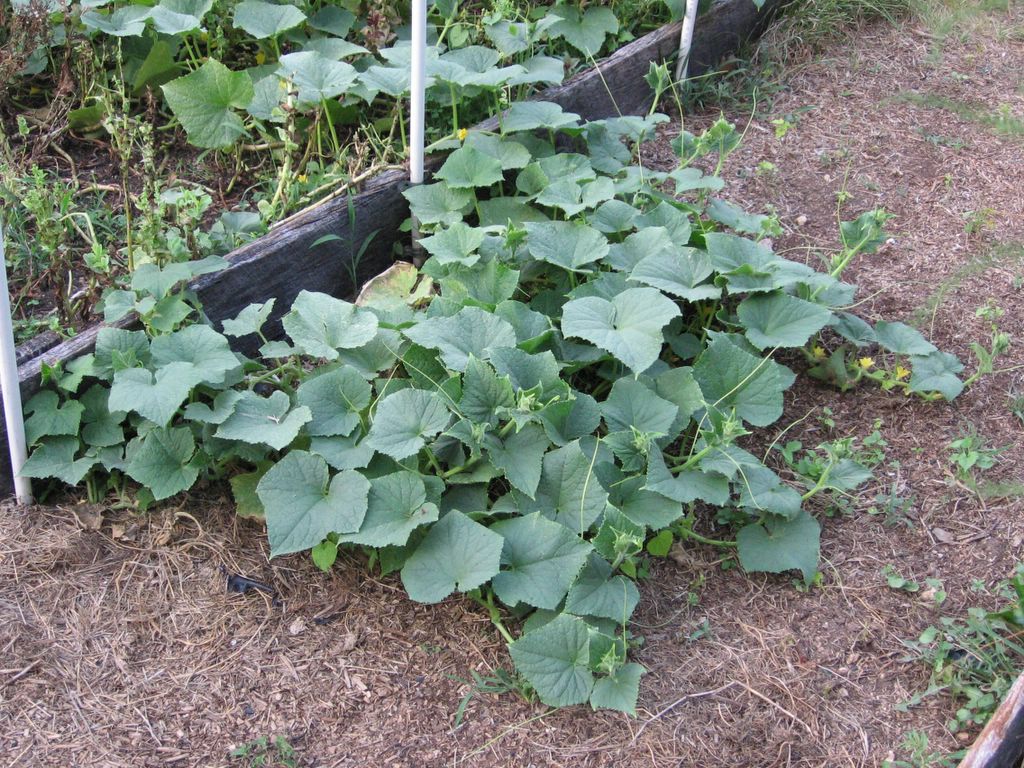
Right now it is quickly turning into a volunteer lemon cucumber bed, but that is just fine with me. It's hard to believe that happy mass of vines was just a couple of leaves a month ago. (Well, no, it's not. I take that back. These are cucumbers after all! Once they start growing, they usually can't be stopped. But now I'm getting ahead of myself.) Anyway, at this point I'll take my cucumbers any way I can get them in the garden--even it means obliterating my experimental plans for an autumn bed of self-seeded salad greens. (And I haven't completely given up hope on that idea yet.)


The only cucumber plants I have growing in the garden this year are volunteers, as the seeds I started in containers never made it into the ground (along with a bunch of other things like the tomatillos, but that is just how it goes sometimes). Besides the ones in the lettuce bed, there are these two plants growing alongside it--despite a couple of brushes with death. When they were just little sprouts, Cary sat on (and nibbled on) them. They managed to survive and started to spread, only to be overcome by some unknown disease/insect attack/whatever that, practically overnight, made nearly all of the leaves turn yellow and then shrivel up and die.


I thought I took a photo when that happened, but I guess it was too depressing. I did take this current picture of one remaining sickly leaf (which looks better than the others did). Referring back to my point above about unstoppable cucumber plants brings me to. . .

Realization #2:
For every awful thing that happens in the garden, there is usually (if you look hard enough) a wonderful surprise to balance things out.

This time it was these cucumber plants that I was sure were goners. But while I sulked I continued to water them (lack of water was not the reason they shriveled up), and suddenly one day the plants were back and bigger than ever. And that brings me to. . .


Realization #3:
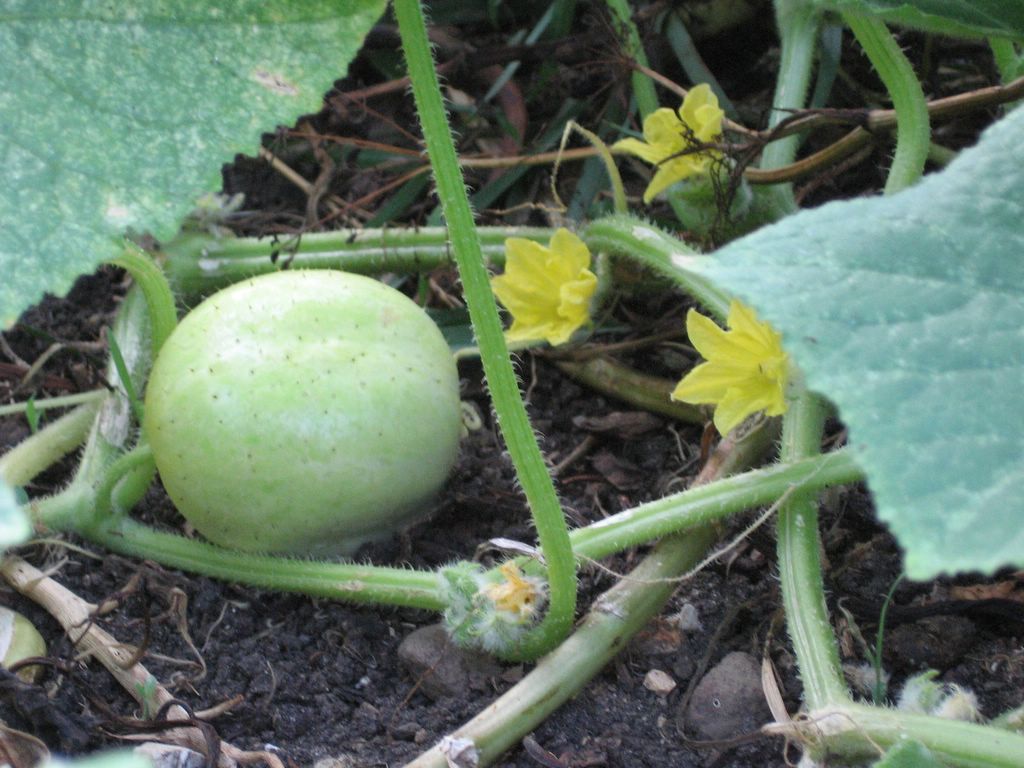
The Great Lemon Cucumber Glut should soon be here! I can't wait.

Wednesday, August 02, 2006

What's Growin' On: 8/2/06


Realization Of The Day:
Surprise! Cary didn't eat all the surprise lilies in the front yard--yet.

Minding The Moonsigns:
Thursday 8/3, Monday 8/7, and Tuesday 8/8 are all fertile days in the second quarter--great days for starting seeds. Fall crops, anyone? I'm still debating if/what I want to plant. This area is not exactly conducive to fall crops--it stays hot too long and then gets cold too fast. I do keep hearty greens such as chard and beets growing all winter long in the greenhouse (and this year I plan to experiment with my new permanent arugula plot), but anything outdoors is always an iffy proposition. Knowing me, though, I'll probably end up throwing caution to the wind and planting all kinds of seeds during the next few weeks--assuming I can find them. (Just where do those little packets go when I'm not looking?)

Friday 8/11, Saturday 8/12, and Tuesday 8/15 are fertile days in the third quarter. These are the best days for transplanting--seedlings into the garden, potted plants into roomier accomodations, etc.

If you have no idea what this minding the moonsigns business is all about but are intrigued (and need all the help you can get in the garden), click here to read more about it.

Monday, July 31, 2006

Garden Journal 7/31/06: Growing Arkansas Traveler Heirloom Tomatoes & How To Save Your Own Tomato Seeds


Arkansas Traveler tomato plants are one of my favorite heirloom tomatoes to grow from seed.


The pretty pink tomatoes are crack and disease resistant, and the plants don't mind the heat and humidity.

Realization Of The Day:
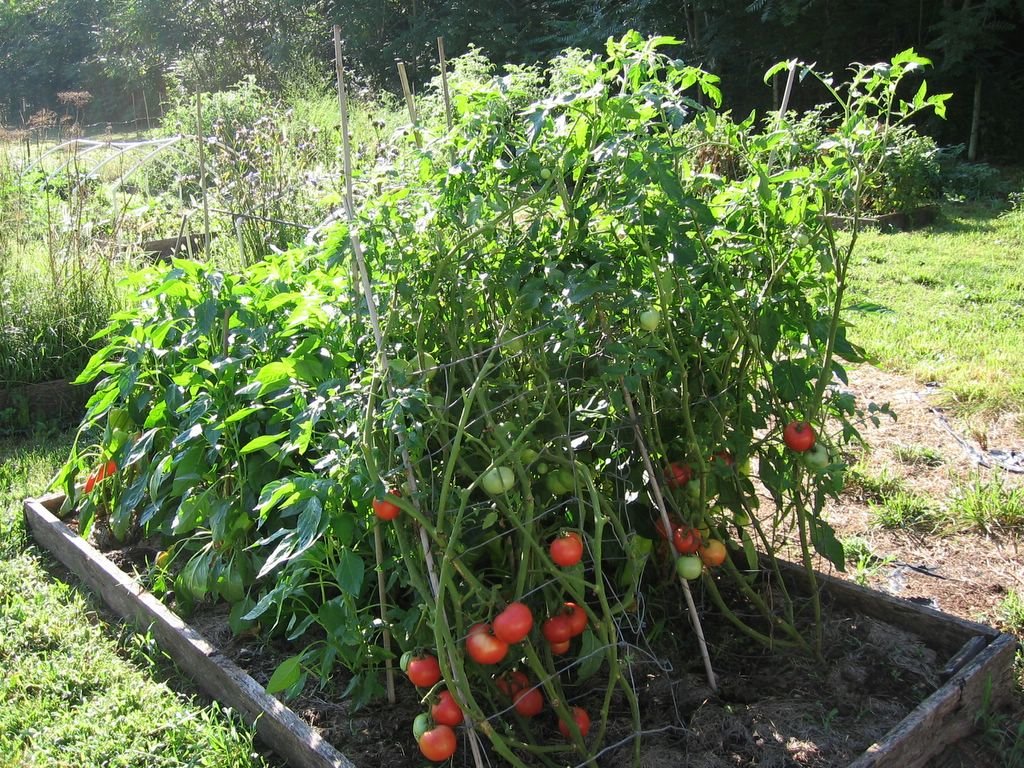
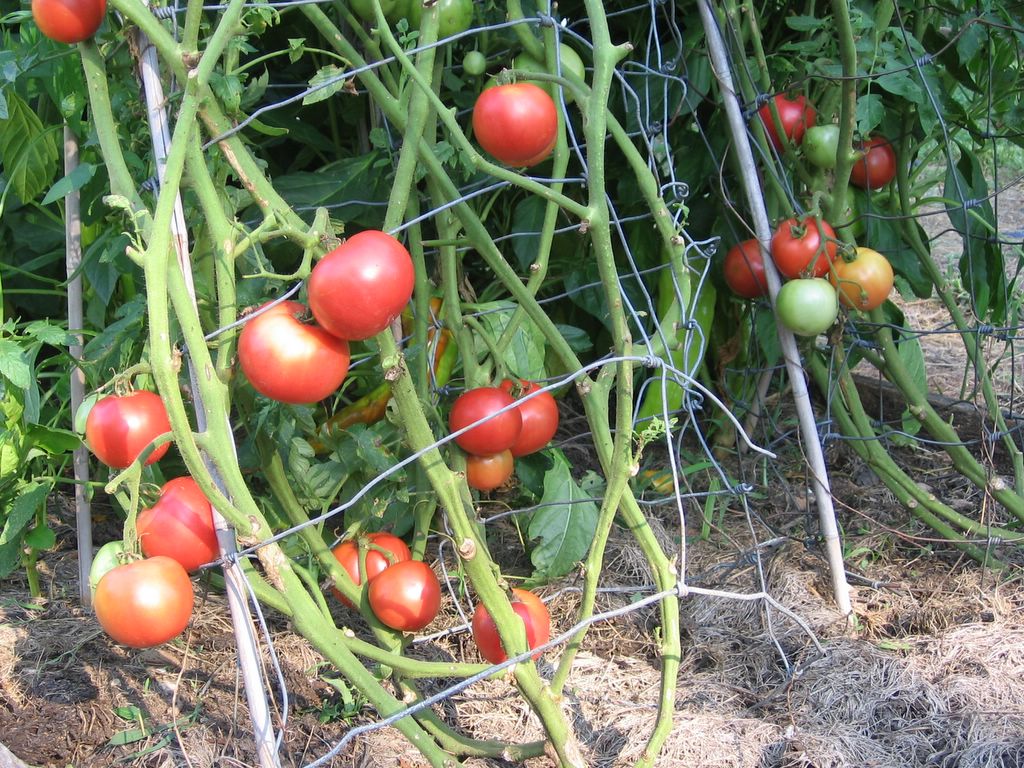
The scary experimental super trim I gave my two Arkansas Traveler tomato plants back on July 7th appears to be a success. What a relief! As you can see, all those green tomatoes at the base of the plants ripened nicely, and the tops have not only filled out with lush new growth but are also putting on quite a few more fruits.

There are two ripe tomatoes with minor pale splotches (I assume from 'sunburn'), but other than that, these beautiful rose colored babies are nearly all perfect and have a great flavor.

The plants were started on 2/6/06 with 2003 seeds from Baker Creek Heirloom Seeds and transplanted into individual plugs on 3/20/06.

The seedlings were planted in a raised bed full of soil rich with aged sheep manure on 4/20/06. They were mulched with grass clippings which kept all but a few determined weeds from sprouting. I watered them regularly.

If you garden in a location with iffy and unpredictable weather like I do, and/or you often have a hard time getting good looking mature tomatoes, I highly recommend giving this medium-sized variety a try.

Don't forget to save the seeds from your best tomatoes to plant the next year! It's so easy:

1. Slice off the top of the tomato, squeeze the seeds into a small dish (by all means eat the rest of it!)

2. Add a little water (I can't remember why I do this part except that years ago I read that I should—and considering the VFN tomatoes I grew this year were from 5 year old seeds, I'm going to keep doing it).

3. Let them sit around for a day or two, then pour the seeds into a fine strainer, rinse them off, and allow them to dry in a little cotton drawstring bag, or spread out on some waxed paper in a protected spot, or however you like to dry your seeds.

4. Store your dry seeds in bags or containers (I use itty bitty zipper seal plastic bags) in a cool, dry place or in the freezer.

From Garden To Table:
So how have we been enjoying these luscious beauties (besides as Summer In A Bowl)? Well, the other night we piled thick slices on homegrown, grass-fed Angus beef burgers while they were still on the grill—and before we put on the cheese. Oh my.

Allowing the tomatoes to cook slightly, while sealing in all the juices between the meat and cheese, gave the burgers a whole different flavor. In fact, they were so good we had burgers again the next night.

And last night we had the first BLTs of the summer (though these were made with VFN tomatoes—a standard, disease resistant heirloom—pictured here and here). This is always a highlight of the year for us—and even more so last night since we used up our last package of bacon in the freezer. No, we can't just go out and buy some more. This was not your average bacon.

Every couple of years we purchase an entire hog that has been locally and naturally raised and have it butchered to our specifications, including having bacon made that's smoked without any nitrates or other additives. I'd never seen or tasted bacon like this before 'going whole hog.' It's so lean and meaty you have to add oil to the pan when you cook it up.

But back to the BLTs. That amazing bacon, thick toasted slices of freshly baked Farmhouse White basic sandwich bread slathered with mayonnaise, the most wonderful tomatoes on earth (because they were grown on our little piece of it), crisp Iceberg lettuce. Smirk or gasp if you will, but we're old-fashioned purists when it comes to BLTs—we love that Iceburg crunch—and besides, there hasn't been any lettuce in the garden in two months.

It just wouldn't be fair to show you a photo—which is good because once those heavenly sandwiches were assembled, the thought of taking pictures of them was the last thing on my mind.

It's reward time in the garden. This year's tomato disasters are for another day. Enjoy!

© FarmgirlFare.com, the vine-ripened foodie farm blog where we eat as many fresh tomatoes as we can during summer and then dream about them the rest of the year.

Saturday, July 29, 2006

I Can't Live Without. . .


My Wide Brimmed Sun Hat!

Forget Botox. The secret to keeping your face (and the rest of you) looking young is to stay out of the sun. I cringe at the thought of the endless hours I spent during my 20s wandering around flea markets with the summer sun blazing down on my totally unprotected face (and arms and legs). Then there were the teenage sun worshipping years when I fried my skin with (gasp) baby oil for the sake of the beloved 'tan' I'd been convinced is so beautiful. Not to mention countless childhood sunburns (including on my face) that were so bad my skin peeled off. There's nothing like growing up in sunny California.

I think you get the idea--I long ago soaked up my lifetime allotment of sunshine. Add in the fact that my mother had a brush with skin cancer a few years back, and, well, I'm just a teeny bit nervous. I've also become super-protective of my skin.

You won't catch me outdoors on the farm without my sunhat--even if I'm just running to the garden to snip some chives or snatch a tomato. And that's all year round, not just during the summer. I also keep my arms and legs covered up. It might be 98 degrees in the shade, but I'll still be wearing a long sleeve shirt around the farm. (Yes, for a heat-intolerant person like me, it's practically unbearable being outside in so much clothing this time of year, but it beats skin cancer any day.)

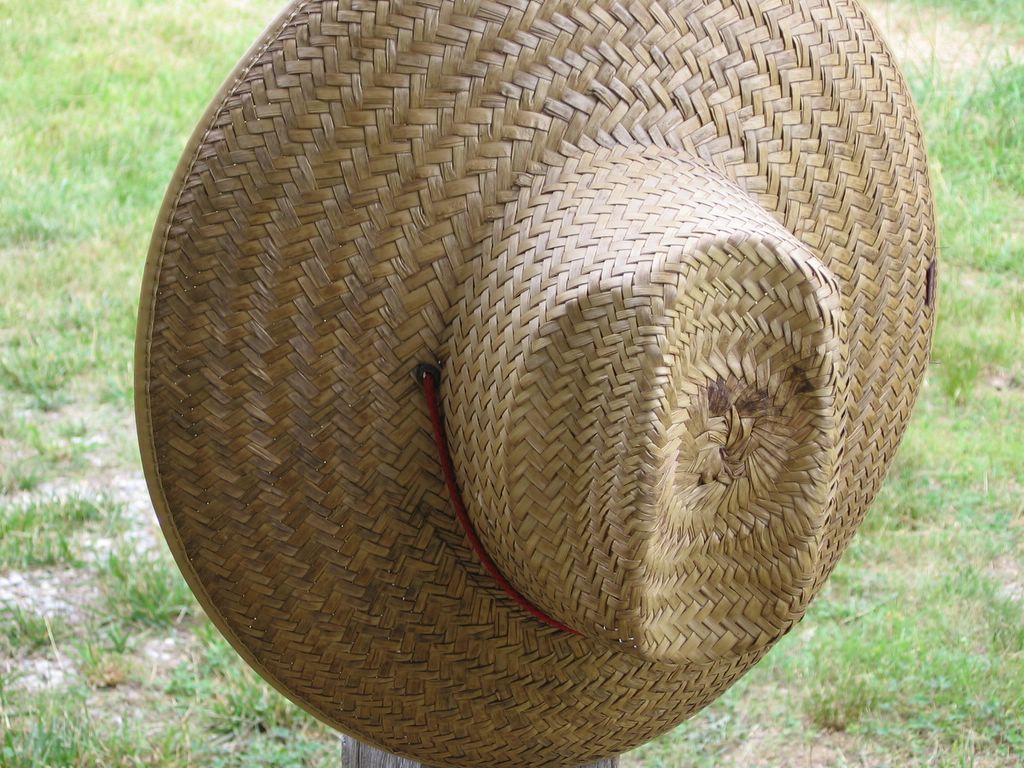
For me, the most important thing in a good sun hat is a wide brim. A hat that barely covers your face might make a chic fashion statement, but it's useless from a skin protection point of view. And while a baseball-style cap is certainly better than a bare head, it's doesn't completely cover your face and neck. My "lifeguard style" hat has a generous 5-inch brim that I absolutely love, but I do have to point out one drawback. A hat like this will not only block out the sun, but part of your line of sight as well. This means that you need to be very careful around things like low hanging branches, short-sided barns with stout wooden ceiling beams, and even forehead-level doorways attached to aging log cabins that are sinking into the earth. Yes, I've been bonked badly on the bean by all of the above while wearing my beloved hat. But don't let that keep you from wearing one--I'm sure you're not as absentminded as I am. (Joe has threatened to make me start wearing a hardhat, and I will as soon as he finds one with a wide enough brim.)

The other thing I require in a sun hat is an adjustable chin strap. Mine is a simple, shoestring-like affair that keeps my hat firmly planted on my head on even the most blustery of days. I bought two of these hats a couple of years ago after someone at the feed store obviously went on a springtime hat-buying frenzy. There were hats of all shapes and sizes and styles stacked and hanging everywhere. These were less than $8.00 apiece and will last for many more years. I even wear mine during light rains.

If you can't find a local source for a hat, there are literally hundreds of varieties of sun hats available online. A quick search at Amazon.com turned up this natural straw hat similar to mine for $10.50 and this lifeguard straw hat from Columbia Sportswear for $7.00. You can even buy sunhats for kids that are UPF 50+ rated and made from UV protective fabric that blocks 97.5% of UV rays.

Of course even the best hat and shirt do not provide complete protection from the sun. My second line of defense is sunblock, and I slather it on every single day of the year. Again, there are all kinds of sunblock to choose from. For several years I have been happily using Neutrogena UVA/UVB Sunblock Lotion with 45 SPF. It includes the ingredient Parsol 1789 which protects against the sun's skin-aging UVA rays and was recommended by my dermatologist. Once my current supply is used up, I'm probably going to switch to another Neutrogena product I recently discovered--Neutrogena Ultra Sheer Dry-Touch Sunblock.

My face and neck receive a daily (and sometimes second) dose of Neutrogena Healthy Skin Face Lotion (SPF 15), and Neutrogena Healthy Defense Daily Eye Cream (SPF 30) goes on the delicate area around my eyes. (Short haired people--don't forget the back of your neck.)

If you aren't able to shop at a small, locally owned pharmacy, all of these products can be found in the new Grocery store at Amazon.com. You really can't beat the prices (not to mention the convenience), especially if you take advantage of the $10 instant rebate now being offered on purchases of $49 or more. (Click here for details.) And don't forget the free shipping on all purchases over $25--and no sales tax.

Don't need $49 worth of sunblock? I did a little poking around in the new Grocery section today and discovered that included in the 14,000+ items they offer are many from some of my favorite companies--such as Celestial Seasonings (91 items), Newman's Own Organics (47 items), and even Wild Oats (110 items). There are also 55 different Seventh Generation products available. I noticed that many items are sold in multiples (the sunblocks all came in 2-packs), which simply means that you'll be able to shop less often--and that will help save valuable natural resources.

So this pale-skinned Irish girl may no longer be the bronze beauty she once was, but since I'm pushing 40 and still getting asked for ID when buying wine at the supermarket, I figure I must be doing something right. I definitely don't see any Botox in my future.

Thursday, July 27, 2006

What's Growin' On: 7/27/06


Realization Of The Day:
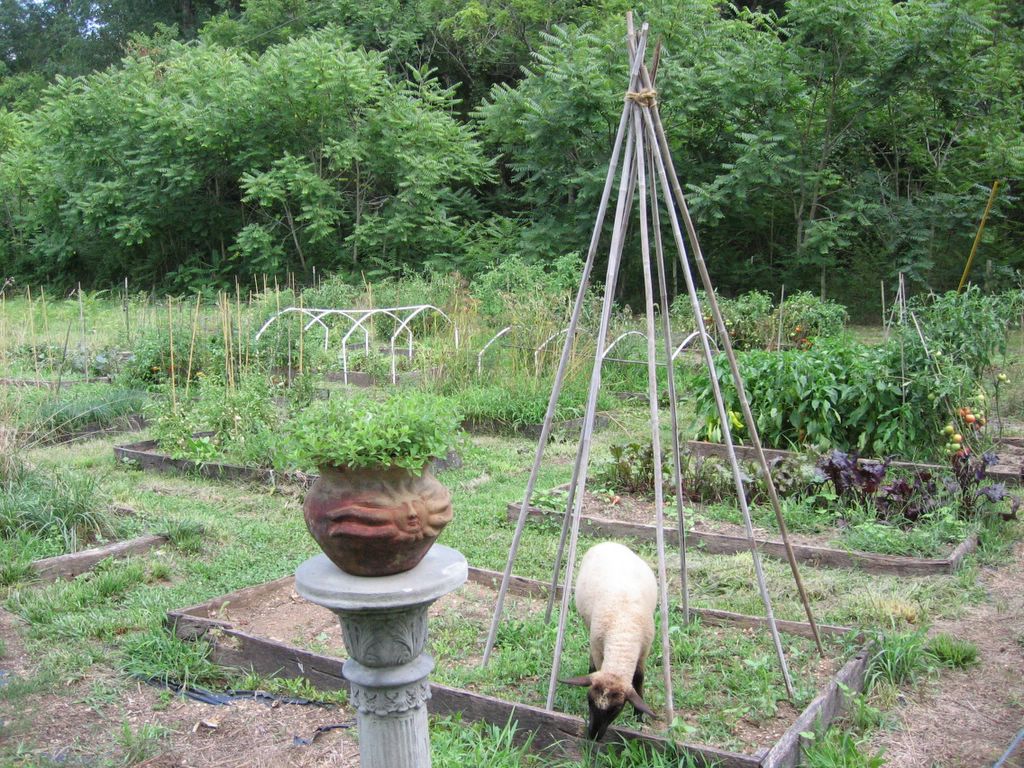
Last week's storm (which supposedly swept through the farm at somewhere between 60 and 80 miles per hour) blew my entire greenhouse apart--and yet this makeshift bamboo bean trellis standing just a few feet away didn't move an inch. There is definitely something to be said for tipi/teepee/tepee design. Now if there were only some beans growing up those bean poles.

Okay, I know what most of you are probably thinking after reading that last sentence and staring at this photo in disbelief:

Hello!? That looks suspiciously like the same little lamb you permanently kicked out of the garden just a few short days ago for gobbling up two rows of your bush beans--and who is also responsible for pulling up and munching down most of the pole beans you planted under that trellis! Are you the biggest pushover in the world--or have you just completely lost your mind?

Neither. (Well, maybe the first one--but that was from way before.) Here's the deal. I seriously believe that I made a hasty and incorrect assumption regarding Cary and those two rows of decimated bush beans. My first tip off was the deer I recently spotted nonchalantly meandering toward the garden around dinner time. I'd been faithfully covering up all of the beans with floating row covers every single night for weeks after deer ate the first batch of them, but I'd stopped because of the storms, and because I figured the deer were done in the garden. (I know, more shaking of the head, rolling of the eyes. Deer do not get full! Ever! Maybe I am losing my mind.)

Anyway, while I stared in disbelief at the deer, saying how it probably wasn't Cary who ate all those bean plants after all (and mumbling something about grabbing the gun), Joe brought up a good point:

"Cary doesn't have that long of an attention span."

And he is absolutely right. She (like all sheep) is constantly on the munching move, always searching for the next tastier treat. There is no way she would have stood at that raised bed and systematically worked her way down two 8-foot rows of beans. I thought I had solid, tangible evidence--size "C" hoofprints right there in the dirt. But I was obviously wrong--they were in fact size "D."

So Cary is once again allowed back in the garden. I did get a few disbelieving looks from Joe who thought I just kept forgetting to shut the garden gate after myself. In fact, he still can't believe I'm letting her back in there. But the thing is, I pointed out, that all of her damage has been done already. The pole beans are history, she has pretty much already clearcut the asparagus fern forest, the bugs devoured the Nero di Toscana cabbage she recently acquired a taste for, and she did actually help tame the raspberry jungle. Besides, in all reality, she really does prefer eating weeds and grass over anything else.

This is the time of year when I pretty much give in to the fact that I have lost many of my battles in the garden, so I simply try not to get totally frustrated and just enjoy whatever there is left to harvest (although if there weren't any tomatoes it would be a whole other story). And besides, it was getting awfully boring in there without her.

I had every intention of ending this post with some useful and practical gardening advice, but I think I'd better do some laundry instead. There was a good chance of rain in the forecast today, but it seems to be passing us by. Obviously those jeans out on the laundry line aren't enough. Oh, wait! I do have some useful advice I can pass on after all. Okay, clean wet laundry on the line can definitely make it rain. But a lawnmower left out in the garden two nights in a row? That's apparently just a little too much.