Showing posts with label recipes. Show all posts

Sunday, October 12, 2008

Growing Tomatoes: How Many Plants Do You Need? (And What To Do If You End Up with Too Many Tomatoes)


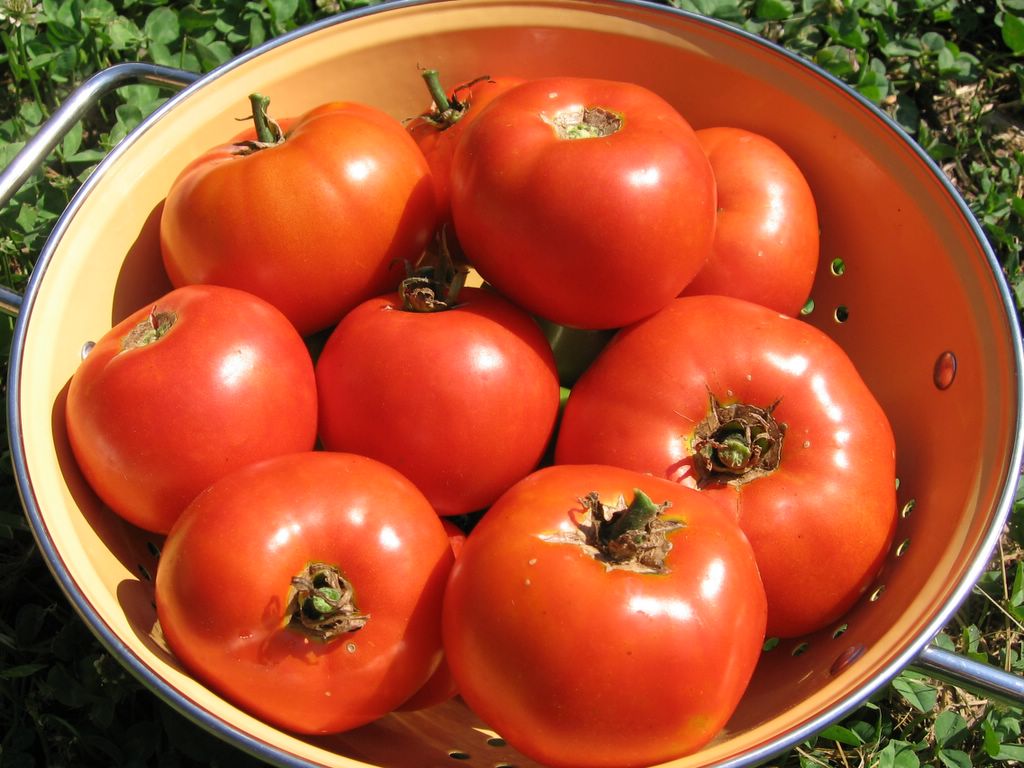
Just Juice Them Using My Homemade Tomato Juice Recipe!

It hasn't been a good year for tomatoes in the garden, partly because I never got around to starting any seeds (for the second embarrassing year in a row), and partly because the mostly boring varieties of purchased plants I had to make due with didn't go into the ground until June (okay, okay, and maybe a few in July). I did end up with about 20 producing plants and a small but fairly tasty harvest.


My favorite variety of the year is a tasty little plum type with a dark reddish green skin and interior. It has a really nice flavor, was a good producer, and didn't have any disease or pest problems. Unfortunately I never wrote the name down and seem to have misplaced the tag that came with the one plant I bought. If I figure it out, I'll definitely let you know. I'm pretty sure it was from Baker Creek Heirloom Seeds (great seeds, great Missouri company), but the only description I could find that seemed right said the tomatoes were six ounces each, and these are less than one.

I'm still getting a few ripe sweet cherry, Celebrity, and Arkansas Travelers (an always reliable variety in my garden), and the Romas are just coming into their prime, so I've been swaddling the plants in floating row covers and old bedsheets at night to protect them from the 37 degree temperatures we've been having (though now we're headed back up into the 50s at night). Soon I'll get tired of all that covering and uncovering and will turn whatever's left into a big batch of my popular salsa-like green tomato relish (no canning required unless you want to save it for months).

People sometimes ask me why I like to have at least 70 or 80 tomato plants in the garden. "So I can be sure of getting at least a few tomatoes!" is how I always reply. This question is never posed by anyone who has tried to garden in Missouri. While talking tomatoes with my blueberry supplier last summer, he confessed that he usually puts out 200 tomato plants—and that's just for him and his wife.

On the other end of the growth chart, my all-around talented friend Finny picks enough tomatoes to eat her fill all summer and put up several jars of what she swears is the best tomato sauce ever from the two measly plants in her Northern California garden. These plants apparently "grow to gargantuan sizes and impose their overabundance on us with unrelenting ferocity." It's just way too easy to garden in California.

So how many tomato plants should you put in your garden? It obviously depends on where you're located and what you plan to do with your bounty. If you just want some slicers for salads, a couple of plants will probably suffice. But if you're hoping to line your pantry shelves with dozens of jars of tomatoes and sauce, I'd say you'll want at least 10 or 12 of the meaty paste varieties.

Last year my 46 tomato plants gave me less than 46 pounds of tomatoes (a terrible yield), which might sound like a lot until you start preserving them. It takes an amazing number of tomatoes to fill up one little quart-sized container. I also never knew how many fresh tomatoes I was capable of eating until I broke down and bought some from a neighbor last year while waiting for mine to mature. Um, like twenty-five pounds in a couple of weeks. Joe helped of course, but still. Even I had trouble believing it. But indulging like this in summer is of course the only way to survive the rest of the year sans fresh tomatoes. And besides, I really do love them.

When I moved from Northern California to Missouri back in 1994, I was told that the general rule for growing anything was that you need to plant one for the weather, one for the bugs, one to die, and one for yourself. That's about right, though for a lot of things six would be better.

You also never know what's going to do well and what isn't, which is why I like to plant several different varieties of tomatoes (and everything else). And unless I really don't care for the taste of one, I always give each kind at least two summers to prove itself. A total disappointment one year might very well be the star of the season the next—or vice versa. The first year I planted Thai Pink Egg tomatoes they were a delicious success. The compact plants were loaded with little egg-sized fruits that started out white and ended up the most beautiful dark pink—while turning about five gorgeous shades of pink in between. The next year was promising, but as soon as the plants put on all those white eggs they promptly turned brown and died.

I always recommend having at least one cherry tomato plant because not only will your first tomatoes be ripe earlier, but the small size of the fruits means there's less of a chance for things to go wrong. There are dozens of types of easy to grow heirloom cherry tomatoes, and I love to experiment each year (well, except this one) with various colors and sizes. Some of my all-time favorites are red and yellow currant (a pain to pick but so adorable) and yellow pear, which add a touch of tasty elegance to everything.

Sometimes the garden gods smile do down on us, and we end up with a tomato surplus. You can never have too many plum tomatoes around (I'm particularly fond of San Marzanos) because this meaty type is perfect for canning and freezing as well as drying (a food dehydrator is a wonderful thing to have). Some day I may even give in and turn on the oven for hours on a sweltering day so I can make the slow roasted tomatoes my food blogging friends are always raving about.

Regular salad or slicing tomatoes aren't as easy to preserve because they're usually more juice than meat. Two years ago I turned an excess into a dressing/dip that I called Susan's Seven Second Tomato Glut Solution, but now I know better. If I ever have an overabundance of tomatoes again, whatever isn't tossed into my new favorite quick and easy gazpacho will be turned into homemade tomato juice. In fact, I'm so in love with this simple, scrumptious, amazingly good-for-you juice that I'm planning to increase my harvest odds next year by putting at least 100 tomato plants in the garden. I already have something like 45 different kinds of heirloom seeds in my stash. Maybe I'll go ahead and try some of each. Can't hurt. Wish me luck.

So how did your tomatoes grow this year? Any stories or tips you'd like to share? What about your favorite varieties-or, better yet, save us some trouble and tell us which kinds of tomatoes you won't be growing again.


These Mexican Jumping Bean Slaw Tacos Were a Hit Last Year

What else do I do with tomatoes?
How to Freeze Tomatoes the Really Easy Way
Saving the Harvest with No Sugar Green Tomato Relish
Quick and Easy Gazpacho
Fresh Tomato Pizza Sauce
Fiesta Cottage Cheese Veggie Dip (and Factory Tours)
Savory Tomato Pesto Biscuit Crust Pie
Fresh Tomato & Basil Whole Wheat Sourdough Bread
Tomato Pesto Pizza & My Favorite Basil Pesto Recipe
Purple Basil Pesto & White Bean Dip
Three No-Cook Summer Recipes: Mexican Jumping Bean Slaw, Easy Vegetarian Tacos, & High Kickin' Creamy Tomato Dressing
Cream Cheese & Tomato Sandwiches On Italian Black Olive Cheeks
The Easiest Greek Salad Ever
My Seven Second Tomato Glut Solution
Colors Of Summer Salad
Summer In A Bowl

© Copyright 2008 FarmgirlFare.com, the award-winning blog where despite our whining, there's always something ready to eat in the garden, something delicious on the menu, and something that tells us we'll never give up trying to grow too many tomatoes.

Wednesday, July 02, 2008

Orange Yogurt Loaf Cake:
An Easy 4th of July Dessert Recipe


Take a Break and Have Some Cake!

Remember that orange yogurt cake I served up for breakfast alongside a pile of freshly picked strawberries from the garden a few weeks back?

Well I've been tinkering with the recipe and am now perfectly pleased with the results. This is the kind of easy cake recipe I love to have in my collection, and I know I'll be turning to it again and again. It mixes up quickly, stands up to being transported even on hot afternoons, and stays moist for several days. Like most baked goods it also freezes beautifully, and it can even be sliced while still frozen. Serve in bowls topped with fresh berries and ice cream or on napkins at picnics and potlucks.

You'll find the recipe in my post, Strawberries in the Garden & an Orange Yogurt Cake Recipe in the Kitchen, over on Farmgirl Fare, where it's already been receiving rave reviews. Enjoy!

Will goodies from the garden or farmers' market be part of your 4th of July celebration?

© Copyright 2008 FarmgirlFare.com, the award-winning blog where we love homegrown fruits and vegetables but are also crazy about cake.

Thursday, January 24, 2008

Let's Trade: Your Purple Kohlrabi Growing Tips For My Best Kohlrabi Recipe Ever


Pathetic purple kohlrabi direct seeded sometime last summer


Realization Of The Day:
I'm giving up on the kohlrabi - again. (But I'll still eat the leaves.)


There's nothing like a couple of zero degree mornings to put things into perspective. It's time to let last year's garden go. This is actually a relief because there comes a point, usually around mid-December, when covering and uncovering half a dozen raised beds with floating row covers, old bedsheets, raggedy quilts, sheets of thick clear plastic, tarps, and whatever else is cheap and handy starts to feel like a real pain in the butt—especially when you uncover the tiny Swiss chard plants you've been coddling along for months in one of the mini greenhouse beds only to find that they've been munched down to nothing but pathetic little stems by. . . well, I have no idea what ate them, only that they had to have been really persistent (and really hungry) to reach them.


As for this row of kohlrabi plants I direct seeded sometime around last June, it's actually doing pretty well considering it's been covered with nothing but two floating row covers and an old sheet during these record-breaking bitter cold temperatures, more of which are expected tonight. Kohlrabi is one cold-hardy little vegetable, but my problem seems to with the other end of the thermometer. Once again the plants have refused to form bulbs, and I think it may have to do with the heat.


Early last spring (unfortunately I didn't write down exactly when) I direct seeded a couple of rows of purple kohlrabi, and only a few of the plants ever formed bulbs. They didn't get too cold, were planted in rich organic soil, had plenty of sunshine, were watered regularly, and weren't overcrowded. But they just kept growing straight up instead of out.


Not a single one of the plants in my second planting (again I forgot to make a note of exactly when I started the seeds, but I think it was June) formed bulbs, and I made sure they were thinned out so that none of the plants were even touching each other just in case that was the problem, though I didn't think it was.


Apparently most gardeners don't have any trouble growing kohlrabi, because my search through books, blogs, seed catalogs, gardening forums, and various other online sources for help about my no-bulb problem came up with zilch.


Everybody did say that kohlrabi matures quickly, likes cool weather, should be grown in the spring and/or fall, tastes even better after a frost, and is extremely easy to grow. For them, maybe.


I did find an excellent online article about growing kohlrabi from Mother Earth News called "Cool Kohlrabi" that said if you let the bulbs form during warm weather they can become woody. I also read somewhere that if you let the bulbs get too large they can become woody, but nobody mentions what you're doing wrong if the bulbs don't form at all.


It's iffy growing spring and fall crops in Missouri, which is why I almost never get any decent broccoli. Or cabbage. Or spinach. Or rapini. Or cauliflower, which I fortunately quit trying to grow years ago because I recently learned that it is incredibly finicky.


Our winters are harsh (relatively speaking), spring heats up very quickly (we almost always have April days in the 90s), and by the time the ridiculously hot and humid summers have cooled down enough to start seeds for fall, it's well into September, and there isn't usually enough growing time left before winter really sets in.


That's what happened this year with a lot of my fall plantings. I direct seeded all sorts of things on September 15th, and while I did enjoy some gorgeous spinach, a fine crop of kale, a few Oriental greens, and even a double cutting of mizuna, the turnips, five kinds of beets, and several varieties of Swiss chard I had high hopes for unfortunately never amounted to anything. (The chard I definitely should have started earlier, as it is extremely heat tolerant.)


On the other hand, the four types of bush beans I planted in late March (and was so happy I was getting them in the ground early!) froze to death.


This is just wrong—and depressing.


I'm not giving up on my purple kohlrabi, though. I love it way too much. In fact, I probably love it even more because I hardly ever get to eat it.


Kohlrabi, from the German words kohl (cabbage) and rabi (turnip), is not actually a cabbage or a turnip. Cultivated in Europe since at least the mid 1500's, this cold loving member of the brassica (cabbage) family is low in calories, high in fiber, and a good source of several vitamins and minerals. Although kohlrabi has been grown the U.S. since at least the early 1800's, it still has yet to become very popular.


Sweet and mildly flavored, kohlrabi can be braised, boiled, stuffed, sliced, scalloped, steamed, julienned, roasted, and sautéed. You can grate it into slaw, toss it into salads, slip it into soups and stews, snack on it raw with dip, and stir-fry it. You can even wrap it in foil and grill it.


I've seen recipes where kohlrabi was covered in cream, sautéed with anchovies, stuffed into empanadas, fried into cakes, served with hollandaise sauce, and turned into a cinnamon brunch bake. This vegetable is versatile.


Unfortunately all of these cooks are wasting their time - and their kohlrabi. For the only thing you should ever be doing with kohlrabi is turning it into purée. Trust me. You'll find my favorite recipe in this post on Farmgirl Fare, What To Do With Kohlrabi? Purée it! What's really nice about this recipe (besides the fact that it tastes divine) is that it makes use of both the kohlrabi leaves and the bulbs. By the way, the cute little baby leaves make wonderful additions to salads.


Now that's kohlrabi! (This photo was taken in my kitchen garden on 7/16/07, so I know I can really do it - or it can really do it.)


Okay, so now that you have my recipe, I'm hoping you'll give me some kohlrabi growing tips. What do you think I'm doing wrong? I know kohlrabi can be successfully grown here, as I've had bumper crops in the (very distant) past, and even last spring's planting gave me enough harvestable plants, like the beautiful one above (which I supposedly let get too large but didn't taste woody at all), to make one batch of perfect purée. Any help is greatly appreciated!


In the meantime, I'm tempted to start some kohlrabi seeds in the greenhouse right now, but even in winter it can quickly shoot up to 90+ degrees in there on a sunny day, and if the heat actually is my problem I'd be wasting my time.


Instead I think I'll start a few containers of seeds indoors (which is how I used to start almost everything, but I've been direct seeding more and more as the years go by) then set out the seedlings as soon as they're a couple inches high since I know they can handle the cold.


Wish me luck. I'm really hoping that 2008 will be The Year Of The Humongous Kohlrabi Harvest. I know that someday I'll have so much kohlrabi I'll actually get tired of devouring it puréed, so I'd love to know your favorite ways to eat it, too.


Never give up for good in the garden.


© FarmgirlFare.com, the purple passioned foodie farm blog where Farmgirl Susan shares stories & photos of her crazy country life on 240 remote Missouri acres.

Friday, October 12, 2007

What To Do With Swiss Chard: Hot Swiss Chard Artichoke Dip Recipe and Other Ways To Cook and Enjoy My Favorite Leafy Green

Chard art

November 2011 update: I share a great new way we enjoy Swiss chard in Wondering What To Do with Swiss Chard? Favorite Recipes and Ways to Use My Favorite Garden Vegetable. Hint: we love our powerful little $50 Waring juicer!

The best Swiss chard you'll ever eat is that which you grow yourself. Find out how easy it is in my post, How To Grow Your Own Swiss Chard from Seed & Why You Should.

While there are endless things you can do in the kitchen with Swiss chard, I have to admit that every year the vast majority of what I grow gets harvested very young and tossed straight into the salad bowl. But of course I eat a lot more salad than normal people.

The flavorful baby leaves are a wonderful stand-in for spinach and can be happily combined with just about any other salad green you can think of.

When I'm lucky, I have more Swiss chard in the garden than even I can eat in salad form. This happened early last spring when two dozen overwintered plants in the greenhouse came back to life with a vengeance.

One of the things I love about Swiss chard is how amazingly big the leaves can get, but when I step inside the greenhouse and feel as if I've suddenly been transported to Jurassic Park, it starts to get a little scary. That's when it's time to whack them down and hit them with some heat, because even the most enormous leaves will shrink down to practically nothing if you cook them.

It never ceases to amaze me that a bowl of bounty nearly too big to get through the door will fit inside a teacup once you cook it. The concentrated amount of nutrients that must be contained in that teacup is mind-boggling.

You'll find bunches of Swiss chard in supermarkets year-round, but freshness and quality can vary greatly. Peak season in most areas is from June through October, though in milder climates you often can find interesting varieties of just-harvested bounty at farmers' markets from early spring until late fall or even early winter. Look for crisp stalks with shiny, unblemished leaves.


Canary Yellow Swiss Chard in the homemade greenhouse last October

Wondering what to do with your Swiss chard? You can't go wrong if you sauté it with chopped fresh garlic in some nice olive oil. And by all means, don't forget the stalks. I chop them up and cook them in the oil until they're soft, then add the coarsely chopped leaves, covering the pan for the first minute or two.

You can add a smidgen of anchovy paste to the oil to coax out flavor (it won't add a fishy taste). Throw in a handful of chopped pancetta or proscuitto, and you'll probably receive a round of applause. A sprinkling of freshly grated Pecorino Romano might be considered over the top, but only by people who haven't yet tried it.

You can use Swiss chard (and many other greens) in place of spinach in virtually any recipe. Try it in lasagna, ravioli and quiche — or even your favorite stuffing. Toss it with pasta or add thin strips to stir-fried rice during the last few minutes of cooking.

Mix chopped fresh chard or kale into pizza sauce or scatter over homemade pizza before adding the cheese. Stir sliced leaves into soups, and slip steamed greens into scrambled eggs, omelets and frittatas. You can even steam Swiss chard stalks and eat them like asparagus.

Need more inspiration? You'll find all sorts of other scrumptious ideas in the comments section of this post. Many thanks to all the In My Kitchen Garden readers who responded to my request to share their favorite ways to eat Swiss chard. And you'll find links to more of my Swiss chard recipes at the bottom of this post.

Do you have a favorite Swiss chard recipe you'd like to share?


One of my favorite ways to enjoy Swiss chard is in this dip I created last spring. This addictive stuff goes well with practically anything: crackers, tortilla chips, toasted or untoasted sourdough baguette slices, fresh veggies, pita chips, even pretzels.

Don't be afraid to think beyond the dip bowl, either—try putting it on baked potatoes or using it in an omelet. I even like it cold.

Farmgirl Susan's Hot Swiss Chard Artichoke Dip Recipe
Makes about 3 cups

My version of the popular spinach artichoke dip is cooked on the stovetop instead of in the oven and uses chopped fresh Swiss chard leaves and stalks in place of frozen spinach, along with plenty of onion and garlic for extra flavor.

It tastes even better if you make it a day ahead and reheat it just before serving, either in the microwave or on the stovetop (you might need to add a splash of milk when reheating on the stove). You can use reduced-fat cream cheese and mayonnaise, as well as low-fat sour cream, if desired.

When I was creating the recipe, I used red Swiss chard for the initial batch, thinking the chopped stems would add nice bits of color. Instead I ended up with pink dip. It tasted great but looked like salmon spread, which might be confusing to eaters. If you're making it for yourself, go ahead and use whatever color chard you like.

1/4 cup olive oil
1 cup finely chopped onion (about 5 ounces)
4 to 6 cloves garlic, minced
1 bunch Swiss chard (about 12 ounces), leaves and stalks separated and both chopped into small pieces
1 14-ounce can artichoke hearts (packed in water), drained and rinsed, chopped into small pieces
4 ounces cream cheese (half of an 8-ounce package), softened
1/2 cup sour cream
1/4 cup mayonnaise
1½ cups finely grated Pecorino Romano (or parmesan) cheese (about 4 ounces)
2 teaspoons Worcestershire sauce
Salt and pepper to taste
Chopped scallions or chives for garnish (optional)

Heat the olive oil in a large pot. Add onion and chopped Swiss chard stalks and cook, stirring frequently, until soft, about 5 to 7 minutes. Add garlic and cook, stirring frequently, 2 minutes; do not let garlic brown.

Stir Swiss chard leaves and chopped artichoke hearts into onion mixture. Cover and cook, stirring occasionally, until chard is tender, about 5 minutes. (Remove lid for last few minutes of cooking if there is liquid in the pot.)

Stir cream cheese, sour cream, mayonnaise, Romano cheese and Worcestershire sauce into Swiss chard mixture and cook 10 to 15 minutes, stirring occasionally, until dip is hot and thick. Add salt and pepper to taste.

Serve warm, garnished with plenty of chopped scallions or chives, if desired.

Still have some Swiss chard left? You might enjoy these recipes:
Healthy Swiss Chard Tuna Salad with Scallions & Kalamata Olives
Swiss Chard Cabbage Salad with Garbanzo Beans & Cottage Cheese
Swiss Chard & Artichoke Soup

Swiss Chard & Artichoke 'White' Pizza

Can't survive on leafy greens alone? You'll find links to all my sweet and savory Less Fuss, More Flavor recipes in the Farmgirl Fare Recipe Index.

© FarmgirlFare.com, the chard crazy foodie farm blog where Farmgirl Susan shares stories & photos of her crazy country life on 240 remote Missouri acres.

Sunday, September 16, 2007

Another Less Fuss, More Flavor Recipe: The Easiest Greek Salad Ever


This beautiful summer salad is so full of flavor it doesn't even need dressing.


The way I cooked, ate, bought, and even thought about food all changed dramatically when I left urban Northern California for rural Missouri 13 years ago. Most of this was a direct result of space and availability. Moving from a 900 square-foot cottage with a postage-stamp sized yard to a couple of hundred acres meant there was space for a large kitchen garden, space for chest freezers, space for animals to graze.

Availability was a different story. Relocating from one of the undisputed gastronomic capitals of the world to the middle of nowhere in middle America meant that a lot of food purchasing options disappeared. Order Chinese take-out or have a pizza delivered? Neither. Dash to the store for proscuitto, kohlrabi, sherry wine vinegar? Forget it. Buying parsley or cilantro means 80 miles of driving. One learns to adapt.

My food philosophy these days can pretty much be summed up by the phrase Less Fuss, More Flavor. And what that simply means is this: the better your ingredients, the less you have to mess with them.

Of course some might argue that growing two dozen types of salad greens or putting up 100 pounds of tomatoes or raising your own lamb and beef constitutes a fair amount of fuss. But the nice thing is that if you start with the best, then at the end of the day when you're tired and sore and starving to death, a meal fit for even the most gourmet gourmand can be ready in a snap.

A typical late summer dinner for us might include grilled lamb chops or lamb leg steaks (I love these!), the last of the French filet beans in the garden, and some freshly dug Yukon Gold potatoes (because the best way to store your potatoes is to leave them in the ground). Now sure, you could marinate the lamb for hours with garlic and fresh herbs and all sorts of other delightful stuff, make the delicious sounding but 4-step Warm Green Bean, Pancetta & Tomato Salad with Parmesan in the issue of Fine Cooking I had sitting on the kitchen counter for months (but never actually made), and turn the potatoes into some gorgeous, creamy gratin. But the point is, you don't have to.

More often than not, the lamb gets tossed straight onto the grill, and the beans and potatoes are cooked up (steamed just until tender and boiled, respectively) and served with nothing more than a little organic butter and some nice salt and pepper. Less Fuss, More Flavor allows you to be lazy in the kitchen—without anyone ever realizing it.

A crusty loaf of homemade crusty bread (I always bake three or four loaves at a time and freeze them) and an heirloom tomato salad round things out. Except for a platter of plain sliced tomatoes, which often appears at our table, you can't get much simpler than this bare bones Greek style salad.

So what's your favorite Less Fuss, More Flavor recipe?

Farmgirl Susan's Simplest Greek Salad
Serves at least one

This pared-down version contains just five ingredients, so using the finest of each is of utmost importance. Juicy, vine-ripened tomatoes are the key, which means this is a Summer Only recipe. Stuff yourself silly on it now, and let the memories keep you satiated through the rest of the year.


Most Greek salads call for various other ingredients, some traditional and some not. Everybody seems to have their own favorite version. I used to add olive oil and vinegar but don't bother anymore. I've listed several optional additions below, though none are necessary. I didn't even put salt & pepper in the batch pictured here, though I did add a large handful of chopped flat-leaf parsley.

If you're a nibbler like me, bear in mind that the more complicated the recipe gets, the longer you'll have to fill yourself up while putting it together. Many Greek salad recipes call for cutting the vegetables into large pieces, but I like them on the small side because I'm one of those people who wants a taste of every thing in every bite.

Garbanzo beans (chickpeas) aren't traditional, but I'm addicted to them and will toss them into practically anything when I'm not snacking on them straight from the can (I do rinse them first). Flavorwise, they fit right in here, and they give the salad a fiber and protein boost as well, which can be important if this ends up being your entire meal, like it was for me tonight.

Organic garbanzo beans are a bargain and should be a staple in everyone's pantry. You can find them in many places for under a dollar a can, including at Whole Foods Market, where they'll give you an extra discount if you stock up and buy a dozen cans at a time.


One large cucumber, cut into dice
Several vine-ripened tomatoes, preferably freshly picked, organically grown heirlooms (a variety of colors is nice), cut into small chunks
A handful of kalamata olives, pitted and coarsely chopped
A generous handful of fresh basil, chopped
A hunk of the nicest feta cheese you can find, preferably made from sheep's milk
Splash of brine from the olives or feta

Optional additions:
Garbanzo beans (chickpeas)
Salt & pepper to taste
Olive oil
Your favorite vinegar
Fresh lemon juice
Fresh garlic
Fresh oregano
Flat-leaf parsley
Anchovies, laid on top or a smidge of anchovy paste mixed in
Capers
Red onion
Sweet red peppers
Green bell peppers

Place cucumber, tomatoes, olives, basil, and half the feta cheese (crumbled) in a large bowl along with any desired additional ingredients. Gently toss with a large spoon until combined. Sprinkle with remaining feta cheese just before serving. Alternatively, you can whisk together an olive-oil based dressing and then toss it with the rest of the ingredients.

This salad tastes best if you mix it up and then let it sit for an hour or two at room temperature so the flavors can mingle, but it's delicious even in the making, which is of course how I always eat it.

Tomatoes lose their flavor when refrigerated, so don't make enough for leftovers—just mix up another batch.

Still have more tomatoes left? You'll find links to all my Less Fuss, More Flavor tomato recipes at the end of this post.

© FarmgirlFare.com, the freshly picked foodie farm blog where Farmgirl Susan shares recipes, stories, & photos of her crazy country life on 240 remote Missouri acres—and we never get tired of tomatoes, though each summer we try our very best.

Monday, September 10, 2007

What's Growin' On 9/10/07:
Planning & Planting The Fall Garden


Golden California Wonder Pepper Ready To Pick

Realization Of The Day:
The best thing about this year's summer gardening season is that it's almost over.

Spring wasn't real great either, but it did give me my best spinach crop ever (I ate spinach salad for weeks from one 4-foot by 8-foot raised bed), as well as that
long and glorious lettuce season. I had so much lettuce I was eating it for breakfast. And of course in spring there's always the prospect of all that glorious summer bounty to come. Which mostly didn't. It's no wonder I haven't written anything here in months. (Welcome to all the new subscribers!)

I did learn a few things, though, including the fact that I really need to focus on growing more fall and winter crops. Now I just need to plant some.

I was shocked the other day when I realized I'd taken
this photo of gorgeous, freshly picked autumn greens last year on October 4th. I've been so busy watering and sweating to death over the past couple of months that I didn't start any seeds for fall. No pak choy, no Swiss chard, no lettuce, no endive or escarole, no spinach, no kale, no turnips, no beets, not even any of my beloved Nero di Toscana cat cabbage
.

Fortunately it shouldn't be too late to plant an autumn garden here in southern Missouri. The official frost date isn't until October 15th (though ours often arrives earlier since we're tucked down in a little valley), and the weather can be fairly mild into November. All sorts of salad greens, as well as other vegetables such as kohlrabi, cabbage, and brussels sprouts thrive in cooler weather, and many taste better if they've been subjected to a couple of frosts.


Greenhouse Permanent Arugula Bed On November 8th, 2006

Last winter as I harvested arugula leaves from the same big bug-free plants for weeks without them turning bitter or bolting, I realized that this easy to grow green actually
thrives in cold weather.

In areas such as the South and the West Coast, you should be able to plant now and continue eating from your garden straight through winter and right into spring.

We're still seeing temperatures in the mid 80s on
the farm, but yellow leaves have begun speckling some of the trees, and the nights are finally cooling down. We've even had some much needed rain. Best of all, the last chigger bite of the year is thankfully in sight.

My appetite for tending to my garden--and my garden journal--has returned. So if you'll excuse me, I have some serious weeding and seeding to do.

How did your summer grow? Successes? Failures? Lessons learned you can pass on to the rest of us?


Coming Up (and this time I really mean it):
--The Easiest Greek Salad Ever
--How to grow Swiss chard from seed, plus two of my favorite Less Fuss, More Flavor Swiss chard recipes
--What I learned this year about growing garlic
--Review of a new dandy little gardening book

Ideas & Inspiration For Your Autumn Garden:
My Review of The Vegetable Gardener's Bible, my favorite gardening book
Building My Inexpensive Greenhouse
Planting My Fall 2006 Garden Part I
Planting My Fall 2006 Garden Part II
Planting My Fall 2006 Garden Part III
How To Grown Your Own Gourmet Lettuce From Seed: It's easier than you think!
How To Go From Seed To Salad Bowl In Less Than A Month: Growing arugula, lettuce, and more, even if you don't have an actual garden
How To Grow Beets From Seed & Why You Should
How To Grow Turnips From Seed And What To Do With Them
How To Grow Endive & Escarole From Seed And What To Do With Them
How To Grow Nero di Toscana Cat Cabbage From Seed And What To Do With It
How To Make It Rain On Your Garden
Pollinators In The Garden

Enjoying The Late Summer Harvest Now:
My Less Fuss, More Flavor Fresh Pizza Sauce
Savory Tomato Pesto Pie
Tomato Pesto Pizza, My Favorite Basil Pesto Recipe, & The Simplest Tomato Salad
Three No-Cook Summer Recipes:Mexican Jumping Bean Slaw, Easy Vegetarian Tacos & High Kickin' Creamy Tomato Dressing
Baby Cream Cheese & Tomato Sandwiches On Italian Black Olive Cheeks
My Seven Second Tomato Glut Solution
Colors Of Summer Salad
Summer In A Bowl
Making & Using Arugula Pesto
My Super Simple Spinach Soup Recipe
Caramelized Beets With Garlic
Herbed Yogurt Cheese Recipe & How To Make Homemade Yogurt
Fast Farm Food: Lettuce For Breakfast? Why not!
My Basic Summer Squash Soup Recipe
My Simple Summer Harvest Soup
My Simple Summer Harvest Soup--The Autumn Version
The Easiest Broccoli Soup Ever
Apple Blueberry Crumble Bars
Just Peachy Blueberry Breakfast Bars

And Later:
Don't Cut Your Basil Season Short!
How To Freeze Sweet Peppers
How To Freeze Zucchini & My One Claim To Fame
What To Do With All Those Green Tomatoes? Make My Easy Salsa-Style Green Tomato Relish!
Quality for Keeps: A Comprehensive Guide To Freezing Vegetables from the University of Missouri Extension Center
The Ball Home Canning Basics Kit includes everything you need get started canning.
I can't imagine life without a FoodSaver and use mine to seal everything from green beans to wild venison to chainsaw chains (it keeps them from rusting). I've found it's more economical to make my own custom bags using two different sized rolls of the FoodSaver bag material.

© 2007 FarmgirlFare.com, the award-winning blog where Farmgirl Susan shares stories & photos of her crazy country life on 240 remote Missouri acres.

Monday, September 25, 2006

Recipe: How To Make Homemade Pizza Sauce Using Fresh Tomatoes

Easy Cooking with Less Fuss, More Flavor

You made the pizza dough, why not make the sauce, too?

Homemade pizza is one of my favorite things to eat. (Click here for my easy pizza dough recipe.) Throughout most of the year, I make what I call Feels Like Cheating Pizza Sauce. It really is almost too easy. Of course you can't take into consideration all the hard garden labor you put into it months earlier.

First I defrost a plastic freezer container of tomatoes (usually San Marzano or Yellow Plum that have been blanched, peeled, and seeded) that I put up during the previous summer. Then I take a pair of kitchen scissors and snip the whole tomatoes into pieces before pouring the contents (minus some of the liquid) into a heavy saucepan.

I turn the burner on medium, toss in a couple of frozen pesto cubes (also put up the previous summer—you just scoop fresh pesto into ice cube trays and once frozen, transfer them to a zipper freezer bag), then head out to the garden or greenhouse for a handful of fresh oregano. This gets de-stemmed, chopped up, and stirred into the pot. Dried oregano can be used in a pinch.

Bring it all to a boil, then simmer until the desired consistency is reached (I like mine very thick). For years it was done at this point.

But then I bought a KitchenAid hand blander (one of my most useful kitchen purchases ever), and while I still adore the chunky version, I was thrilled to discover the joys of having a smoother, more easily spreadable pizza sauce.

Note Of Caution: Blending up a small amount of tomato sauce is a bit more, um, dangerous—think splashing hot tomato flying about the kitchen—than burying the hand blender in an entire pot of soup, which is probably why they call them immersion blenders.

A regular, counter top blender or a food processor would be a safer option for a less reckless and lazy person.

During tomato season, there's simply no reason to use up your stash of preserved tomatoes when you get a hankering for a homemade pizza—unless you're looking at an almost frighteningly bountiful harvest in the garden and are frantically trying to gobble up everything left over from last year.

Making my fresh pizza sauce takes a little more work than the Feels Like Cheating version, but not much. Chopping the fresh basil and garlic is required, but blanching and peeling the tomatoes is not. That is definitely not my idea of less fuss.

If you chop the tomatoes into fairly small chunks, you'll probably never notice the bits of skin buried under the toppings. And besides, the skin is probably good for you. If you happen to have some pesto handy, you could use a couple of dollops in place of the olive oil, garlic, and basil and save yourself some steps.

The nice thing about this sauce is that you can make it with any kind of tomatoes. Pink, orange, plum, salad, even little cherry tomatoes—it matters not one bit. This is also a great way to use up all of those end of the season 'seconds' hanging around the kitchen and languishing on the vines; the ones that aren't pretty enough to toss into salads or slice up for burgers.

Soft spots, cracks, wrinkles, bug bites, funny little bumps on the skin from who knows what—just cut them off and toss them in the compost bin or give them to the chickens.

A few months ago I read about a farmer who feeds his chickens marigold flowers so that the yolks of their eggs will be very orange. It might be my imagination, but—before the chickens went into non-laying mode a couple of weeks ago—their yolks did seem to be darker after a diet heavy on tomatoes.

Of course perfect tomato specimens can be used as well—and none of the ingredients have to come from your own garden. I'm sure the finished sauce would freeze just fine, though I haven't actually tried it.


Less Fuss, More Flavor Fresh Tomato Pizza Sauce
Amounts are entirely a matter of taste

Some nice extra-virgin olive oil
Fresh garlic, coarsely chopped with some nice salt and allowed to sit 10 minutes if possible, so the beneficial compounds have time to mix with the air and become more available
Plenty of vine-ripened, garden fresh tomatoes (preferably heirloom & organically grown), cut into chunks
Fresh basil (at least twice as much as you think seems like the right amount—I measure fresh basil by the handful)
Fresh oregano (more than you're about to put in)

Heat the olive oil in a heavy saucepan over medium heat, then add the garlic and cook for 1 to 2 minutes, stirring constantly. Do not allow the garlic to brown.

Add the tomatoes, basil, and oregano and bring to a boil. Reduce the heat and simmer, stirring occasionally, until most of the liquid cooks out. Cooking time will depend on the juiciness of the tomatoes.

When there is still some liquid left in the pan, carefully purée the sauce using a blender, immersion blender, or food processor.

If you prefer a smoother sauce with fewer seeds, you can put your cooked sauce through a food mill instead. After lusting after one for years, I finally bought an Oxo Good Grips food mill and love it. It's great for making Homemade Vegetable Tomato Juice and makes the best homemade applesauce.

Bring the sauce back to a boil and continue simmering until desired consistency. Let cool, then spread on pizza dough.

If you're like me and never remember to make the sauce ahead of time, you can transfer it into a heat proof bowl and stick it in the freezer for a little while. Just don't spill it, because it will immediate freeze to whatever it falls on and is practically impossible to clean up.

And there you have it. Homemade pizza sauce so simple, yet so delicious, you'll wonder why you never thought to cook some up before.

Of course, if you're so inclined, you can embellish this basic recipe by adding a personal touch. Perhaps some chopped onion, diced sweet red pepper, grated carrot for sweetness, or a few dried mushrooms. (Pizza sauce is an excellent vehicle for hiding vegetables from finicky eaters.) You could even stir in some chopped fresh mushrooms after you've blended it up.

Just be sure to make enough pizza so that you end up with plenty of leftovers.

My other favorite ways to use fresh tomatoes are here:
Fiesta Cottage Cheese Veggie Dip (and going on factory tours)

Still hungry? You'll find links to all my sweet and savory Less Fuss, More Flavor recipes in the Farmgirl Fare Recipe Index.

Growing your own tomatoes? You might find these posts helpful:
9/4/08: How To Freeze Tomatoes the Really Easy Way (and Why I Don't Do Much Canning Anymore) (lots of great comments from other gardeners here)

© FarmgirlFare.com, the vine-ripened foodie farm blog where Farmgirl Susan shares recipes, stories, & photos from her crazy country life on 240 remote Missouri acres.

Thursday, May 25, 2006

Searching for the Best Arugula Pesto Recipe, Making Arugula Pesto Cream Cheese Spread, and Discovering Arugula Pesto Pizza

Arugula Pesto Takes Over the Kitchen!

Low fat arugula pesto recipe made with homegrown arugula and canned garbanzo beans

Update: Wondering what else to do with arugula? You might also enjoy my easy Arugula Cottage Cheese Dip/Spread/Sauce Recipe or this Roasted Leek and Potato Soup with Arugula.

If you thought it took me a long time to get around to writing this post on how to make arugula pesto, you should be glad I started researching arugula pesto recipes after I'd already come up with mine. Otherwise I would most likely either still be sitting at the computer, dazed and Google-eyed, or in the kitchen trying yet another variation. Talk about overwhelming.

So what did I discover from 30,000+ Google search hits for 'arugula pesto?' That there are practically as many recipes for arugula pesto as there are cooks in the kitchen—and that the only thing they appear to have in common is that they all include arugula, which is also known as rocket.

I started working my way through the list and found arugula pesto recipes that called for the following ingredients: walnuts, pecans, hazelnuts, roasted red peppers, toasted pepitas, chopped olives, aged gouda, parmesan, raw garlic, pan roasted garlic (where the garlic is cooked in a pan on the stove for 10 minutes—I've never heard of this but it sounds intriguing), chives, parsley, ricotta, olive oil, honey, red wine vinegar, balsamic vinegar, dijon mustard, miso, Splenda, lemon juice, and one small potato boiled, peeled, and chopped. My goodness.

Recipe below. . .

Wednesday, April 19, 2006

What Is Spring Green Garlic? Growing It, Cooking with It, Loving It, and a Recipe for Easy Green Garlic Fettuccine

volunteer spring green garlic - In My Kitchen Garden
Young volunteer garlic: surprise gourmet food right under my hoes.

2013 Update: Love garlic? It's easy to grow, even in containers. Learn How To Grow Your Own Garlic here.

Last week I received an email from Catherine at Albion Cooks saying that she had just made another batch of my Savory Cheese & Scallion Scones, but this time she substituted cheddar and green garlic for the feta cheese and scallions.

Green garlic? A quick pop over to her site revealed a lovely photo of the item in question, a delicious looking batch of scones, and the nagging feeling that I'd just read about green garlic somewhere else. But where? Oh, wait. Everywhere.

There were green garlic growing instructions from Veggie Gardening Tips. Then the little bit of green garlic history and a great photo, along with a recipe for Catalan-Style White Bean and Green Garlic Tortilla at In Praise Of Sardines.

Mariquita Farm had another beautiful photo of green garlic, along with numerous tips on ways to use green garlic, plus several green garlic recipes, including green garlic mayonnaise, green garlic soup, and step-by-step photos of how to make green garlic pesto.

This stuff really is everywhere. And those are just the ones I remembered.

So what is green garlic, and how had I lived this long without knowing about it? Green garlic, also known as spring garlic, young garlic, baby garlic, and garlic shoots, is, claims Catherine, "a culinary secret." It is "immature garlic that hasn't yet developed its garlic bulb and has a much milder flavor than the mature bulbs, yet still has that distinct garlic flavor."

What do you do with green garlic? "It can be used in any recipe in place of regular garlic or leeks, and can be used raw or cooked." And, obviously, it can take the place of scallions, too.

Green garlic is also a market gardener and small farmer's (and backyard gardener's!) dream crop, as you can grow it in what would otherwise be unused space.

More below. . .