Saturday, September 30, 2006

Weekend Herb Blogging #52

The One Year Anniversary 'My Favorite Herb' Edition!


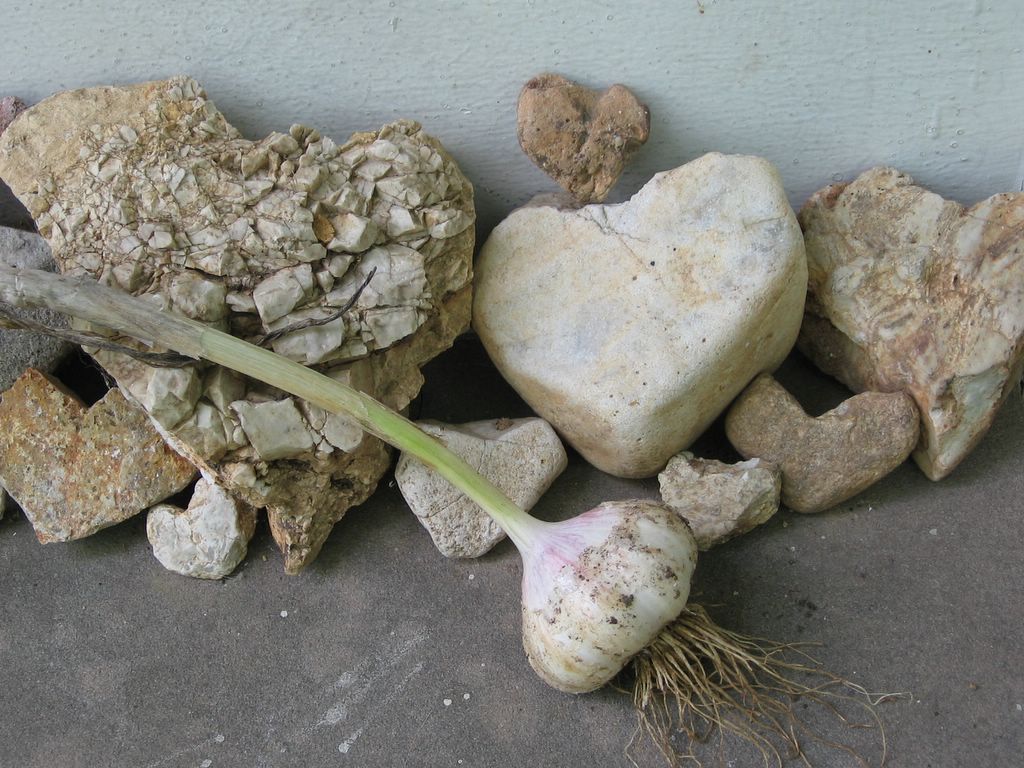
I Heart Homegrown Garlic


It's hard to believe that it's been an entire year since Kalyn put up her first plant post because she didn't have a pet and wanted to join in the weekend fun. What started as a joke between her and Weekend Dog Blogging host Sweetnicks has grown into one of the most popular blogging events around. Food and garden bloggers from all over the world participate in Weekend Herb Blogging, with new people joining in every week. Not only is each weekly recap offer amazing recipes, but it is also chock full of interesting facts and information about practically every kind of herb and edible plant you can imagine. Click here to read the wonderful Year In Review recaps Kalyn has been posting over the past week.

For the one year anniversary, Kalyn has asked everyone to name their favorite herb and then post one of their very best recipes using that herb. Click here to read about this cream of the crop of recipes.

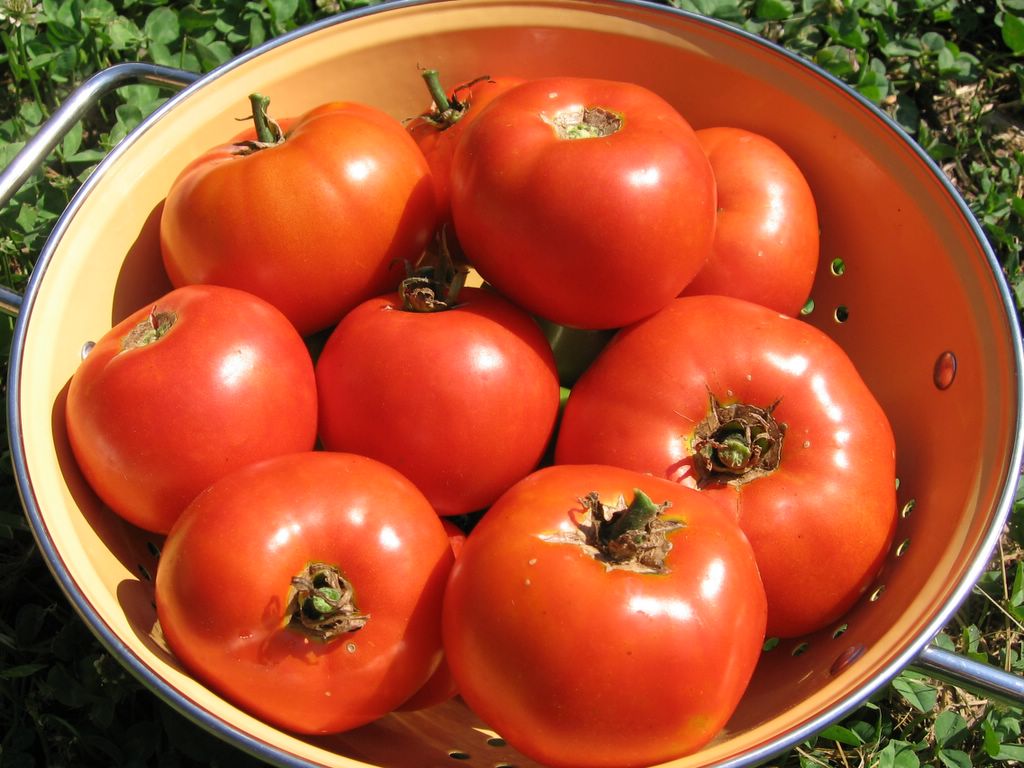
Well, hands down garlic is definitely my very favorite herb. In fact I have been known to say that if a recipe doesn't contain chocolate, then it most likely could do with some garlic. Since garlic figures so much in my cooking (there is even some in the Mexican ground beef that's simmering on the stove as I type this), it wasn't easy to choose one favorite recipe. But this Savory Tomato Pesto Pie, which I created and wrote about this summer on Farmgirl Fare, was not only a big hit with readers, but it also contains my second favorite herb--basil.

So here, once again, is one of my favorite new original recipes, Savory Tomato Pesto Pie. Enjoy!


Worth Turning On The Oven For

Sometimes it is good to be alone in the kitchen. That way, when you pull a pie like this out of the oven and are standing there staring at it cooling on the counter, mesmerized, your mouth watering, stomach rumbling, fingers twitching, you do not have to worry about losing control and getting your hand slapped because you cannot resist it. You can simply tear off a piece of that warm, golden crust with your fingers and pop it into your mouth--and nobody will ever know (because pieces of crust break off all the time). Of course if you end up nibbling off five or six inches of the edge. . . well, you're going to have to come up with a really good explanation as to why it is missing (pets can be quite handy for this). If the pie is just for you, then you will be forced to face the fact that you just gobbled up the very best part off a large portion of your pie.

This recipe (which I created in my head a few days ago and then created in the kitchen the following night) is actually a combination of four things that I love. The first is pizza. The second is homemade pecorino romano crackers (yet another recipe I've been meaning to share for over a year now) which I don't make very often because Joe doesn't care for them. This means it is up to me to eat them all--and I have absolutely no self-control when they are around. I have had entire meals that consisted of nothing but these crackers. The third thing is a similar pie I've made with tomatoes, cheddar cheese and fresh basil using a recipe from a 1998 issue of Country Home magazine. The fourth thing is something I invented on a whim years ago when I had my little bakery cafe in California. It was basically a freeform calzone made with a biscuit-type crust and filled with sliced roma tomatoes, mozzarella cheese, and pesto. I called them Pesto Piezones, and each one was about the size of both of my hands put together (with fingers spread apart). I sold them for four dollars apiece, and they were usually all spoken for well before lunchtime. Until the other day I had forgotten all about them.

Now this may look like a pie (and I may even be calling it a pie), but it is really not a pie. So those of you who are afraid of pies can keep on reading. And now I'm going to say this again in a slightly different way because people who are afraid of making pies have often been tricked into making them and then suffered traumatic experiences: This is not a piecrust. It is made with a biscuit dough, but (for those of you who are afraid of making biscuits) it is not made from biscuits. This dough is easy to work with. This pie is quick and easy to make. That--for anyone who is still suspicious--means that this is by no means a difficult culinary endeavor. You can make this pie. Yes, you. And when you do--if you decide to share it--it will most likely make whomever you feed it to immediately smile with delight and love you even more than they already do. And you certainly can't beat that.

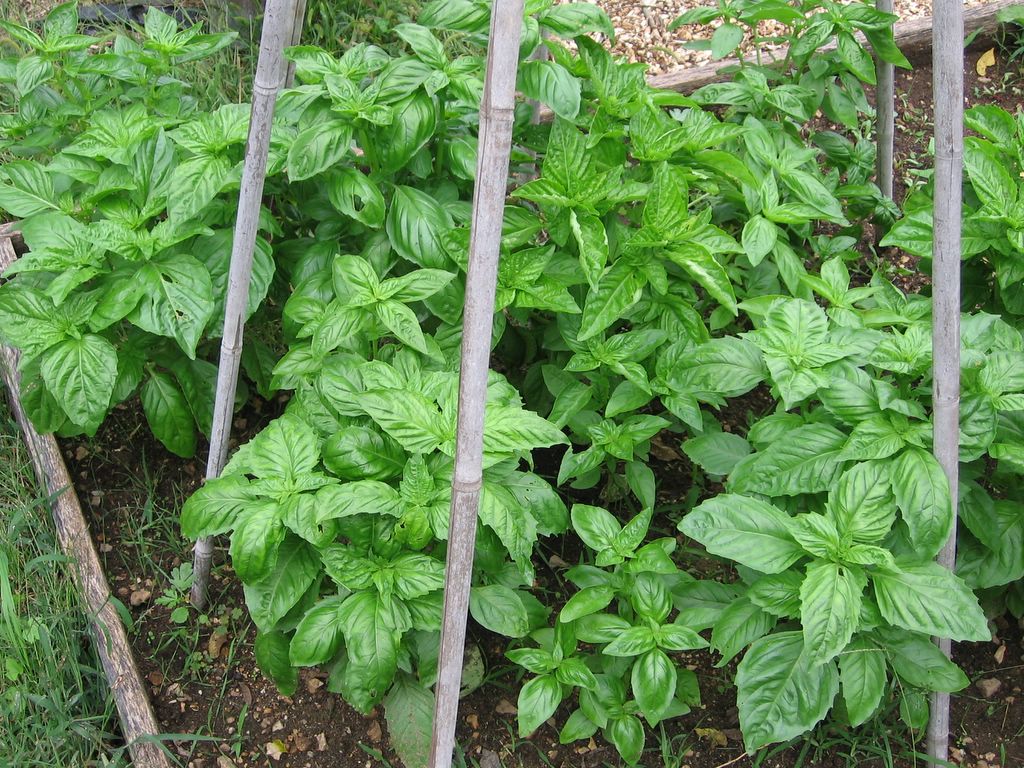
Purchased pesto will give you perfectly good results in this recipe, but if you have half an hour to spare and can get your hands on some beautiful fresh basil, by all means make your own. Use your favorite recipe or try my latest version that I created specifically to use in this pie. It is adapted from the Basil Pesto recipe in
The Sonoma Diet book, which I am currently reviewing.

(Since I have no idea if or when I will actually get around to finishing the review, let me just say this: I highly recommend
The Sonoma Diet book for anyone who loves great-tasting, real food that also happens to be good for you--regardless of whether you want to lose weight. The book basically offers a new way of thinking about and appreciating food, and it doesn't involve counting or measuring or scary meal replacements. In my opinion, the "Seasonings" recipe section alone is worth the price of the book. And the Peachy Berry Cobbler came together in minutes and did not taste like diet food.)

The Sonoma Diet pesto recipe caught my eye because it called for pine nuts or almonds. I never put pine nuts in my pesto. I don't particularly care for them, and they are always frightfully expensive. Almonds, however, I like. And compared to pine nuts, they are a bargain. I had never thought of using almonds in pesto and was thrilled with the results. I'm looking forward to enjoying this new pesto in other ways besides in this pie and by the spoonful. (If desired, you can omit the almonds or substitute pine nuts in the recipe.) The tomatoes are my own addition. They give the pesto a whole new flavor while making it thin enough so as to be spreadable. You can save time by making the pesto a day or two ahead. Or you can make the entire pie ahead of time and simply reheat it in the oven. Individual leftover slices can be wrapped in foil and reheated in the oven or toaster oven, although it isn't too bad cold either. If you are very, very gentle, you can heat a slice in the microwave.

What I like most about this recipe is that although the tomatoes are cooked, they manage to maintain their fresh-from-the-garden taste. Yes, I've gone from
Summer In A Bowl to summer in a crust. Be sure to use the meaty plum/roma tomatoes, as other varieties are too juicy. As always, I urge you to seek out the best locally produced and organic ingredients you can find. They will make all the difference in this (and any) recipe. Enjoy.


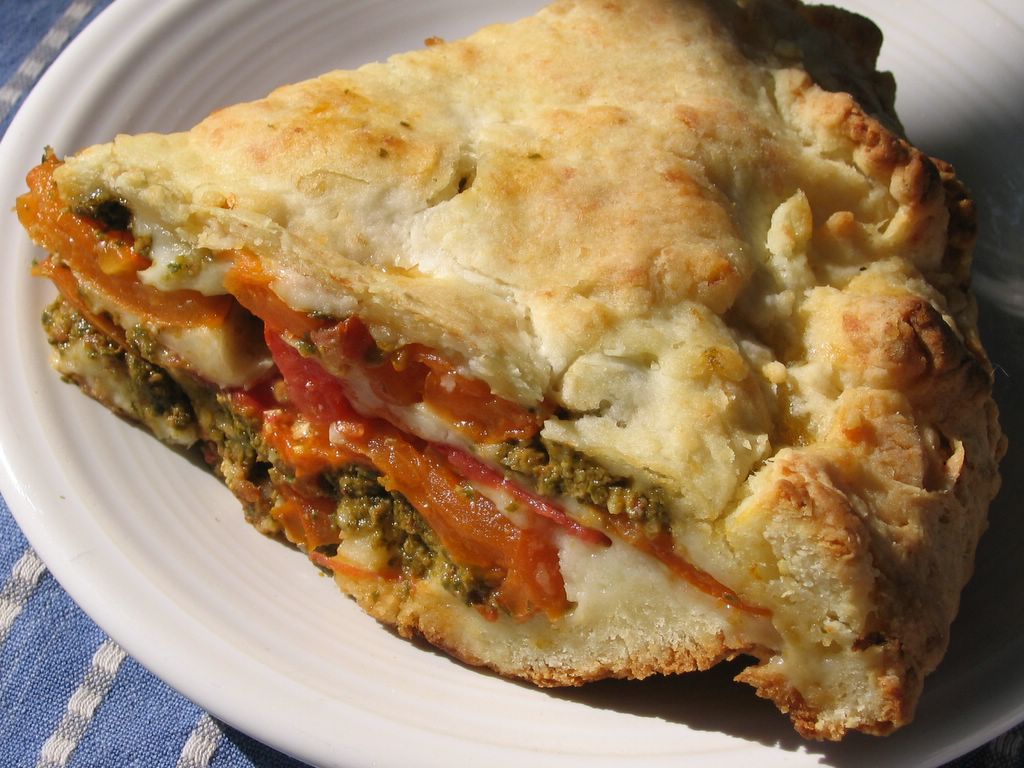
Farmgirl's Savory Tomato Pesto Pie
Makes One 9-Inch Pie

For The Pesto:
Makes about 1-1/2 cups (you will need 1 cup)
1/2 cup (about 2-1/2 ounces) raw whole almonds (optional)
4 ounces fresh basil leaves (about 4 cups packed, but it's best if you weigh it)
6 Tablespoons extra-virgin olive oil
6 cloves of garlic
4 Tablespoons finely grated pecorino romano cheese
10 ounces tomatoes (about 3 smallish ones), any kind, quartered
1/2 teaspoon nice salt

Spread the almonds on a baking sheet or piece of aluminum foil and place them in a 350 degree oven or toaster oven for 8 to 10 minutes. Mix all ingredients, including almonds, in a food processor until thoroughly combined. (You could probably also use a blender--or a gigantic mortar and pestle if you are trying to build up your arm muscles.) Add more salt to taste if necessary. Heat the oven to 375 degrees F.

For The Crust:
2 cups all-purpose flour (I use
Heartland Mill organic)
4 teaspoons baking powder (make sure it's fresh!) **
1 teaspoon salt
1/2 cup (1 stick/ 4 ounces) cold butter
1 cup (about 2-1/2 ounces) finely grated pecorino romano (or other hard cheese)
3/4 cup milk

Combine the flour, baking powder, and salt in a medium bowl. Mix in the butter using a pastry blender, fork, or your fingers until the largest pieces are pea-size. Stir in the pecorino romano. Pour in the milk and use a fork to gently form a soft dough. Do not overmix. Divide the dough in two pieces, making one slightly larger than the other.

On a generously floured surface, use a rolling pin to gently roll out the larger piece of dough into a circle about 12 inches across, rolling from the center outward. Sprinkle dough with flour if sticky. Gently fold the dough in half and transfer into a 9-inch pie pan. If the dough tears, simply press it back together with your fingers. Roll out the remaining piece of dough into a slightly smaller circle and set aside (or wait until you have the filling in the pan and then roll it out).

Assembling The Pie:
1 cup pesto, divided
2-1/2 pounds of the best plum tomatoes you can find, sliced lengthwise into 4 or 5 slices each (I used San Marzanos & Golden Romas to add extra color as well as more flavor)
8 ounces mozzarella, grated or thinly sliced (I used fresh which can't be grated)
1/2 cup (about 1-1/4 ounces) finely grated pecorino romano (or other hard cheese)

Using a spoon, spread 1/2 cup of pesto over the bottom layer of dough in the pie pan. Layer about half of the tomatoes over the pesto. Cover the tomatoes with about 2/3 of the mozzarella. Layer on the rest of the tomatoes (you may not need them all to fill the pan). Carefully spread the remaining 1/2 cup of pesto over the tomatoes. Cover with the remaining mozzarella and the pecorino romano.

Roll out the second piece of dough if you haven't already, and carefully place it over the pie. Fold the edge of the bottom piece over the top piece and press together to seal. Use your fingers to make a crimped design around the edge. If any dough falls apart, simply press it back together with your fingers. Don't worry if it isn't perfect. The handmade look has much more charm. Cut four slits in the top of the pie for steam to escape. Bake at 375 degrees F in the center of the oven until the crust is golden brown, about 40 minutes. Cover the edge with foil if it starts to brown too quickly.

Let cool on a wire rack for at least 15 minutes before serving. Crust edges may be sampled much sooner. (As with nearly any fruit pie, if you cut into it while it is still warm, some juice will seep out. If you plan to store any leftover pie right in the pan, simply drain off the juice so the bottom crust doesn't become soggy.) Or cool pie completely, cover, and refrigerate.

This pie also freezes beautifully. I wrapped a hunk in foil then put it in a zipper freezer bag and tossed it into the freezer. I defrosted the whole piece overnight in the refrigerator, then cut it in half and reheated the slices in my handy little
DeLonghi Convection Oven for 15-20 minutes at 325 degrees, each on a fresh piece of foil and covered lightly with the foil so the tops wouldn't brown too quickly. The bottom crust was a bit soggy, but I'm pretty sure that was because I let the pie sit in the fridge three days before deciding to freeze it. Otherwise it looked and tasted as if it had just come out of the oven the first time. Hint: If you plan to freeze the entire pie and don't want to freeze it in the pan, use a disposable pie pan or line your pan with a piece of heavy duty foil so you can simply lift the whole cooled pie out of the pan.

Other Ideas:
--Use
arugula pesto or spinach pesto instead of basil pesto.
--Omit the pecorino romano from the crust, and use cilantro pesto (thinned with salsa, if desired) and jalapeno jack cheese in place of the basil pesto and mozzarella.

**Fresh baking powder is essential to the success of any recipe that calls for it. If your baking powder is more than a couple of months old, toss it out and buy a new container. It will cost you about two dollars, and your homemade baked goods are surely worth much more than that. I buy Rumford brand because it does not contain aluminum and consistently gives me good results.


Entire Contents Copyright 2006 FarmgirlFare.com.

Monday, September 25, 2006

Recipe: How To Make Homemade Pizza Sauce Using Fresh Tomatoes

Easy Cooking with Less Fuss, More Flavor

You made the pizza dough, why not make the sauce, too?

Homemade pizza is one of my favorite things to eat. (Click here for my easy pizza dough recipe.) Throughout most of the year, I make what I call Feels Like Cheating Pizza Sauce. It really is almost too easy. Of course you can't take into consideration all the hard garden labor you put into it months earlier.

First I defrost a plastic freezer container of tomatoes (usually San Marzano or Yellow Plum that have been blanched, peeled, and seeded) that I put up during the previous summer. Then I take a pair of kitchen scissors and snip the whole tomatoes into pieces before pouring the contents (minus some of the liquid) into a heavy saucepan.

I turn the burner on medium, toss in a couple of frozen pesto cubes (also put up the previous summer—you just scoop fresh pesto into ice cube trays and once frozen, transfer them to a zipper freezer bag), then head out to the garden or greenhouse for a handful of fresh oregano. This gets de-stemmed, chopped up, and stirred into the pot. Dried oregano can be used in a pinch.

Bring it all to a boil, then simmer until the desired consistency is reached (I like mine very thick). For years it was done at this point.

But then I bought a KitchenAid hand blander (one of my most useful kitchen purchases ever), and while I still adore the chunky version, I was thrilled to discover the joys of having a smoother, more easily spreadable pizza sauce.

Note Of Caution: Blending up a small amount of tomato sauce is a bit more, um, dangerous—think splashing hot tomato flying about the kitchen—than burying the hand blender in an entire pot of soup, which is probably why they call them immersion blenders.

A regular, counter top blender or a food processor would be a safer option for a less reckless and lazy person.

During tomato season, there's simply no reason to use up your stash of preserved tomatoes when you get a hankering for a homemade pizza—unless you're looking at an almost frighteningly bountiful harvest in the garden and are frantically trying to gobble up everything left over from last year.

Making my fresh pizza sauce takes a little more work than the Feels Like Cheating version, but not much. Chopping the fresh basil and garlic is required, but blanching and peeling the tomatoes is not. That is definitely not my idea of less fuss.

If you chop the tomatoes into fairly small chunks, you'll probably never notice the bits of skin buried under the toppings. And besides, the skin is probably good for you. If you happen to have some pesto handy, you could use a couple of dollops in place of the olive oil, garlic, and basil and save yourself some steps.

The nice thing about this sauce is that you can make it with any kind of tomatoes. Pink, orange, plum, salad, even little cherry tomatoes—it matters not one bit. This is also a great way to use up all of those end of the season 'seconds' hanging around the kitchen and languishing on the vines; the ones that aren't pretty enough to toss into salads or slice up for burgers.

Soft spots, cracks, wrinkles, bug bites, funny little bumps on the skin from who knows what—just cut them off and toss them in the compost bin or give them to the chickens.

A few months ago I read about a farmer who feeds his chickens marigold flowers so that the yolks of their eggs will be very orange. It might be my imagination, but—before the chickens went into non-laying mode a couple of weeks ago—their yolks did seem to be darker after a diet heavy on tomatoes.

Of course perfect tomato specimens can be used as well—and none of the ingredients have to come from your own garden. I'm sure the finished sauce would freeze just fine, though I haven't actually tried it.


Less Fuss, More Flavor Fresh Tomato Pizza Sauce
Amounts are entirely a matter of taste

Some nice extra-virgin olive oil
Fresh garlic, coarsely chopped with some nice salt and allowed to sit 10 minutes if possible, so the beneficial compounds have time to mix with the air and become more available
Plenty of vine-ripened, garden fresh tomatoes (preferably heirloom & organically grown), cut into chunks
Fresh basil (at least twice as much as you think seems like the right amount—I measure fresh basil by the handful)
Fresh oregano (more than you're about to put in)

Heat the olive oil in a heavy saucepan over medium heat, then add the garlic and cook for 1 to 2 minutes, stirring constantly. Do not allow the garlic to brown.

Add the tomatoes, basil, and oregano and bring to a boil. Reduce the heat and simmer, stirring occasionally, until most of the liquid cooks out. Cooking time will depend on the juiciness of the tomatoes.

When there is still some liquid left in the pan, carefully purée the sauce using a blender, immersion blender, or food processor.

If you prefer a smoother sauce with fewer seeds, you can put your cooked sauce through a food mill instead. After lusting after one for years, I finally bought an Oxo Good Grips food mill and love it. It's great for making Homemade Vegetable Tomato Juice and makes the best homemade applesauce.

Bring the sauce back to a boil and continue simmering until desired consistency. Let cool, then spread on pizza dough.

If you're like me and never remember to make the sauce ahead of time, you can transfer it into a heat proof bowl and stick it in the freezer for a little while. Just don't spill it, because it will immediate freeze to whatever it falls on and is practically impossible to clean up.

And there you have it. Homemade pizza sauce so simple, yet so delicious, you'll wonder why you never thought to cook some up before.

Of course, if you're so inclined, you can embellish this basic recipe by adding a personal touch. Perhaps some chopped onion, diced sweet red pepper, grated carrot for sweetness, or a few dried mushrooms. (Pizza sauce is an excellent vehicle for hiding vegetables from finicky eaters.) You could even stir in some chopped fresh mushrooms after you've blended it up.

Just be sure to make enough pizza so that you end up with plenty of leftovers.

My other favorite ways to use fresh tomatoes are here:
Fiesta Cottage Cheese Veggie Dip (and going on factory tours)

Still hungry? You'll find links to all my sweet and savory Less Fuss, More Flavor recipes in the Farmgirl Fare Recipe Index.

Growing your own tomatoes? You might find these posts helpful:
9/4/08: How To Freeze Tomatoes the Really Easy Way (and Why I Don't Do Much Canning Anymore) (lots of great comments from other gardeners here)

© FarmgirlFare.com, the vine-ripened foodie farm blog where Farmgirl Susan shares recipes, stories, & photos from her crazy country life on 240 remote Missouri acres.

Thursday, September 21, 2006

What's Growin' On 9/21/06: How To Keep Your Basil Plants Growing Into Fall

Don't Cut Your Basil Season Short


Volunteer Basil On August 8th
(Those bamboo stakes form a teepee for some pole beans that never popped up.)


Begging To Be Picked Just Over A Month Later

The smaller plants were rootbound seedlings I transplanted shortly after taking the top photo. I find it interesting that the volunteers are so much bigger and healthier. To me, there is nothing better in the garden than a happy volunteer, and basil always seems willing to make a reappearance in mine. Growing basil from seed is easy, and growing volunteers is absolutely effortless, so don't forget to allow some of your plants to bloom and go to seed each year. An added benefit is that the pollinators will love you.


Don't Worry, It'll Grow Back

Realization Of The Day:
I don't think I've ever pulled a live basil plant out of the ground. There's simply no reason to.

About 14 or 15 years ago, when I was still living in northern California, I came upon a vendor at a farmer's market who was selling nothing but basil. He had a long table set up, and on it were several dozen brown paper bags, each holding one entire basil plant that had been uprooted only hours before. They were $1 each, and I remember thinking this guy was brilliant. (And still do.)

But even when I was selling fresh basil to an upscale restaurant a few years back, I still didn't pull up the entire plants when the basil was ready to be picked. Instead I simply snipped off most of the stems and left the stubs in the ground. The plants grew back, and this way I was able to get two or three good harvests over a period of many weeks from just one planting.


So even now, with that crisp feel of autumn in the air, I saw no reason to declare an end to basil season when I did a major harvest the other day--despite the fact that temperatures for the next two nights were predicted to be around 40 degrees F (and heat loving basil will turn black and croak well above freezing). The snipped plants are healthy and happy, and they survived the cold snap just fine tucked under a light blanket. As you can see, I left plenty of leaves on them so they didn't go into some kind of naked shock. Given a few more temperate weeks, these plants should fill out and reward me with more beautiful bounty. And since we're supposed to be having days in the 70s for at least the next week, I think the probability of more basil is very high.

Worst comes to worst? An arctic blast swoops in and kills off my crop. In the meantime, I'm putting in no extra effort except the ten seconds it took to cover and uncover the plants. It may not be a sure thing (because nothing in the garden ever is), but it seems foolish not to make this basil bet.

Pining For Some Pesto Now? Click here for my new favorite recipe.

Coming Up:
Another Less Fuss, More Flavor recipe—Fresh Tomato Pizza Sauce.

NOTE: This is my entry for Weekend Herb Blogging #51, a deliciously informative event based at Kalyn's Kitchen. Food and garden bloggers from around the world participate, and you never know what interesting new edibles you'll discover each Monday in the roundup. Check out the WHB rules if you'd like to join in the fun. And click here to read about next week's Special WHB Event.

Monday, September 18, 2006

What's Growin' On: 9/18/06


Realization Of The Day:
My glorious garden mint is being seriously underutilized in the kitchen. Any suggestions?

Weather, Please Make Up Your Mind!
Saturday we had a record breaking 88 degrees F, and yet tonight and tomorrow night it's supposed to dip down to 40F. These between-season fluctuations always discobulate the heck out of me. I can only wonder what the plants think.

I've harvested most of the basil except for the half dozen plants in the greenhouse, and I'll cover the giant bushes outside that are going to seed as best I can. I was thrilled by all the volunteer basil I ended up with this year--I'd hate to have an early cold snap kill off the plants before the seeds had a chance to mature. I'll be making another big batch of pesto tonight using my new recipe. I plan to put it up in its own little post, but for now you can find it here--it's the same pesto I used in my popular Savory Tomato Pesto Pie.

I took the large shade tarp off the greenhouse last week, so now the scraggly herbs on the north side that were painfully stretching toward what little sun they could reach are getting much more light. They should be upright and smiling soon.

Outside I still need to pick a bunch of Aconcagua sweet peppers that are earmarked for the freezer. There are still various tomatoes are here and there, but pickings are getting slim. I know I complained a bit about a tomato glut a while back, but that was because the majority of slicing/salad tomatoes, like the VFNs and the Arkansas Travelers (as opposed to the plum tomatoes I freeze for use during the winter and spring), all seemed to ripen at once. I picked my first tomato way back on July 9th (and a lovely birthday present it was), but suddenly it seems like this year's tomato season only lasted a couple of weeks.

I'll also be tossing old sheets over the squash plants and of course the late planting of Straight 'N' Narrow beans that are finally putting on some bounty--neither of them will like these cold temps. Whatever sheets are left will go over the tomato plants that are still producing, along with anything else that is a cold weather wimp. All the new fall green seedlings should be just fine. Some, like the Nero di Toscana Cat Cabbage, taste even better after a frost (not that I'm hoping for a frost anytime soon--not yet, please!)

Gee, it sounds like I need to get my tail out to the garden and get busy.

Out Of My Inbox:
A is For Apple, C Is For Cookbook, F Is For Foodie--and Free!

Belly DuJour, a free twice-weekly email newsletter, is "the definitive insider source for epicureans, gourmands, foodies, gastronomes, bon vivants, hedonists, gluttons, and all-around eating enthusiasts seeking delectable specialty foods."

The fortunate foodies at Belly DuJour act as our "own personal tasters and forage through the country’s gourmet offerings and report back with bite-sized reviews on the ultimate farmstead cheeses, single-origin chocolates, aged vinegars, handcrafted sausages, wild mushrooms, artisanal ice creams, and other mouthwatering delicacies—all of which can be ordered online or found at your local market. Additionally, we focus on the unique people, farms, restaurants, and companies behind these products—the artisans, farmers, chefs, and dedicated producers who labor to bring deliciousness to our collective table." How cool is that?

Their latest Bite is called "Apples Of Our Eye" and offers everything from interesting apple facts (I had no idea that apples give off a gas that ripens fruits and harms leafy greens and cruciferous vegetables) to a link to a free downloadable cookbook by Chef/Owner Scott Carsberg of Lampreia Restaurant ("for those who want simple, seasonal cuisine") in Seattle, Washington.

All About Apples is the first cookbook from TastingMenu.com Publishing. It includes 100 pages and 291 beautiful photos. The book comes in Adobe's Acrobat (.pdf) format and is readable on almost any home computer (Windows and Mac) using Adobe's Reader software (which you can download here). So click here to take a look and decide if you would like this book!

Saturday, September 16, 2006

What's Growin' On: 9/16/06


Sedum Autumn Joy

Realization Of The Day:
After several minutes of closely scrutinizing the mysterious squash plants in the garden this morning, I have changed my mind about them once again. Yep, less than twenty four hours after writing about them. I saw tendrils. I saw leaves nearly 12 inches across. I am now thinking gourd. I am also thinking that I need a break from these blasted garden mysteries (oh yes, there's still more than one squash mystery to solve), so I am going to spend the rest of the day admiring something that I can positively identify instead--my Sedum Autumn Joy. (And if that isn't what it really is, please don't tell me until tomorrow.)

Realization #2:
Rats. I just remembered the pot of Sedum Autumn Joy has a mystery plant growing alongside it. What is it with me and purchased plants? I almost never buy them, and when I do, they all come with weird companions. There was the ajuga that arrived with the lovely pink flowering unidentified perennials, the strawberry plant that looked very wrong and turned out to be (thanks to all of your help) a dreaded wild violet (which, I just realized, is still in the strawberry bed, forgotten once it became obliterated by weeds), and then the Sedum sidekick. Oh well, who am I to knock free plants--even if they are weird.

Out Of My Inbox: Discounted Daylilies
Gardens Alive!, a company that sells "environmentally friendly products that work" (you can read what I recently wrote about them here--just scroll down), is offering a special "Winner's Circle" collection of 10 daylilies for only $19.95 (which is 68% off the regular price). They say that "daylilies are one of the easiest to grow of all hardy flowers. Plant them once-that’s all there is to it. They grow with little care… reproduce annually… are immune to pests and diseases… yet they bloom with spectacular beauty week after week, year after year." Click here to read descriptions of each of the daylilies in the collection or to place an order. The offer is good through September 28th, or until supplies last. (Note: if you do decide to order them, you might need to enter Offer Keycode: 143025 in the keycode box in your online shopping cart.)

We actually have a few ancient daylilies in the yard, and I can attest to the fact that they do indeed grow with little care (and that they can miraculously survive years of being ravaged by moles, mole-digging dogs, ravenous baby lambs, and a Lawn Mowing Guy who doesn't differentiate between grass and everything else in the vicinity). I don't think I have the courage to order an entire collection of plants right now, though. I can only imagine what else might show up in the box with them.

Friday, September 15, 2006

What's Growin' On: 9/15/06


They Look Like Squash Plants


But Not Like Any Squash Plants I Can Recall Ever Seeing

Realization Of The Day:
I think 2006 is going to go down in history as (besides The Year Of Cary Laying Waste To The Garden) The Year Of Mysterious Plants. Looks like I've got yet another one.

I recently mentioned that some volunteer cucumber plants were coming up in one of the newly planted raised beds the dogs decided to dig up and destroy (obviously for my own--but unknown--good, as Finny Knits, who so totally takes the animal's side in these matters, has assured me). Then I amended my statement because the little seedlings were beginning to look like squash plants rather than cucumbers (hey, a lot of those first leaves look alike). No problem. I love squash, and if you've been reading about my garden for very long, you know that there is a dire (and really pathetic) shortage of it here.

But now I'm just (once again) a teensy bit worried. These squash plants are very, very happy and are practically growing by the hour. They're surviving nights around 50F just fine, and I haven't seen a single squash bug on them! All good news, yes. The only thing is, well, they look weird. Really weird. As in, I don't know if I can handle another mysterious plant in the garden this year weird. Of course if the weather continues to cool down at night, I may not have to worry about it as they will self-destruct. In the meantime, a proper identification sure would be nice.

A few years ago I did successfully grow some lemon squash (which I used--along with my faithful Aconcagua peppers--to make my Simple Summer Harvest Soup, as well as the Autumn Version), and although I don't remember exactly what the plants looked like, they may have resembled these, with the flower buds popping out all the way up the stalks. I just came back in from a very close inspection and did discover the teeniest, tiniest yellow squash you've ever seen on one of the plants, which could possibly someday turn into a full grown lemon squash. At least right now it's the correct shape.

The thing is, though, that the lemon squash from a couple of years ago grew in a raised bed all the way on the other side of the garden. And even if, say, some seeds ended up in the compost bin, why would they suddenly decide to sprout now? (I didn't recently spread any new compost in this bed.)

So this brings me back to the unlikely explanation I made in a previos post--that the dogs felt so bad about digging up all my newly sprouted fall greens that they planted some squash for me instead. Now I am thinking this may not have been as preposterous as it seemed at the time. Perhaps the seeds were actually hiding several inches down in the soil, and only the canine excavation brought them up to sprouting level?

It's the only thing I can come up with at the moment. But you can be sure I'll be watching these plants closely for any signs of suddenly transforming into something else entirely--or, more hopefully, putting forth some edible bounty. Squash, cucumbers, whatever. As long as I can eat it, I won't complain. Of course it is always nice to know what you're eating.

Miscellaneous: Seeds (that I actually planted) are popping up all over!
--About half of the Oriental Greens seeds I sowed on September 4th have sprouted already.
--The beet and chard seeds I planted in the spots where the dogs had obliterated the original plantings are also poking out.
--Various stray seedlings that escaped dog destruction are doing well: a few Nero di Toscana (or Cat) Cabbage, a few Red Russian Kale, and a surprising number of rapidly growing Escarole plants.
--Lots of tiny lettuce seedlings are slowly covering the mini-greenhouse bed. But considering I literally sowed about 5,000 seeds, I was expecting more of a showing than what's come up so far. And of course I have no idea what varieties sprouted and what didn't since I raked them all together when I sowed them. At this point, though, I'll happily munch on any lettuce that will grow!

From Garden To Table:
--I did recently harvest three of the Summer Straightneck Squash (that were supposed to be Golden Zucchini) and cooked them up in my Less Fuss, More Flavor manner by simply slicing them into rounds, sauteing them in some nice olive oil, and flavoring them with nothing more than a sprinkling of salt and pepper. Delish! I think there are a few more babies out on the vines, and I am looking forward to hopefully harvesting them soon. No sign of any actual zucchini on any of the palnts--golden or black.
--I am thrilled to report that my salad bowl is once again full of the dark, tasty, incredibly good-for-you greens that I love so much: baby Nero Cat Cabbage, baby Red Russian Kale, baby Purple Kohlrabi leaves, Escarole, Yellow Chard (from the greenhouse), baby Arugula (greenhouse), and baby beet greens (though some are actually red). And in a week or so, some of those Oriental Greens should be big enough to start sampling.

I am not, however, thrilled to report that yesterday I spotted two large deer ambling toward the garden at five o'clock sharp--dinner time! I spied them through the back window and could practically see the cartoon bubbles floating above their heads: "Hey look! She planted fall greens!" and "Oooh, I love them when they're so young and tender!"

I grabbed my camera (I know, I know, I should have grabbed the gun) and--smart and stealthy farmgirl that I am--sneaked out the front door and then slinked around the house, camera on, ready to shoot. Damn! Spotted! They casually bounded away, flashing me with their big white tails. When I later reported the incident to Joe, I told him that I'd been this close to having a clear shot before they spotted me and took off.

"They can see you moving inside the house, you know."

"Well, if that's true, they don't seem to be scared of me when I'm in the house. They didn't run away until I was outside."

"That's because they know that almost nobody will shoot at them through a closed window."

Catching Up:
I'm still behind responding to your wonderful comments, questions, and emails. Please bear with me, and thanks for your patience. I'd start catching up right now, but it's well past 5pm, and I think I'd better go see if anyone is outside munching on my dinner. I'm sure you understand.

Tuesday, September 12, 2006

What's Growin' On: 9/12/06


Realization Of The Day:
After pretty much ignoring them for a couple of months (except to toss new stuff in of course), it always feels good to get the compost bins in order--especially when you discover a lot more finished compost than you thought there was. (Click here for a lighthearted look at my first venture into the compost bin, as well as several sources for helpful information about composting.)

Realization #2:
I am so totally out of shoveling shape.

Out Of My Inbox:
--Even though parts of my garden are still in full swing, it's time to start thinking about fall clean-up and getting things ready for winter. The folks at High Mowing Organic Seeds in Vermont have already had their first frost, and their latest online newsletter includes two timely articles--End of Season Management: An Ounce of Prevention by Vern Grubinger, Vegetable and Berry Specialist, University of Vermont Extension and Planning a Winter Vegetable Garden by David Kopsell, UNH Cooperative Extension Vegetable Specialist. Click here to visit their Web Only Specials page.

--My favorite Pinetree Garden Seeds in Maine is having a Fall Clean-Up Sale.

--And on a completely non garden- but food-related subject (that I couldn't resist mentioning)--Teo at Belly Dujour sent me the following note:

"As a lover/blogger of food, I thought you'd get a kick out of a video we just posted that catalogues the Minnesota State Fair’s famed food-on-a-stick tradition. We’ve captured all the fair’s foods on a stick—from corn dogs and deep-fried Twinkies to chocolate-covered cheesecake and spaghetti and meatballs. Check it out if you've got the time, it's hysterical."

I have a lot of trouble watching videos with my dial-up connection, but I'm going to have to figure out a way to see this one. And now I think I have a sneaking suspicion why my shepherdgirl friend Katherine at Apifera Farm says the Minnesota State Fair beats the Oregon State Fair ten to one. And speaking of Katherine, I've just found out that Little Buttercup needs a home. So, if you are a city dweller with a yearning for a cow, here's your chance. No manure, no annual vaccinations, no flies.

Green Tomato Glut? I'd Relish The Situation!
I know that some of you are already picking the last green tomatoes in your garden before cooler weather hits. While they will gradually turn that summer red (possibly allowing you to indulge in homegrown tomatoes on Thanksgiving--or even Christmas), they won't have nearly as much flavor than if they'd ripened on the vine in the sun. So if you're looking for something interesting to do with your green tomatoes, you might try whipping up a batch of my Green Tomato Relish. This easy recipe (that I created several years ago for Kitchen Gardener magazine) is unlike any green tomato relish you've ever tasted--it contains no sugar (or raisins or spices) and is really more like a salsa. Click here to check it out. And you don't have to go to the trouble of canning it, as it will keep just fine in the fridge for several weeks.

From Garden To Table:
Last night we had an amazing fresh from the farm Less Fuss, More Flavor dinner:
--Roasted leg of lamb smothered with a thick layer of homegrown garlic and herbs
--The first Straight 'N' Narrow beans from my late planting, steamed until crisp-tender and dressed with only a sprinkling of salt and a touch of butter
--The first red potatoes from my experimental planting (which appears to have been a huge success--and which I will write more about another time), boiled, dashed with salt and pepper and smothered in butter
--Warm homemade rolls and a glass of red wine.

For me, this is what it's all about. The hard work, the struggling, the aching body parts, the questioning of your sanity, the ongoing battles over garden bounty, the general craziness of life on the farm . . . All is forgotten when you sit down to a dinner like the one we so gratefully enjoyed last night.

Saturday, September 09, 2006

9/9/06 Garden Journal How To: Growing Hardneck Garlic


I can do better than this—but it's gonna cost me.


Realization Of The Day:
Never in my wildest dreams did I think I would ever spend $77.00 on five pounds of garlic.


But of course this is no ordinary garlic. This is Extra Special Super Duper Fancy Schmancy Punishment Garlic. Because if you somehow never get around to planting your garlic one fall, when summer shows up you will be hit full force by the frightening result of your laziness—there is not only no garlic to eat, but there isn't any to plant the following autumn either.


If you've been saving and planting your own garlic for ten years (and improving it along the way), this is a really big bummer. Then there's the shock to your already distressed gardener's system that comes when you start shopping around for replacement stock, knowing that you will need about 200 cloves. Garlic prices are high. Very high.


So if you just cannot bear to fork over $17 a pound (plus several more dollars a pound for shipping), the only alternative is to buy some very nice tasting organic garlic from the natural foods store and plant that. Which is what I did last fall. And the photo above is what I ended up with. Actually, this is what I ended up with. I know it doesn't look all that bad, but compared to what I was expecting, my Gardening On The Cheap way out was a dismal failure.


Part of the reason is because I had been growing hard-necked (Rocambole) garlic, and most commercial garlic sold (including what I planted) is the soft-necked type. Rocambole garlic produces larger cloves, and the clove covering tends to more easily come free from the clove, making it much more fun to deal with in the kitchen.

Hard-necked garlic also sends up flower stocks in the spring that will steal energy away from the growing bulbs if you don't snip them off. Once snipped, they become garlic scapes, which seem to be all the rage with foodies and food bloggers these days.
 Who knew? For years I tossed them around the garden as a natural pest deterrent or fed them to the chickens.

While some people claim that garlic scapes have a pleasant, very mild garlic flavor, I've found the opposite to be true. My homegrown garlic scapes are strong and fiery—and I love the taste of garlic. Even the donkeys don't like them. On the other hand, spring green garlic, another chic item these days, is wonderful, especially when cooked in some butter and tossed with pasta.


Now that it's almost time to plant garlic again, I figured I'd better stop ignoring the "Hunt down some reasonably priced but superb planting garlic" note that has been on my Never Ending To Do List since, oh, late last spring. One thing I quickly discovered while doing a little online research is that by now many suppliers have been sold out of garlic for months. Oops.


Not to fear, though. Sometimes even lazy, scatterbrained gardeners are given the gift of Being There At The Right Time (and being coherent enough to realize it). For me, 'there' was at my computer this morning when the September e-newsletter from Johhny's Selected Seeds in Maine arrived. And the coherent part was when I remembered that I'd been meaning to see what kinds of garlic Johnny's had to offer and immediately opened up the newsletter.


After reading that some varieties have indeed already sold out, and that the rest typically will, too, I followed Chairman Rob Johnston Jr.'s advice to "get your garlic plans settled and your order to us ASAP." I hopped right over to their website and managed to nab five pounds of organically grown German Extra-Hardy Garlic, which I was thrilled to learn is their "easiest garlic to grow." This is what else Johnny's has to say about it:


Among the most winter-hardy garlic varieties. Very large bulbs with 4-5 large cloves. The outside skin is very white and the skin covering the cloves is dark red. The New York farmer who grows this stock for Johnny's says, 'Out of over 200 sources of garlic that I have had in my trials over the past 15 years, I believe that this is the finest garlic that I have had on the farm.' A vigorous-growing garlic with long roots, which gives it the ability to winter over without heaving out of the ground. Flavor is very good and stores well.


Sold! I readily forked over my credit card number. Okay, I hemmed and hawed and dawdled around for an hour or two before finally explaining my dilemma to Joe, who immediately told me to "Get back online and buy some before they run out!"


Realization #2:
Today's realization is also a rationalization. I finally convinced myself that this seemingly outrageous outlay of cash for a few pounds of garlic really is worth it—because you'll never end up with the best if you start out with anything less.


And if you figure that this is hopefully the last garlic I will ever have to buy again in my life, it's definitely a worthwhile investment. Now all I have to do is make sure I never, ever forget to plant garlic in the fall again—but I have a feeling that won't happen anytime in the near future.


I'm just happy that I finally took the great garlic plunge—and even managed to find some wonderful sounding organically grown garlic for less than $17 a pound plus shipping. (Although I did find one possible explanation for why gourmet garlic prices are so high. Click here and scroll down to "How Did All These Garlics Get Here?")


Now while I obviously will not be able to report on how this garlic performed in my garden until next year, I can say that I have purchased all kinds of seeds from Johnny's over the years and have never been disappointed. They're a reputable company offering quality products that all come with 100% satisfaction guarantee. They are also in the process of becoming employee owned.


If you're interested in planting some really good garlic this year, you might give Johnny's a try. You can purchase as little as 3 heads at a time, and other varieties are still available. If you live in a warmer climate, you'll want to plant a soft-necked variety, as Rocambole garlic requires a cold winter and a cool spring. You can also call Johnny's toll-free number (found on the website) for help deciding what variety would do best in your garden. Each garlic clove that you plant will (hopefully) turn into one head of garlic. When figuring out how much garlic you'll need to buy, don't forget to add in enough to save and plant next year.


Another place to look for interesting garlic to plant is at your local farmer's market. You may be able to find several varieties, and if you can't decide which one(s) you'd like to grow, you could buy a few heads and have yourself a little taste test. Another advantage to purchasing locally grown garlic is that it should do well in your climate. And of course you can always ask the farmer for growing and planting tips!


For information on everything from preparing your soil for planting to harvesting and curing your garlic, visit this page on the Gourmet Garlic Gardens website. And click here for a close-up look at 21 different cultivars of garlic.


Minding The Moonsigns:
I usually plant my garlic in October, on a fertile day in the 3rd quarter, though last year I didn't get it into the ground until the end of November. As long as the ground isn't frozen, late planting isn't a problem.


Here are the upcoming "good" days to plant if you're minding the moonsigns. First and 2nd quarter days are best for starting seeds. Third quarter days are best for transplanting and starting things that grow underground such as garlic and potatoes and turnips. Some people treat the 4th quarter the same as the 3rd, and others consider it a bad time to do anything but weed and mulch. (Click here to learn more about this.)


--3rd Quarter Fertile Days: Monday September 11th & Tuesday September 12th
--4th Quarter Fertile Days: Saturday September 16th
--1st Quarter Fertile Days: Monday, Tuesday, & Wednesday September 25th, 26th & 27th
--2nd Quarter Fertile Days: Monday October 2nd, Thursday October 5th, & Friday October 6th
--3rd Quarter Fertile Days: Monday October 9th & Tuesday October 10th
--4th Quarter Fertile Days: Saturday October 14th, Friday October 20th & Saturday )ctober 21st
--1st Quarter Fertile Days: Monday October 23rd, Tuesday October 24th, & Saturday October 28th


© FarmgirlFare.com

Thursday, September 07, 2006

What's Growin' On: 9/7/06


Before


After

Realization Of The Day:
After spending five hours trying to (unsuccessfully) fix a computer problem in a tiny office that has started to feel like a claustrophobic cage, there is nothing better than heading into the garden armed with only a pair of gloves and your pent up frustration and accomplishing something so visible in less than an hour.

This bed is now seeded with all kinds of Oriental greens (left to right looking north):
--Chinese Celtuce (Baker Creek Heirloom Seeds, 2005): This is an interesting green I have successfully grown before in the spring. I can't find the description in the Baker Creek catalog and am thinking they didn't offer it in 2006. It used to be listed in the "Lettuce" section. (The rest of the seeds are in the "Oriental Greens" section.)
--Chinese Kale-Small Leaf Kailann (BC, 2005, $2.00): I have no idea if I've grown this before or not. The seed packet was open, but that doesn't mean much around here. Sounds interesting, though. "This is a delicious small-leafed form of this Asian green. Seed from Thailand.
--Michihli Cabbage (BC, 2005, $1.25): I don't remember exactly what this looks like, but I know I've grown it and liked it. "Big tall heads, widely grown in the Orient. Mild and tasty, very tender, great for stir-fry."
--Chinese Pak Choy (BC, 2006, $1.25): Pak Choy is a personal favorite. Not only is it tasty (fabulous in stir-fries), but I love the look and shape of the plants. "Long, white stems and dark green leaves; one of the most popular Chinese vegetables, used in many Chinese dishes."
--Welcome Choy Sum (BC, 2005): Can't find this one in the 2006 BC catalog either. All I know is I couldn't resist the name last year.
--Canton Bok Pak Choy (BC, 2006, $1.50): Now I know I haven't grown this one before because the catalog says "new!" (so helpful). "The typical Nai-Pe-Tsai type pak choy, semi-upright plant produces thick white stems and deep green leaves. Good for warm areas as it is heat-tolerant." Aha! That's why I bought it. I'm a sucker for anything that says it's heat tolerant.

I've never planted Oriental greens in the fall before, so this is going to be an interesting experiment. If I do have success, most of the young leaves will probably be tossed into salads. (I'll use pretty much any leafy green I can find in the garden to feed my salad habit.) When cooler temperatures hit (we're already getting down into the mid 50sF at night), I'll cover the bed with floating row cover.


Realization #2:
Lucky Buddy Bear is half English Shepherd and half Australian Shepherd. He lives to work. If there aren't any animals around who need herding or watching or tending to, he'll fearlessly guard your dirt. . .


For hours.

Attention Dog Lovers! This is Weekend Dog Blogging #51!
To see fun pup pics & discover yummy new food blogs, visit
Sweetnicks each Sunday night for the roundup. Care to see more canine candids? The Friday Ark boards everything from dogs to dragonflies.

Sunday, September 03, 2006

How to Grow Nero di Toscana Cabbage (aka Tuscan Kale, Cavalo Nero, Lacinato Kale, Dinosaur Kale) from Seed and What To Do with It


Realization Of The Day:
Nero di Toscana Cabbage is known around the world by several other names, including Black Palm Cabbage, Cavalo Nero, Black Kale, Tuscan Kale, Lacinato Kale, and Dinosaur Kale. But it really should be universally called Cat Cabbage because I swear this stuff has nine lives.

Regular readers know that I am entwined in a passionate love affair with Nero di Toscana Cabbage. It is easy to grow from seed and puts up with heat waves, cold snaps, long humid summers, with nary a complaint. But no matter how deep my feelings for it run, year in and year out, this delicious, easy to grow mainstay in my kitchen garden suffers through much more than its fair share of distress.