Showing posts with label onions. Show all posts

Thursday, March 11, 2010

Garden Journal 3/11/10: Growing Onions from Purchased Plants - Ordering and Planning


1015Y Texas SuperSweet onions harvested last June.

Realization of the Day:
Despite numerous failures and disappointments in the garden over the years, when it comes to buying seeds and plants I'm still a consummate optimist. I also have no self control. This can be a dangerous combination—and pricey, too.

Last spring was the first time I grew onions from purchased plants rather than onion sets, and despite the fact that many of them bloomed way too early (which means I ended up with some fairly small onions) I enjoyed some delicious success—and still ended up with bigger onions than I've ever grown from sets. (The flowering was most likely due to some wet and wacky spring weather, and I'm hoping to cover this problem in a future post). I wrote a little about last year's onion growing here and here.

For experiment's sake, in late February of 2009 I ordered a total of 10 bunches (approximately 60 plants per bunch) of 9 different varieties of onions (along with hundreds of leek plants—which was a whole other growing adventure I've been meaning to write about) from Dixondale Farms in Texas, the oldest and largest onion farm in the U.S.

I'm running a little later with my ordering and planting this year, but according to Dixondale's shipping schedule, March 9th was their suggested ship date for my area. I also ordered fewer plants and fewer varieties, sticking to the ones that did the best for me last year.

More below. . .

Thursday, October 08, 2009

Garden Journal 10/8/09: Growing Short Day Onion Varieties in Spring and Free Green Onions in Fall


Fresh Scallions in October? No Problem—and No Effort!

Realization of the Day:
This is perfect green onion growing weather!

I've mentioned before how I love it when my inefficiency in the garden ends up rewarding me with food—and it's happened again. Back in early March, I planted seven of the nine varieties of onion plants that I ordered from Dixondale Farms. You'll find my previous post about these onion plants here, in which I admitted that up until this year, I had no idea that the size of an onion bulb is dependent upon daylength and temperature, not the size or age of the plants.

Because southern Missouri is on the edge of Dixondale's 'which varieties are right for you' map, I went ahead and ordered all three types of onions that they offer—Long Day, Intermediate Day, and Short Day—just to see how they fared, and also because there were no open-pollinated varieties of Intermediate Day onions (which are perfect for Missouri) available and I didn't want to grow just hybrids (which are usually not allowed in my garden!).

I ordered three kinds of Short Day onions: 1015 Texas Super Sweet, White Bermuda, and Southern Belle Red. According to Dixondale's map, Missouri isn't technically in the Short Day growing area, but here's what their description says:

Short Day onions start the bulbing process when the day length reaches 10-12 hours. Since they are planted in the south during the winter or early spring months, they take approximately 110 days to mature. When planted in northern states in late spring, they mature in just 75 days, but produce smaller bulbs. The earlier you plant them, the larger they get.

My 1015Y Texas Super Sweets did well (I'll share photos and write more about them in a future post), and while the White Bermudas didn't get very big, the reason I tried them is because not only is this an heirloom variety that's been grown by Dixondale since 1898, but the description says it's 'great for green onions as it produces a nice, white, large scallion in just 30 days.'

Unfortunately the Southern Belle Reds (another open-pollinated variety) didn't make it into the ground until several weeks (maybe even more than a month—I apparently forgot to take notes) after the original planting (and the Candys never did get planted). They formed tiny bulbs which were soon obliterated by weeds and forgotten until the other day when I realized they were sprouting.

I now have a beautiful little patch of fresh green onions to enjoy as the rest of the garden winds down (the purple basil you can see in the photo above is still flourishing three and a half months after the first harvest). Thanks again to the dozens of you who responded to my request last year for your favorite ways to enjoy green onions.

I was telling a gardening friend the other day about my volunteer green onions, and he said that if you leave a mature onion bulb in the ground, it will eventually form a brand new onion. This makes sense and doesn't. I'm guessing the original onion (from which these fall green onions are sprouting) rots and then regrows a whole new bulb? I may just have to leave some of these Southern Belle Reds in the ground and find out.

This was my first year growing onions from purchased plants, and I'm very happy with the results—especially considering I grew my biggest onions ever despite our wacky, inhospitable-to-growing-onions (and leeks—but that's a whole other blog post) spring weather. A friend who lives nearby said she usually harvests big, beautiful onions and had a pitiful crop this year, so I'm hoping for even bigger bounty in 2010.

How did your onions do this year? Any favorite varieties, growing tips, amusing stories, or recipes to share?

Previous onion posts:
6/2/09: Harvesting Spring Onions Grown from Purchased Plants
6/7/08: What To Do with 125 Green Onions (Scallions)
6/7/08: Wanted: Your Recipes and Favorite Ways to Use Green Onions
6/12/05: Growing Onions In The Garden
3/16/06:
It's Time to Plant Onions!
4/4/06:
Operation Onion Complete!
4/26/06:
Companion Planting Beets & Lettuce with Onions

More ways to enjoy scallions and spring onions:
Sour Cream & Onion Dip
Savory Cheese & Scallion Scones
Fiesta Cottage Cheese Veggie Dip
Mexican Jumping Bean Slaw
Summer in a Bowl
Colors of Summer Salad
Healthy Swiss Chard Tuna Salad with Kalamata Olives
Swiss Chard Cabbage Salad with Garbanzo Beans and Cottage Cheese
Sprinkled on top of Hot Swiss Chard Artichoke Dip
Three Onion & Three Cheese Pizza

© Copyright 2009 FarmgirlFare.com, the rainy day foodie farm blog where the hillsides have started changing to yellows, reds, and browns, but the garden is coming up green.

Tuesday, June 02, 2009

Garden Journal 6/2/09:
Harvesting Spring Onions Grown from Purchased Plants


Just Picked Red Candy Apple Onions (and Topaz)

Realization of the Day:
These just might be the prettiest onions I've ever picked.

Back in February, on the recommendation of my friend and gardening hero, Cynthia Sandberg of Love Apple Farm, I ordered 400 leek plants and way too many onion plants (the more you buy, the better the price) from Dixondale Farms in Texas, the oldest and largest onion farm in the U.S.

I'm a little embarrassed to admit that up until this year, I had no idea that the size of an onion bulb is dependent upon daylength and temperature, not the size or age of the plants—which probably at least partly explains why over the years I've often ended up with disappointing (albeit tasty) little bulbs.

Because we're sitting right on the borders of Dixondale's 'which varieties are right for you' map, I went ahead and ordered all three types of onions that they offer—Long Day, Intermediate Day, and Short Day—just to see how they fared.

I figured if worst came to worst, some of the varieties wouldn't form bulbs, and we'd have a lot of green onions. Fortunately last year, dozens of you pitched in and offered up your favorite ways to enjoy green onions, so I wasn't worried about what to do with the excess.

As a rule, I don't grow any hybrids in my kitchen garden, but I made an exception with these onion plants—mostly because there were no heirloom Intermediate Day varieties available, which looked to be the most suitable variety for our southern Missouri location. Besides, I reminded myself, the onion sets I usually buy at the feed store are probably hybrid varieties, too. I ordered a total of nine different onion varieties, including some heirlooms.

Red Candy Apple is a new variety that is exclusive to Dixondale Farms, where they've been growing onions since 1913. Here's what they have to say about it:

We have been working on a red intermediate day hybrid that is as sweet as candy—so sweet that you can eat it like an apple. Compared to the Stockton Red, the Red Candy Apple offers improved sizing, better interior color and an intense dark red skin with very mild taste. This red onion's color moves inside as the bulb matures and the interior produces beautiful red rings after curing. Remarkably uniform, this new development also features a high percentage of single centers in its solid, firm bulbs.

In order to have enough onions so that I could harvest some of them during the growing season as green onions, when I planted them in early March I spaced them 2" inches apart instead of the usual 4" apart. But since I put in hundreds of plants, the green onions quickly got away from me. They're now what you'd call large spring onions, which I think are even better—at this size you can enjoy the green tops as well as the young bulbs.


One of My New Favorite Easy Salad Recipes

If you want to store your onions, pull them out of the ground and let them dry in the sun for two days—with the tops of one row of bulbs laid over the bulbs of another to prevent sunscald.

There was no need to dry this beautiful bunch of Red Candy Apples, though, as they went straight from the garden into a batch of this simple and refreshing Garbanzo Bean & Feta Salad (along with some fabulous cilantro—the first I've grown in years!). I haven't tried eating one of these onions like an apple, but they are definitely nice and sweet.

Are there onions in your garden this year? Any favorite varieties, growing tips, or recipes to share? Do tell!

Previous onion posts:
6/7/08: What To Do with 125 Green Onions (Scallions)
6/7/08: Wanted: Your Recipes and Favorite Ways to Use Green Onions
6/12/05: Growing Onions In The Garden
3/16/06:
It's Time to Plant Onions!
4/4/06:
Operation Onion Complete!
4/26/06:
Companion Planting Beets & Lettuce with Onions

More ways to enjoy scallions and spring onions:
Sour Cream & Onion Dip
Savory Cheese & Scallion Scones
Fiesta Cottage Cheese Veggie Dip
Mexican Jumping Bean Slaw
Summer in a Bowl
Colors of Summer Salad
Healthy Swiss Chard Tuna Salad with Kalamata Olives
Swiss Chard Cabbage Salad with Garbanzo Beans and Cottage Cheese
Sprinkled on top of Hot Swiss Chard Artichoke Dip
Three Onion & Three Cheese Pizza

© Copyright 2009 FarmgirlFare.com, the heatwave foodie farm blog where they don't always make it into the final photo, but if I'm taking pictures outdoors—or working in the garden—you can usually bet there's a cute four-footed critter somewhere underfoot.

Saturday, June 07, 2008

Garden Journal Entry 6/7/08: What To Do With 125 Scallions (Green Onions)?


Just picked bounty

I'm in a bit of a pickle. Actually it's more of an onion - scallions to be exact. I remembered to double plant my onion sets in the kitchen garden this year so I could thin them out and reap a bonus crop of spring scallions, and my plan worked beautifully.


This is definitely The Year of the Scallion

But despite my tossing extra scallions into pretty much everything except dessert for the last few days, I still have about 125 that really need to be harvested now.

There are a zillion recipes that include scallions - which are also called green onions - but these mild and tasty alliums never seem to be the star of the show. I thought I remembered seeing a delicious sounding recipe somewhere for stir-fried scallions (maybe with a teriyaki sauce?), but a quick online search resulted in lots of stir-fried things with scallions added to them, but no recipe for just the scallions themselves.

When I reported my scallion situation to my best foodie pal Beth (aka kitchenMage), she suggested I toss a pile of them with some olive oil and then slow roast them in the oven at about 325 degrees with some thinly sliced garlic. I haven't tried this yet, but I think the idea it has serious possiblities.


I think spring onions are so pretty

When green onions begin to form bulbs they're called spring onions, or sometimes salad onions. I have plenty of those, too.


Too close for comfort - but very tasty

So what would you do if you were faced with an enormous quantity of gorgeous scallions and spring onions? While I'd love to know any of your favorite ways to use them, I'm particularly interested in recipes that call for large quantities, like 10 - or even 40. You're welcome to leave recipe links from your own blog in the comments section. Thanks for the help!

Oh, and because I'm so desperate, I'm posting this plea on Farmgirl Fare as well, so if you're looking for even more fresh scallion ideas, check out the comments section of Wanted: Your Favorite Recipes & Ways to Use Green Onions.

Up next on Farmgirl Fare (well, probably after a Daily Dose of Cute or two) I'll be sharing my recipe for Swiss Chard Tuna Salad, a refreshing twist on the classic standby that calls for a healthy dose of Swiss Chard (one of the best vegetables you can grow from seed) along with plenty of scallions.

In the meantime, here are some of my other favorite ways to use them:
Sour Cream & Onion Dip
Savory Cheese & Scallion Scones
Fiesta Cottage Cheese Veggie Dip
Mexican Jumping Bean Slaw
Summer in a Bowl
Colors of Summer Salad
Sprinkled on top of Hot Swiss Chard Artichoke Dip
Three Onion & Three Cheese Pizza (starring spring onions)

Related Kitchen Garden Posts:
Growing Onions In The Garden
3/16/06: It's Time to Plant Onions!
4/4/06: Operation Onion Complete!
4/26/06: Companion Planting Beets & Lettuce with Onions

© FarmgirlFare.com, the onion-breathed foodie farm blog where an overabundance of food in the garden is always cause to celebrate, even if we're not sure exactly what to do with all of it.

Wednesday, April 26, 2006

What's Growin' On 4/26/06: Companion Planting Beets and Lettuce with Onions


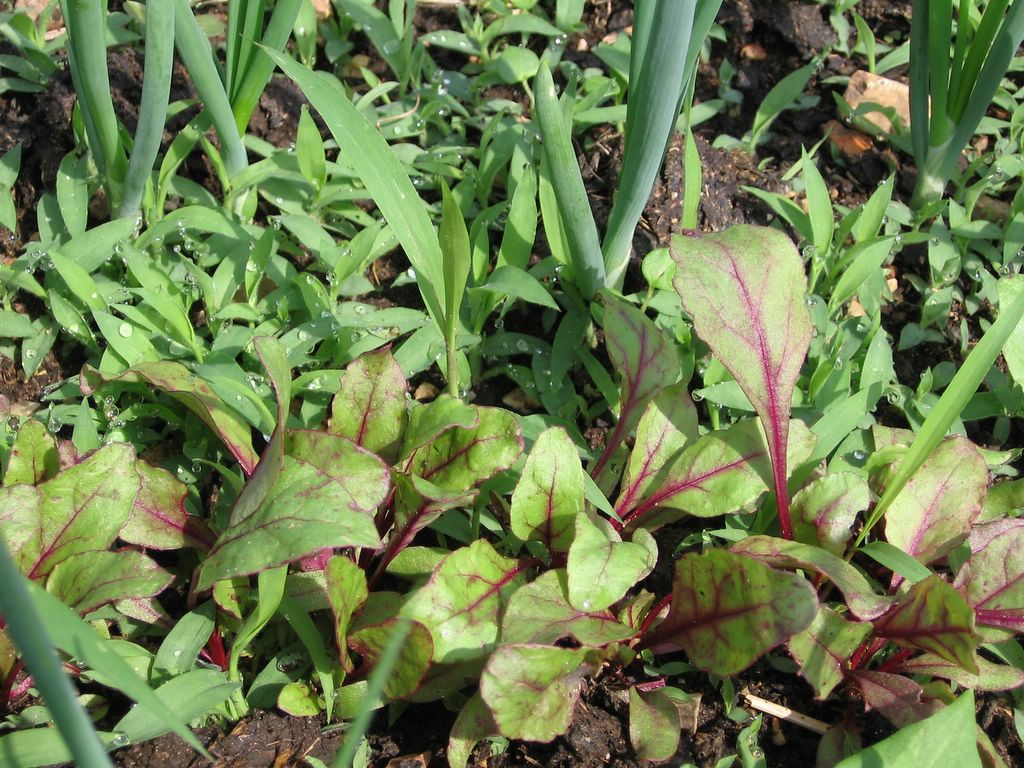
Bull's blood beet seedlings between onion rows


Realization Of The Day:
My experimental companion planting in the onion plot is, so far, a semi-success.


Back on April 1st, I planted five rows of onion sets in one of my 4' x 8' raised beds. Between the onion rows, I sowed three kinds of beet seeds and two kinds of lettuce seeds. Usually I simply mulch the entire plot with grass clippings once the onions have poked up.

The idea behind this experiment was that the companion plantings would create shade that would keep weeds from growing between the rows. They would also provide crops in otherwise unused space. (Click here to read the original onion planting post.)


Great in theory, but not so great in reality. I think part of this was my fault, though. Okay, the Bull's Blood beet seedlings have come up nicely, and, as you can see in the above photo, they are doing a good job at blocking out the weeds. I think if I mulch around them and the onions with grass clippings right now, we should be able to stay weed free until harvest.


Detroit beet seedlings in the same row as the bull's blood seedlings


However, further down the row we come to the Detroit beets. The leaves on these seedlings are smaller and the planting is slightly thinner. Thick, nasty grass has sprouted up all over. These are tough little weeds that are not easy to pull up without disturbing the adjacent beets and delicate, shallow onions. And they are so close to the ground it is hard to snip them at the base (which can work very well with some types of weeds). I'll do what I can and then mulch with grass clippings.


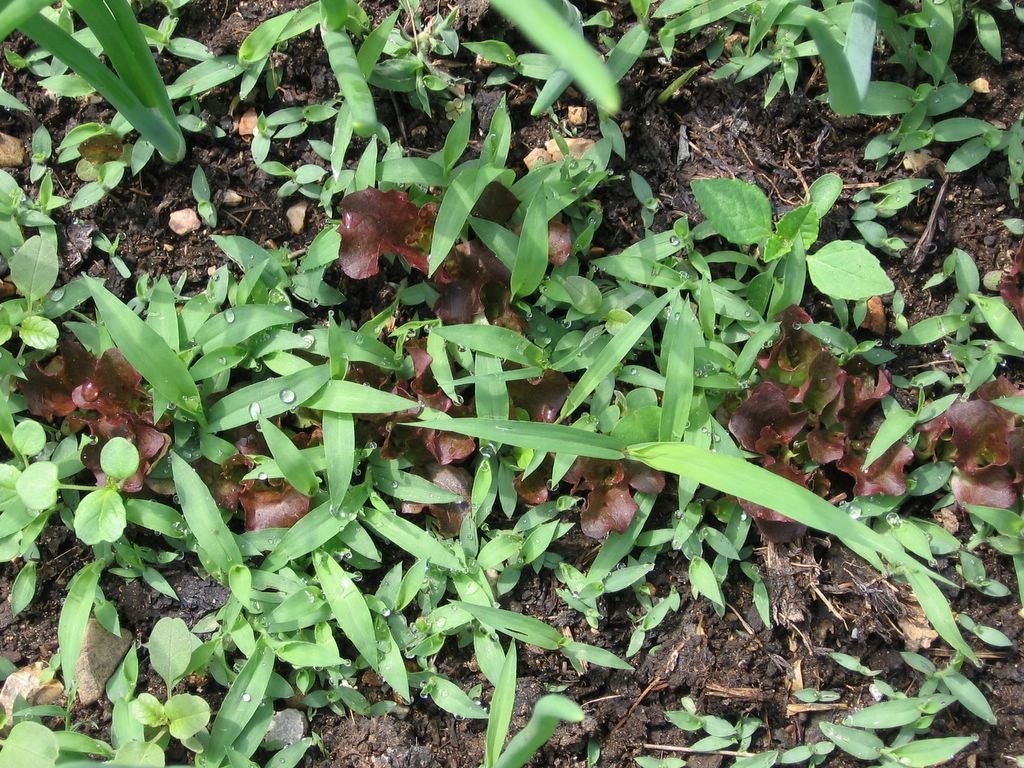
Dark Lolla Rossa lettuce strangled by weeds


Next we come to the row of Dark Lolla Rossa lettuce, and it is definitely a troubling sight. As you can see, the tiny lettuce seedlings are being obliterated by the same nasty grass. This is what I was afraid of. I'm not sure there is hope for this lettuce.

If I simply leave the weeds in place, I think they will end up completely covering the lettuce and blocking it from the sun. Although, now that I think about it, that might be good since it warming up, and the lettuce needs to stay cool. I have a feeling, though, that it would just turn into a big mess--plus the weeds have surrounded the onions as well, and that is not good.


I may end up having to hoe up this entire row and feed it to the chickens (nothing goes to waste around here!), but I am still not thoroughly convinced that this was a lousy plan. I have two ideas. The first is to sow lettuce seeds over the entire space between the onions rather than in a row, leaving empty soil on either side. Then it would look more like this practically weedless lettuce bed. I'm actually surprised I didn't do this in the first place. The second is to try a different variety of lettuce--something taller and less compact.


Overall, this has been an interesting experiment so far. One of the rows between the onions is now planted with garlic (in the hopes that I will be harvesting some late spring green garlic) because the lettuce seeds I sowed there did a no-show. I simply hoed the whole space up and started over. (What kind of hoe did I use to do this delicate work? My beloved scuffle hoe!)

I'll also be mulching that entire row (before the garlic even sprouts) with grass clippings. So already there are some new turns in the plan. And we certainly aren't finished yet. It will be interesting to see what transpires in this plot as the weeks go by.


Note: I'm embarrassed to admit this, but after looking at these photos, I think I may have the beet varieties backwards. My notes say otherwise, but it seems like the Bull's Blood would be the ones with the more reddish leaves, since they turn quite purple eventually. I also remember getting a bit turned around when reading my original planting notes (I have a little trouble with north, south, etc.). And here I thought this garden blog would solve all my record keeping problems!

© FarmgirlFare.com

Tuesday, April 04, 2006

Operation Onion Planting Complete!


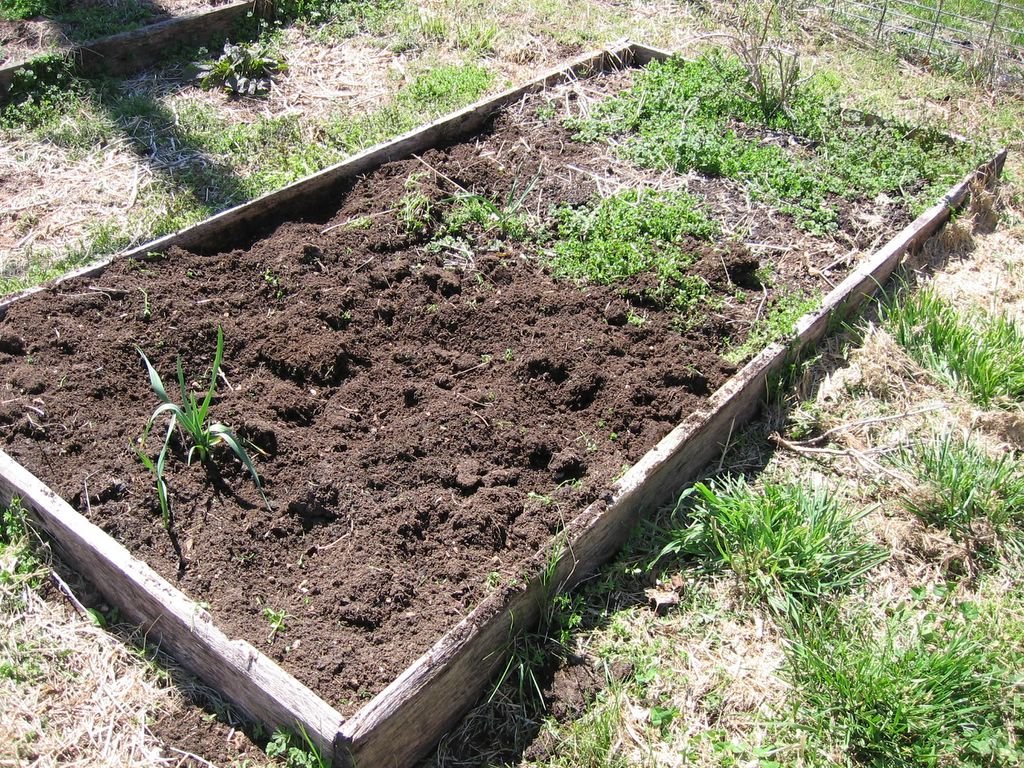
Halfway prepared raised bed


Yellow, white, and red oinons ready to be covered with soil. (No reason to pull up the volunteer garlic plants.)


My faithful gardening companion wasn't quite as helpful as when we planted the garlic together last fall.

On Saturday (as planned!) I prepared and then planted one of my 4'x8' raised beds with onion sets. For more about planting onions, click here to read my previously published article on Farmgirl Fare, "Onions In The Garden."

This bed was covered with a thick layer of sheep manure last winter which I worked into the soil with my hoe. This is some beautiful dirt, but it may be a bit too fertile. Instead of large and luscious onions, I may end up with lots of greens and little bulbs. We'll see. A good lesson either way.

And yes, the onions are planted much too close together, but I do that every year. This time I managed to cram in all but about four or five little onions. I'll be thinning and enjoying early spring onions soon!

Usually as soon as the onion sprouts emerge, I mulch between the rows with a thick layer of grass clippings, pretty much effectively smothering all but a few easily plucked out weeds for the entire growing season. But after doing some reading on using companion plants to help block out weeds (and then writing about it as a viable option in the above mentioned article), I figured maybe I should give it a try.

So after covering the onions with soil and tamping it down with my trusty hoe, I marked the five rows with bamboo stakes and then scattered four rows of seeds between the onion rows. Here's what I planted:

Standing on south side of plot looking north:

--Red Onions
--Beets, Detroit, (from Pinetree Garden Seeds '06, 63 days) left half & Bull's Blood (Baker's Creek Heirloom Seeds '05) right half
--Red, Yellow, & White Onions
--Beets, Lutz Winter Keeper (Pinetree '05, 80 days)
--White Onions
--Lettuce, Amish Deer Tongue (BC '04)
--Yellow Onions
--Lettuce, Dark Lollo Rossa (BC '04--didn't have great germination with these when started in containers so sowed thickly just to use them up)
--Yellow Onions

Using my watering can, I soaked the plot with several gallons of water. Then we had a heavy downpour Saturday night--perfect. The ground should be nice and wet.

This will be an interesting experiment. I figure the worst that will happen is that so many weeds will sprout along with the beets and lettuce that I will end up pulling them all up, feeding them to the chickens, and mulching with grass clippings as usual. But the best case scenario? Tender lettuce in a few weeks, baby beet greens not long after that, and three kinds of beets in a couple of months, all from space that usually goes unplanted.

© FarmgirlFare.com

Sunday, March 26, 2006

It's Time To Plant Onions!


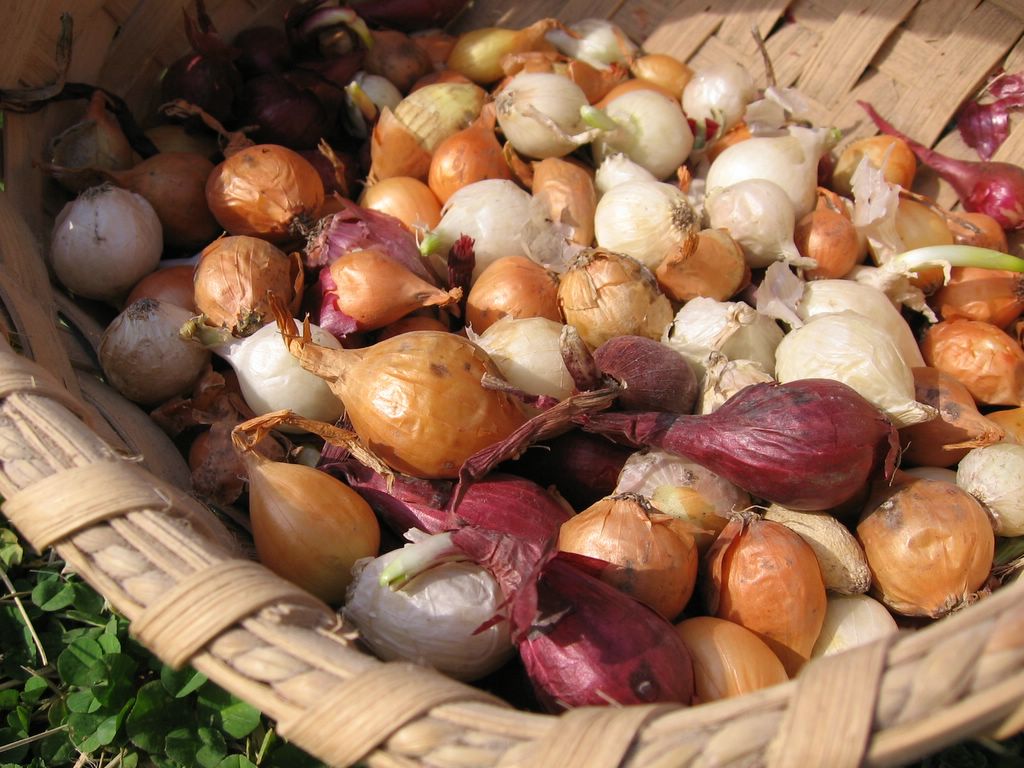
Red, white and yellow onion sets

Well, almost time at least. I'm giving you a little advanced warning. If you garden by the moon signs (I figure I need all the help I can get), then you'll want to plant your onions on a fertile day in the first quarter.* During this moon cycle, they are Friday, March 31st and Saturday, April 1st. After that, the next fertile first quarter days aren't until April 28th, 29th, and May 2nd, 3rd, and 4th--which is getting a bit late for starting onions.

As you can see, I'm all set to go with my three varieties of onion sets. As long as your ground isn't still frozen, you can safely start your onions anytime now, but you really should do it on Friday or Saturday. They're very hardy and once sprouted will survive even hard frosts (we're still having morning temperatures in the low 20s) with no problems. Onions are a wonderful addition to any garden, and they can be popped into even the smallest spaces.

So why do I buy onion sets rather than starting them from seed (like everything else in my garden)? The answer to this question is in one of the first articles I posted on Farmgirl Fare back in June of 2005, "Onions In The Garden," which also includes photos, planting instructions, and some newly added growing tips. Just click here to read it.

*Seeds to start on fertile first quarter days include: flowers, lettuce, all other leafy greens, cruciferous vegetables such as broccoli and cabbage, cucumbers, beans, and peas. (Pretty much anything except members of the tomato/squash/pepper family--which you want to start on fertile days in the second quarter).